Pizza Oven Base Insulation: Into the Void!


I am building a Mattone Barile Grande, and am getting ready to start with the “oven” part of the oven. The first step in doing that is really the last step of building the base: installing insulation for the oven floor. This is the first thing you will do that actually does something oven-like.

I chose to use a Perlite/Portland Cement mix. I decided on Perlite for two reasons:

  1. It is a water-repellant mineral, rather than a water-absorbent mineral like Vermiculite. So, it will cure more quickly because it’s not trying to retain moisture.
  2. It costs 25 percent less than the same quantity of Vermiculite.

I found both Perlite and Vermiculite at my local orange big-box store, in the indoor nursery section, in 2 cubic foot bags. The materials bill calls for 4 cubic feet, and since I was there to purchase Portland Cement it meant one less shopping stop. The price (about $15 for a 2 cubic foot bag) was competitive with other sources.

If your eyes bug out when you see two big bags of either material, especially when you compare that with the apparent volume of the void you created in your slab, they should—but only a little. Volume of a space is always tricky to estimate by eye, because most of us have a very hard time with 3-dimensional space and measurement. You’ll need much more material to fill that “shallow” void than your eyes tell you you’ll need.

I found what I needed around the house to measure Perlite and cement in the proper 5:1 ratio. I have a 10 quart cleaning bucket—voila! 2 buckets equals five gallons. I also have a 1 quart measuring cup I’ve been using to measure water into my concrete. So, 2 buckets of Perlite and 4 cups of dry Portland Cement = 6 gallon dry mix. And of course, 1 bucket and 2 cups is a half batch.

The good news is that this is not back-breaking work like concrete mixing. Pour Perlite into a wheelbarrow, add Cement, then dry-mix with a hoe. When the white Perlite is coated with gray, spray lightly with water. Do this just enough for the surface Perlite to turn white again. Mix with the hoe until all the Cement is wet and the consistency is, as they say, like oatmeal. I found that when the mix of materials and water is correct, the hoe will make a shoop-shoop noise as it’s pulled through the mix.

Even when mixed, the insulation will be very lightweight and easy to transfer.


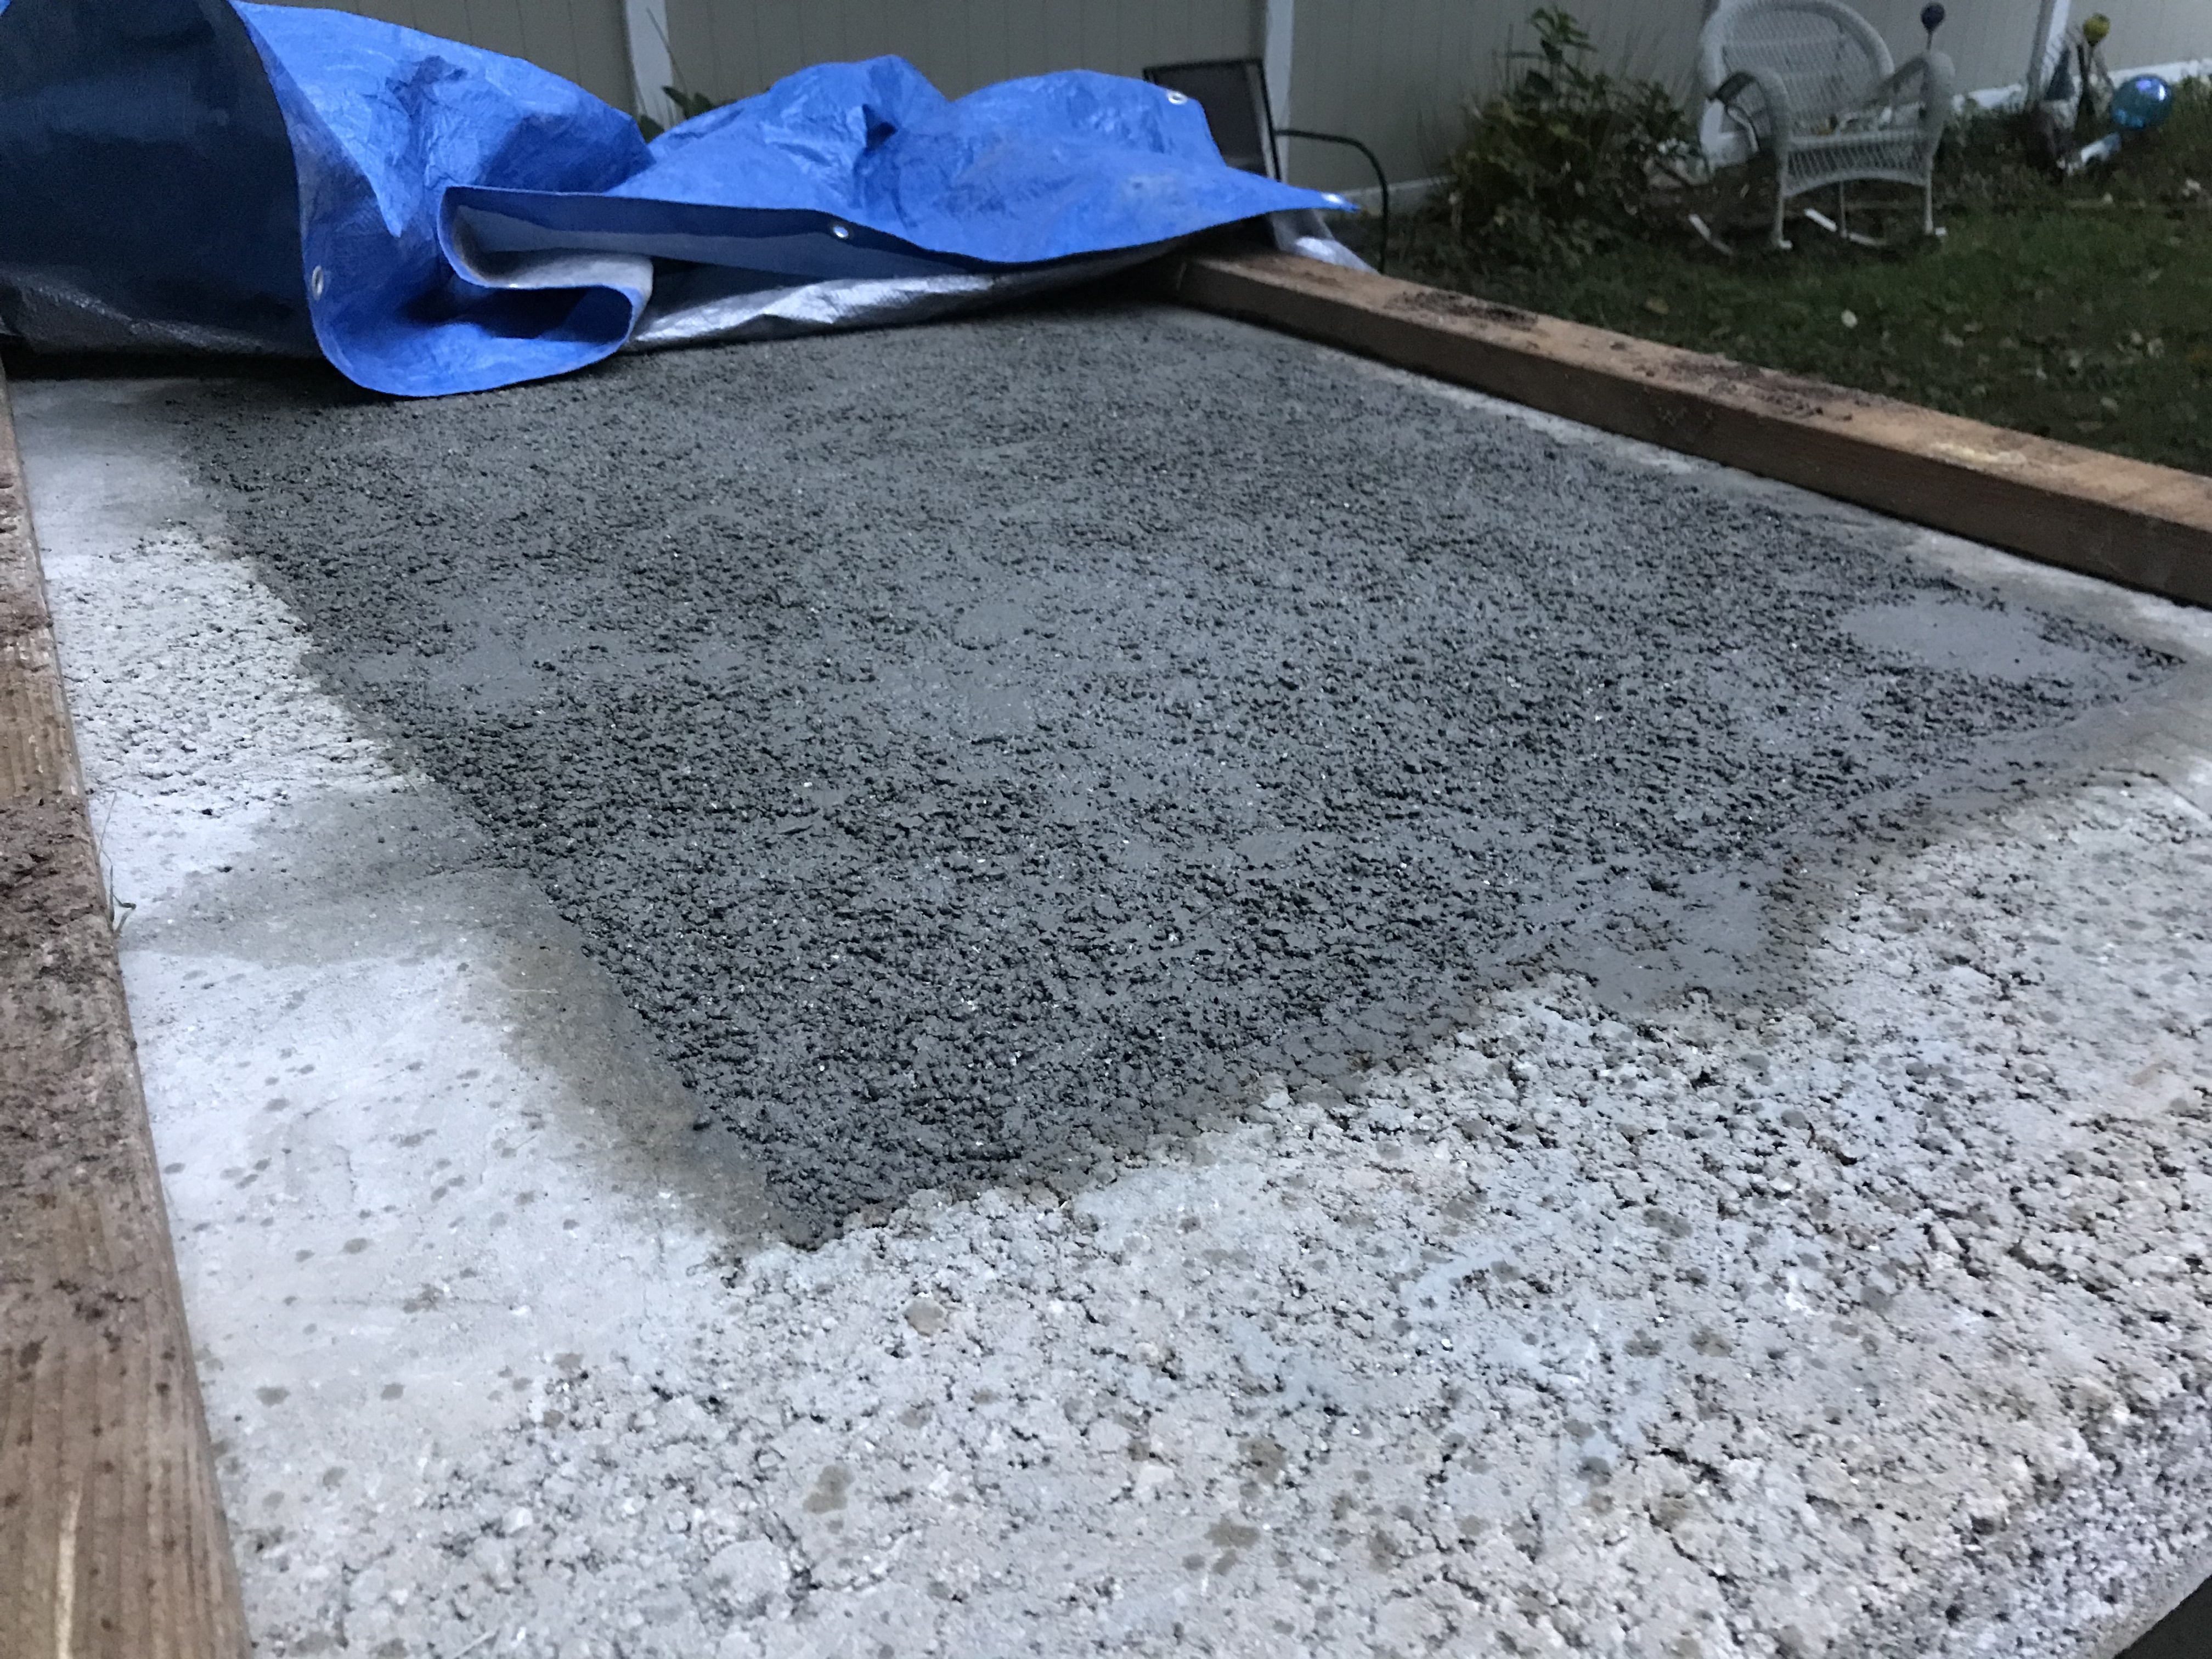
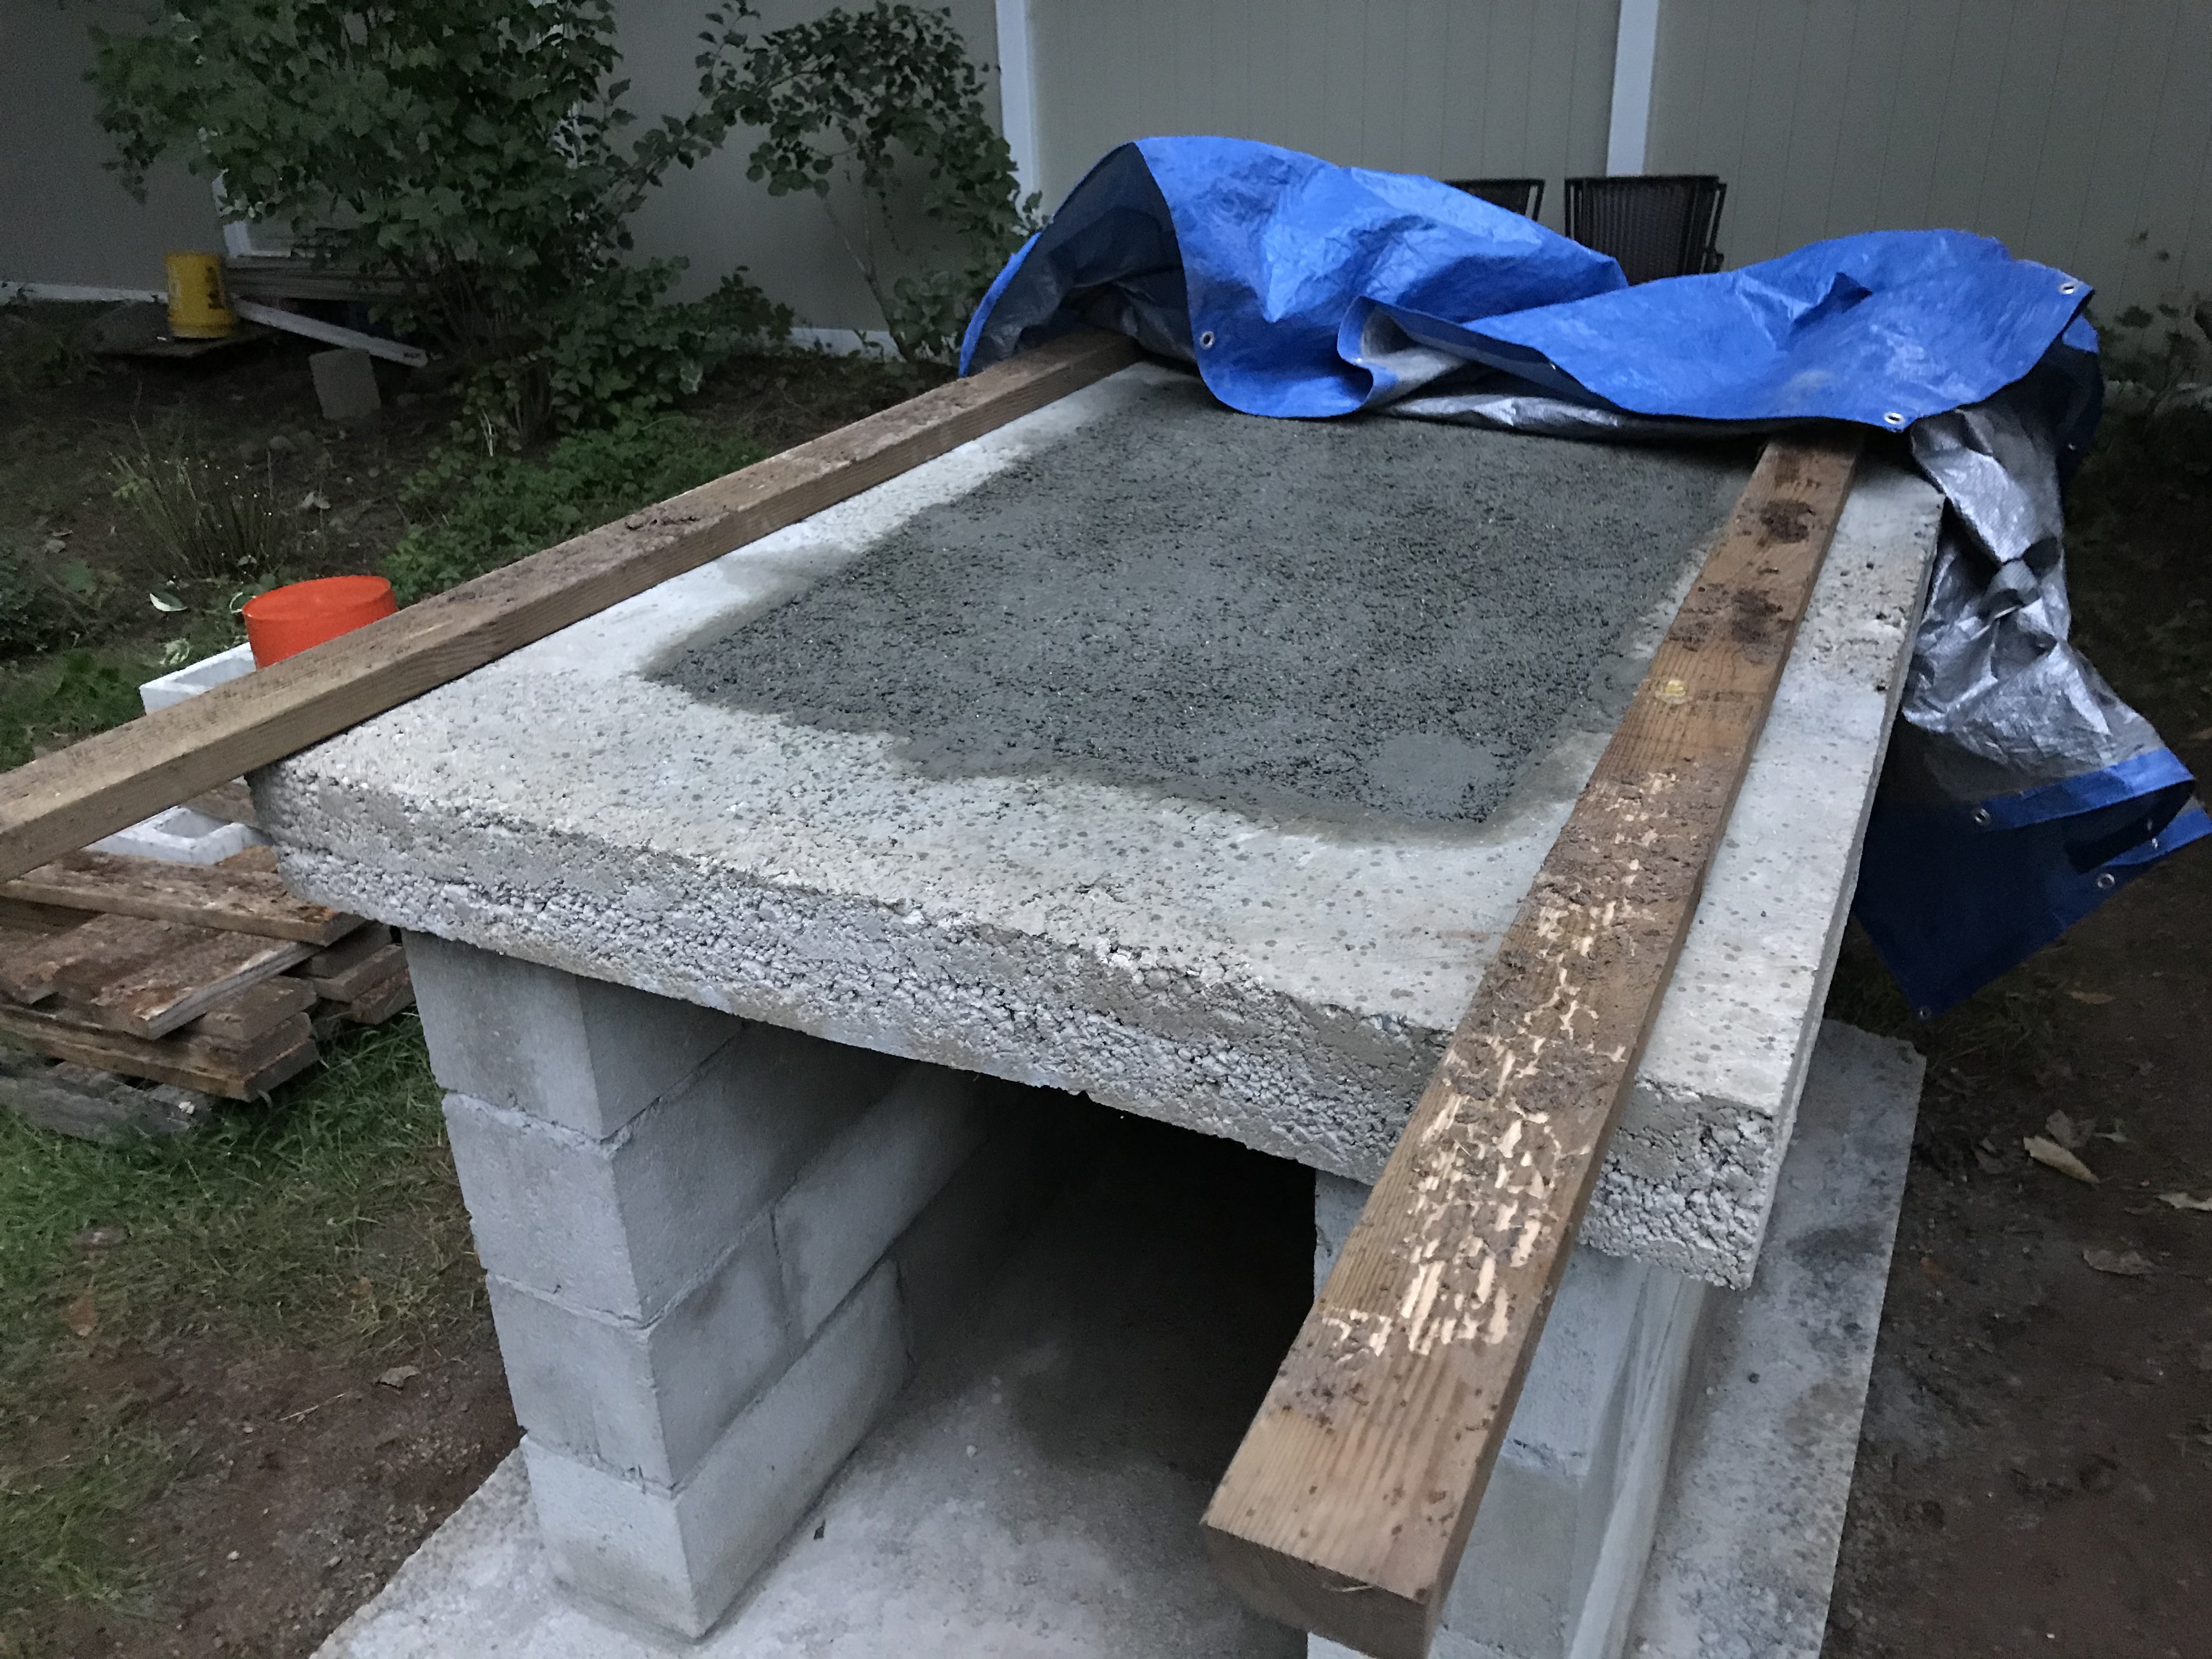
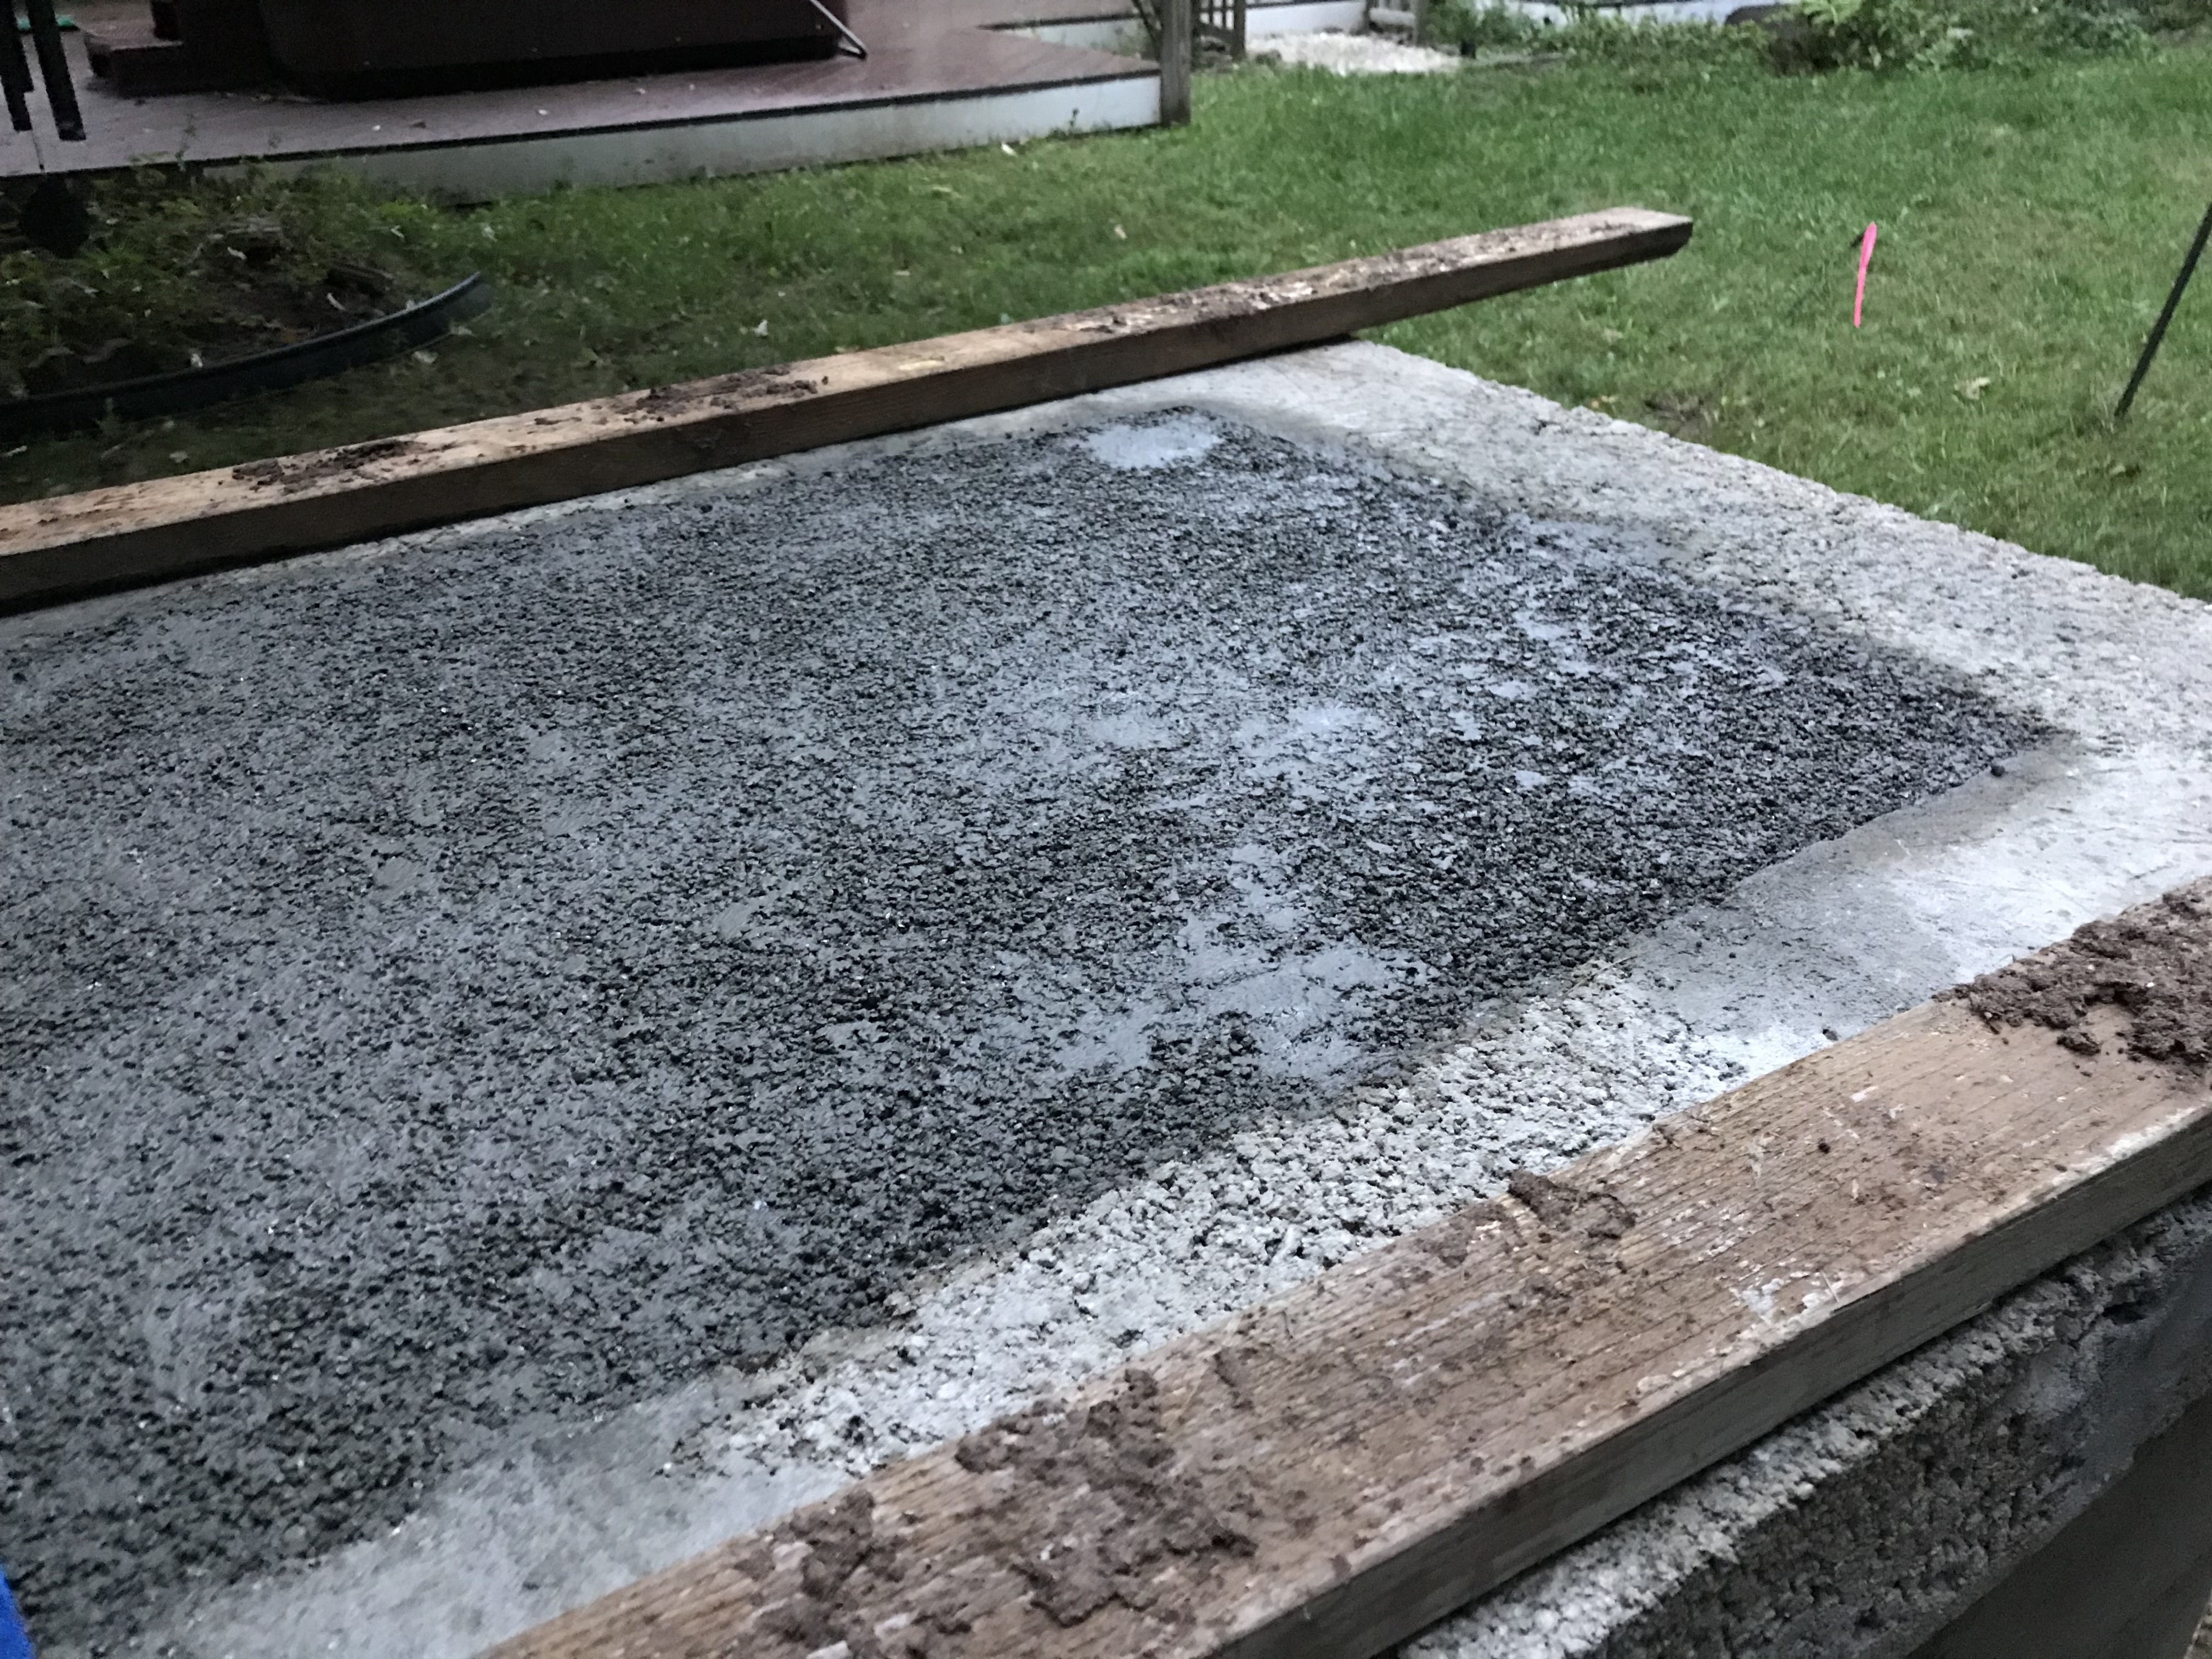
I used my material transfer shovel to transfer the mix to the slab. I spread it out to the edges, then used my tamper to compact it. Then, I repeated.

It took 3½ loads to fill the void, with just a little left on the slab when I had screeded for the last time. I troweled it smooth, then decided to float it as well.

I found that I only needed 2 cubic feet plus 2½ gallons of Perlite from the second bag. And, since Portland Cement around here comes in 94 pound bags, I still have plenty of that left over as well. The remaining Perlite (almost a full bag!) will go to good use in my spouse’s garden, and there’s plenty of call for the remaining Cement in this project.


Cleanup for this part will offer another surprise: when you rinse your tools, you’ll find that the Perlite quickly washes clean. Useless information, perhaps, but it gave me a smile.

1 Like

This is helpful info. Wish it came a little sooner because we’ve just used a vermiculite/Portland cement mixture and I would’ve used perlite had I know it was not absorbant. BTW, we started out with one 50lb bag of insulating castable, per the instructions, but it filled only half of the void. Since it is a special order item and the supplier is a 2 hour drive away, we opted to finish out with the vermiculite mixture obtained from a much closer orange big box home supply store. It’s turned out fine. We’ve started on the next step but talented masons we are definitely NOT. (But that’s not stopping us…)

Sounds like you’re piecing it together just fine, Peter. I’m a novice mason, too. My grandfather and his sons all worked masonary, and he in particular was a legendary French Canadian plasterer. I’ve seen some of his work, now 75 years old, and no cracks. That was skill!

Hope you don’t mind me butting in. Peter this is interesting. I decided to go with insulating castable as well, and like you, followed the directions, and ordered 50 lbs. I’m about two weeks behind you and Matt so I can still correct this. However, I’m curious, did you mix and “pour” the castable discover you didn’t have enough and let it dry? or race to the store and get back in time to mix it in with the castable. Also, if i decide to stay with the castable, do you think I would be safe in ordering one more 50 lb bag? thanks for any help you can lend.

That’s interesting. I know that insulating castable is there as an option, but I’m wondering (completely out of curiosity) what led you to choose it over the Portland Cement/vermiculite mix?

For what it’s worth, I considered it too, and the thought that I had in its favor was that it sounded somehow more suited to the purpose—a ready-made mix that was engineered just for this kind of application.

Hey Matt nice to talk to you. Yes that’s exactly right. Based on Peters description, I think i’m going to order another 50 lbs today.
If anyone else out there has any input on this subject, certainly would appreciate it.

Hey Brad, and with you too. I think I should have added in my previous post, though, that I decided that the Perlite/Portland Cement mixture works, is inexpensive, and doesn’t have to be ordered—you just pick up the materials and go.

Also, if I’m understanding Peter’s post correctly, he decided to finish his insulating base with Vermiculite/Portland Cement. Even though it will take longer to cure than the Perlite, it worked fine for him and saved him from having to get more insulating castable, which involves a considerable trip.

Here’s the Brickwood post on the difference between these two classes of insulator: What is insulating castable? If you end up having to use 100 pounds of insulating castable, it ends up being way more expensive but you get a “slightly better” insulating base. I think, either way, it ends up allowing your oven to stay very, very hot.

I’m sorry if my reply misled you! I really shouldn’t post before my first cup of coffee. Sometimes the finishing sentences are still in my head when I click “Reply”!

2 Likes

Evn’n gents! Just to weigh in, I went with the perlite setup. Worked great. Been through all the curing fires and a few cooking sessions—not a hint of warmth under that base.

2 Likes

Ok thank you for weighing in, appreciate it.

Hi Guys. I’ve been travelling so sorry for the delayed response. We put about a 1" deep vermiculite/Portland cement mixture right on top of the already dried insulating castable to finish filling the cavity. This upper layer cured in less than 2 days. It did get rained-on a little but seems to be in good shape. We hope to get to laying the fire brick sometime this week.

1 Like

Hi Peter, thank you for your response on this subject. Ive been away and missed this until just now.“right on top of the already dried insulating castable to finish filling the cavity” completely answered my question. again thanks for getting back to me. hope your build is going well. - Brad

Matt, Peter,
Merry Christmas hope you are both doing well.
just curious how everything turned out for you guys. I’m almost done, have to finish the base and the back of the oven,
but have cooked 4 times and thankfully, with success. My wife and daughter wanted to have pizza for dinner Christmas day, and we made it. We have about 25 coming. now if we can just get the weather to cooperate.

Merry Christmas to you, Brad! Things are looking up. We’ve had nearly continuous fires going during the daytime for the past 2 days. The floor bricks feel hotter. We cooked two small thin-crust test pizzas yesterday evening which turned out pretty well, although they took about 10 minutes each to bake and the bottoms toasted (not burned) before the ingredients on top (just tomato paste and cheese for these test pizzas) were cooked/melted. From our recollection of our days in Italy the pizzerias used chilled dough and room-temperature toppings. We’ll try that approach tomorrow when we make pizzas for seven of us. I should mention that our oven has a couple of features to increase heat retention: an arch of firebricks at the opening that reduces the opening size by 40% and a Duravent damper accessory for the chimney pipe. I think they do help with overall heat retention and, hopefully, with drying out the floor firebricks.

Merry Christmas to you, Brad and Peter!

Glad to hear your projects are turning out well. I had to put construction on “hold” after I started a new job in October. I have the base completed and ready to continue in the spring. I’m encouraged, Peter, to know that the damper seems to be working out well for you. I bought it when they were in stock again; I’m figuring that the combination of damper, an extra layer of insulation, and the closed-off mouth will let me use the oven year-round in snowy and icy Connecticut. Hope you and everyone gathered around your ovens are enjoying your Christmas pizza!

Hello Everyone!
New to the forum, Just ordered my Mattone Barile Grande kit today. The Slab was put in last week and i lay the first block tomorrow morning!!! So excited!

I have been reading all the forum entries and wanted to ask how long it took for the Portland/Perlite mixture to cure? Reading your post, it seems like using Perlite is the way to go, and if it cures faster, i can move on to the next step quicker.

Any help or advice would be greatly appreciated!!!

Hi Mike, and welcome to the forum! I’m sure you’re eager to get going.

As far as the Perlite mixture goes, it took about a day to cure. As you’ve already read, Vermiculite and Perlite have similar structures, but Perlite doesn’t hold on to water the same way Vermiculite does.

The mix therefore cures in about the same time as a Portland cement mixed with stone.

Hope this helps, and good luck with your build! (A camera of some kind is not listed in the “Tools” manifest, but it should be. Take lots of pictures and share them with us if you can!)

Hello everyone, new guy here.

I am in the planning stage now and since my build is a custom one I have some questions and any help guidance is greatly appreciated.

The oven is going to be the Barile Grande. It is the base that is the custom one since it will also include a Santa Maria style grill on the side. As such, the top that is cast in three pieces normally has to be poured in place. My concern is the 2" cavity for the insulating mix. I am not sure I can place the foam precisely so I was thinking of just doubling up the refractory brick on the floor. Would that work as well? Or if someone has a good pointer how to place and hols the styrofoam insert precisely and firmly in place they I could do that.
Thanks for any input.

Hello Hunter & Welcome -

The cavity in the slab is going to be filled w/ Vermiculite or Perlite (whichever is available in your area). While it’s called an “insulation layer” - it basically acts as a buffer between the hearth firebrick and that cold, cold, cold hearth slab.

When you create a fire inside your oven, you are heating those hearth firebrick to 1000°+ temps. The firebrick is designed to hold that heat for long periods of time.

As an example - Imagine placing a 1000° firebrick on a big block of ice. That ice is going to melt pretty quick. But if you put a 2" layer of vermiculite or perlite insulation between that block of ice and your 1000° firebrick, the ice is going to melt at a much, much slower rate. The insulation layer acts as a buffer between the block of ice and the hot firebrick to slow the heat transfer process.

Now, let’s say that block of ice is actually your concrete hearth slab - even with 2 layers of firebrick as you mentioned… It’s going to take a long time to heat your oven / oven floor as that cold, cold concrete hearth slab is just stealing the heat from your hearth firebrick like a sponge! And you will never get your oven as hot as it could / should be - and let’s not even mention the additional refirings you’ll need to do to get the oven back to temp. The insulation layer (which is airy when dry) prevents the cold slab from sucking the heat from your 1000°+ hearth firebrick.

As for pouring a monolithic slab w/ styrofoam - I don’t have instructions (yet), but its easy to do. After you build your concrete slab frame, cut out a 2" piece of foam to the exact size you want your insulation layer void to be (L" x W"). Simply grab a couple of 2" x 4" x 5’ - and lay parallel on the garage floor… about 2’ apart. Then GORILLA GLUE the foam panel to the CENTER of those 2’ x 4’s so it looks like a giant letter H. Only use Gorilla Glue as all other glues melt foam.

When the foam / wood combo is dry, simply place it on top of the wood concrete slab frame and center / position to your preferred measurements. Mark the position on the frame w/ a sharpie and remove.

Then fill the frame w/ 3.5" of concrete (better to be less than over) - then place the 2x4 / foam form on top - then fill open sides w/ concrete.

Be sure to take pics - sounds like an AWESOME build! Love those Santa Maria grills!

2 Likes

Thank you so much for the welcome and the quick reply. It is greatly appreciated.
I was not entirely sure of the purpose of that insulating layer, but now it is clear so I will act accordingly.

Another question. Since the refractory bricks are only placed on the floor of the oven without any binding mortar, why not use high temp adhesive between them to “secure” them? Some available adhesives can withstand up to 2000 degrees?

The project is my retirement bucket list so it is a bit out yet but I like to plan in advance. I will take pictures of the entire process of the build and post. That is how I refined my idea, by looking at so many wonderful builds by others.

Hello Hunter and welcome to the Brickwood forums!

[Edit: I got interrupted while I was typing this, and posted it before I saw that @BrickWood had posted a much more detailed response! And, as always, I learned something helpful from his post.]

I like what you’re planning. I’m not sure I’d want to simply double up on firebrick.

One of the jobs that the insulating layer under the hearth accomplishes is providing a “break” between the cold concrete slab and the very hot environment in your oven. The firebrick absorb heat energy, but they eventually pass it through. That’s the same reason you have mineral fiber insulation around the arch of the oven, rather than extra layers of firebrick.

It’s important to keep your floor insulated because you want that sizzling 800°F+ heat underneath a pizza crust—or otherwise why bother building?

It’s totally doable to build a frame to suspend your void form on top of your concrete pour. I’ll leave the details to others who have experience with it.

I am so eager to see photos of your progress and the final outcome. Glad you’re here!

1 Like