BrickWood Box In Progress | Ideas for Improvements


Brickwood Box Project

I have taken a few months to get started on this. First trying to get all materials locally, but I ended up buying from Harbinson Walker, which are in the same state (FL), just not local.

I started by reading the manual of instructions and lots of questions. I swear, I asked (and continue to ask) in the BrickWood forum anything that came to mind.

We already had a concrete slab created for this a while back. The slab had been made with rebars and high strength concrete, so it was perfect.

The first thing we did was to build the frame for the insulation slab and the foam. That is as far as we got because we were waiting on materials. BTW, the 6" cinderblock does not seem to be a common size here in Miami, FL, so it took me a bit to get them. Even the bolts and nuts from the essential package (sold for this project) were late. Another thing we did was to drive 4 rebars through the existing concrete slab.

Everything arrived the same week. So, we just got started this month (July 2021)

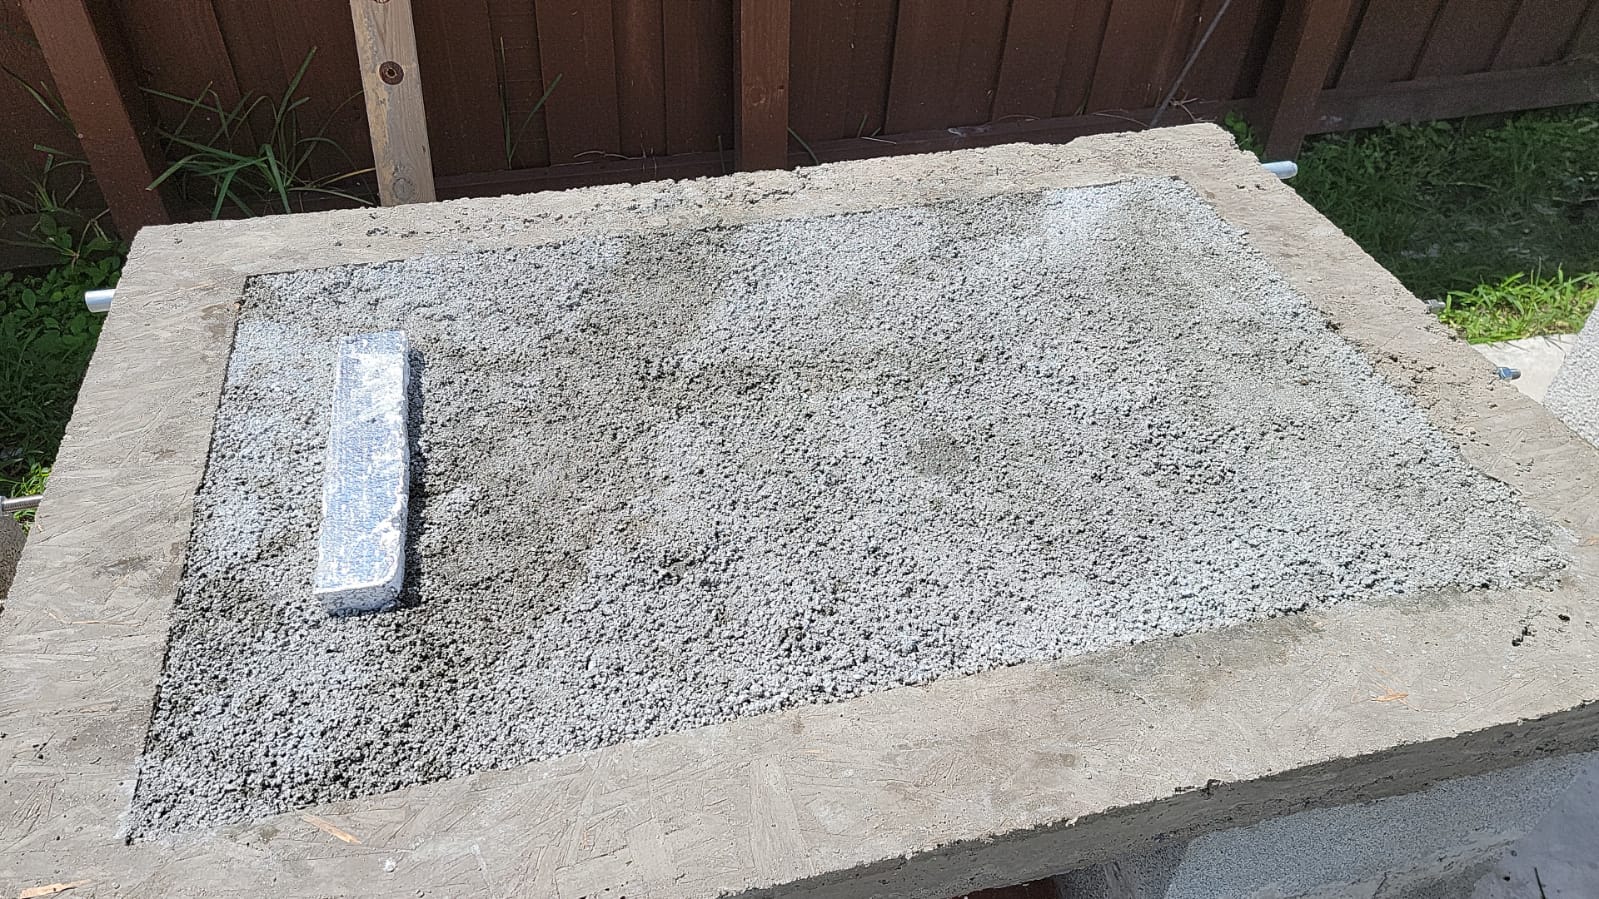
7/10/2021 - We made the insulation slab using the bolts and nuts as indicated. When we finish filling t with the fiber mix, and because we were already dirty, we filled a few cinderblocks with the insulation mix (5:1 perlite/portland). This had to cure for a few days, but it would not be until the following week when we could continue.

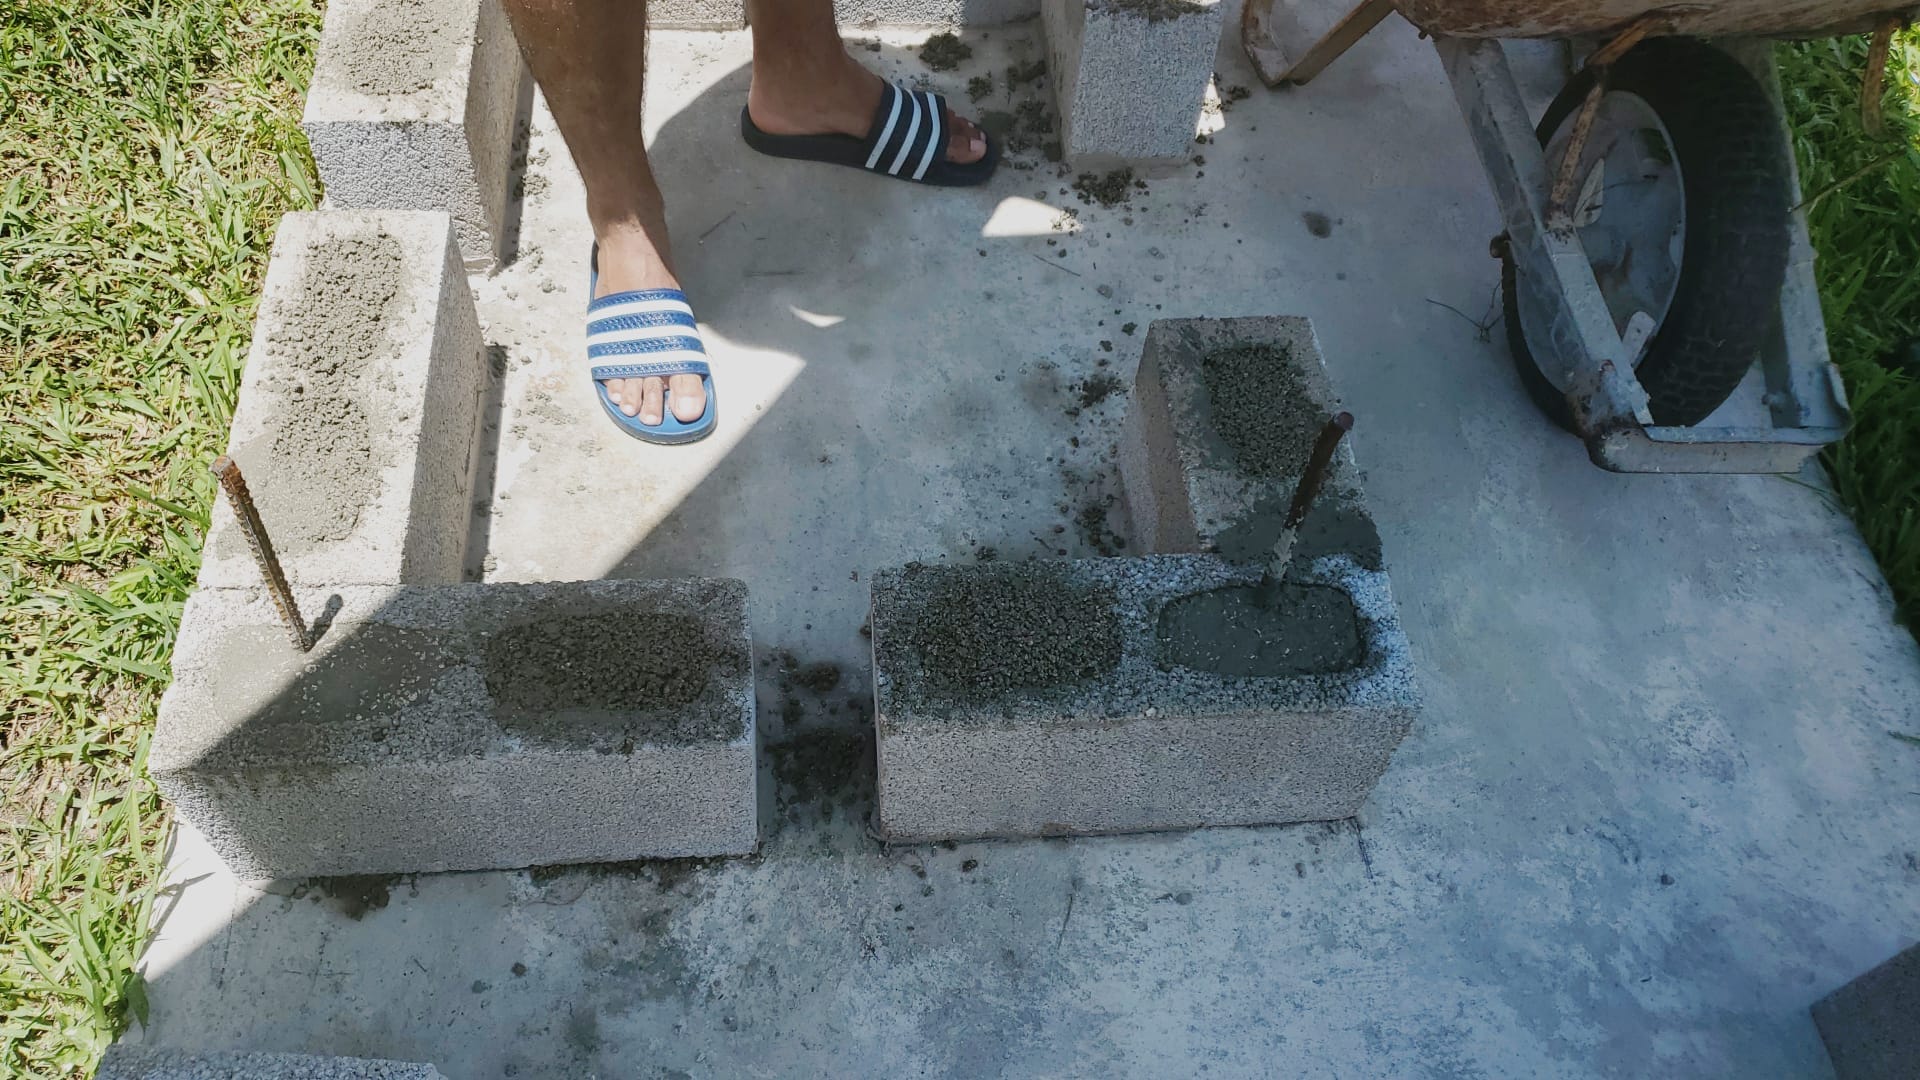
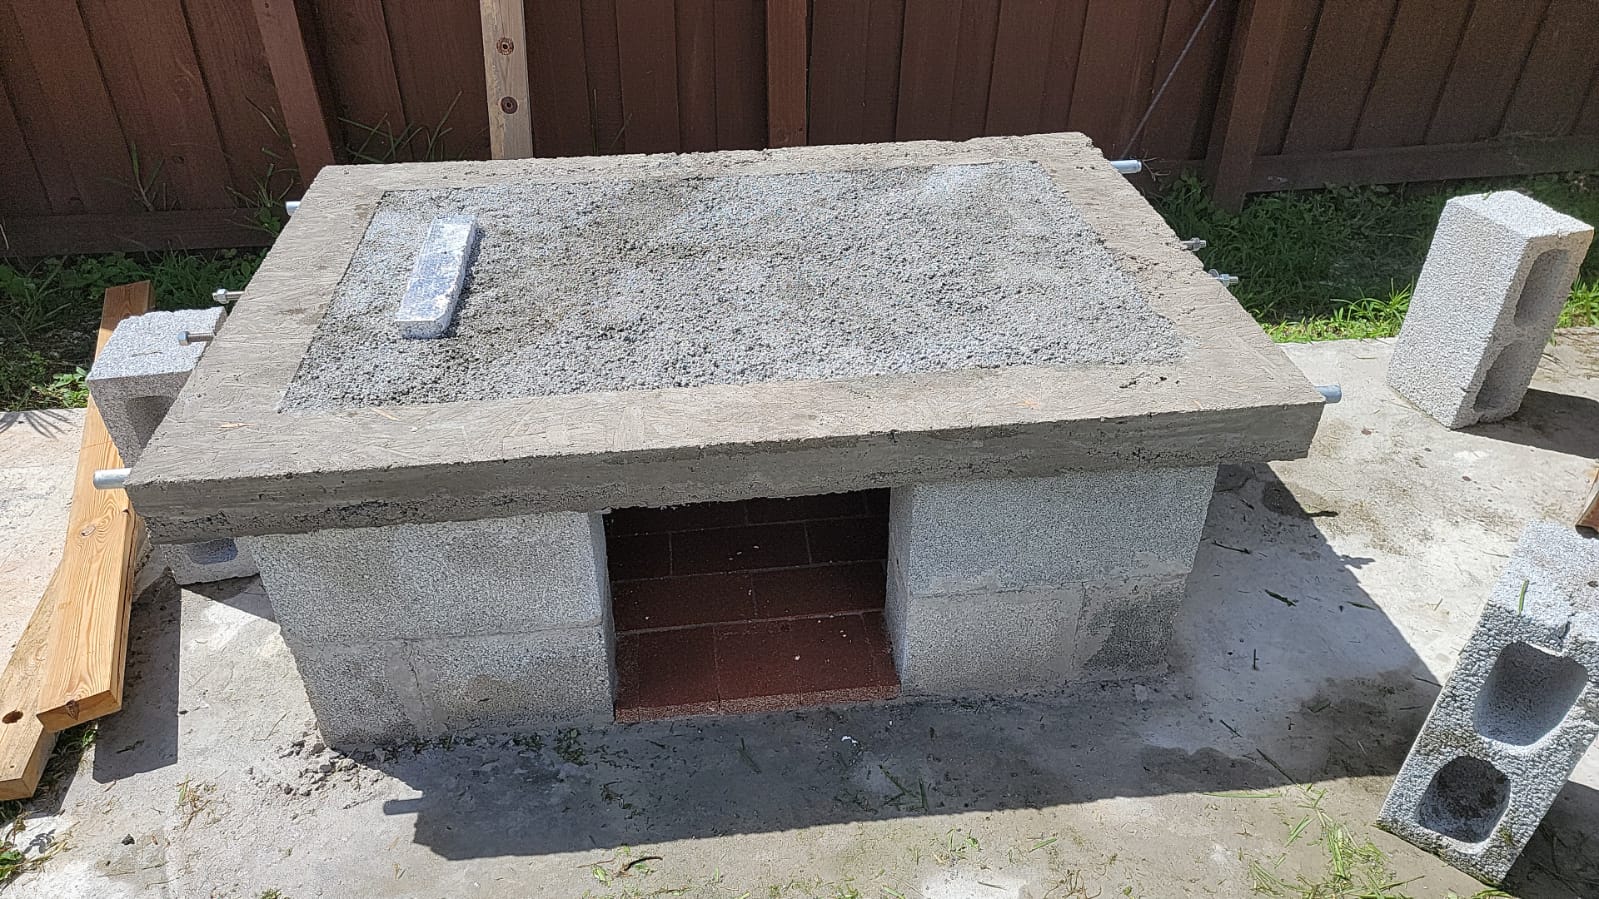
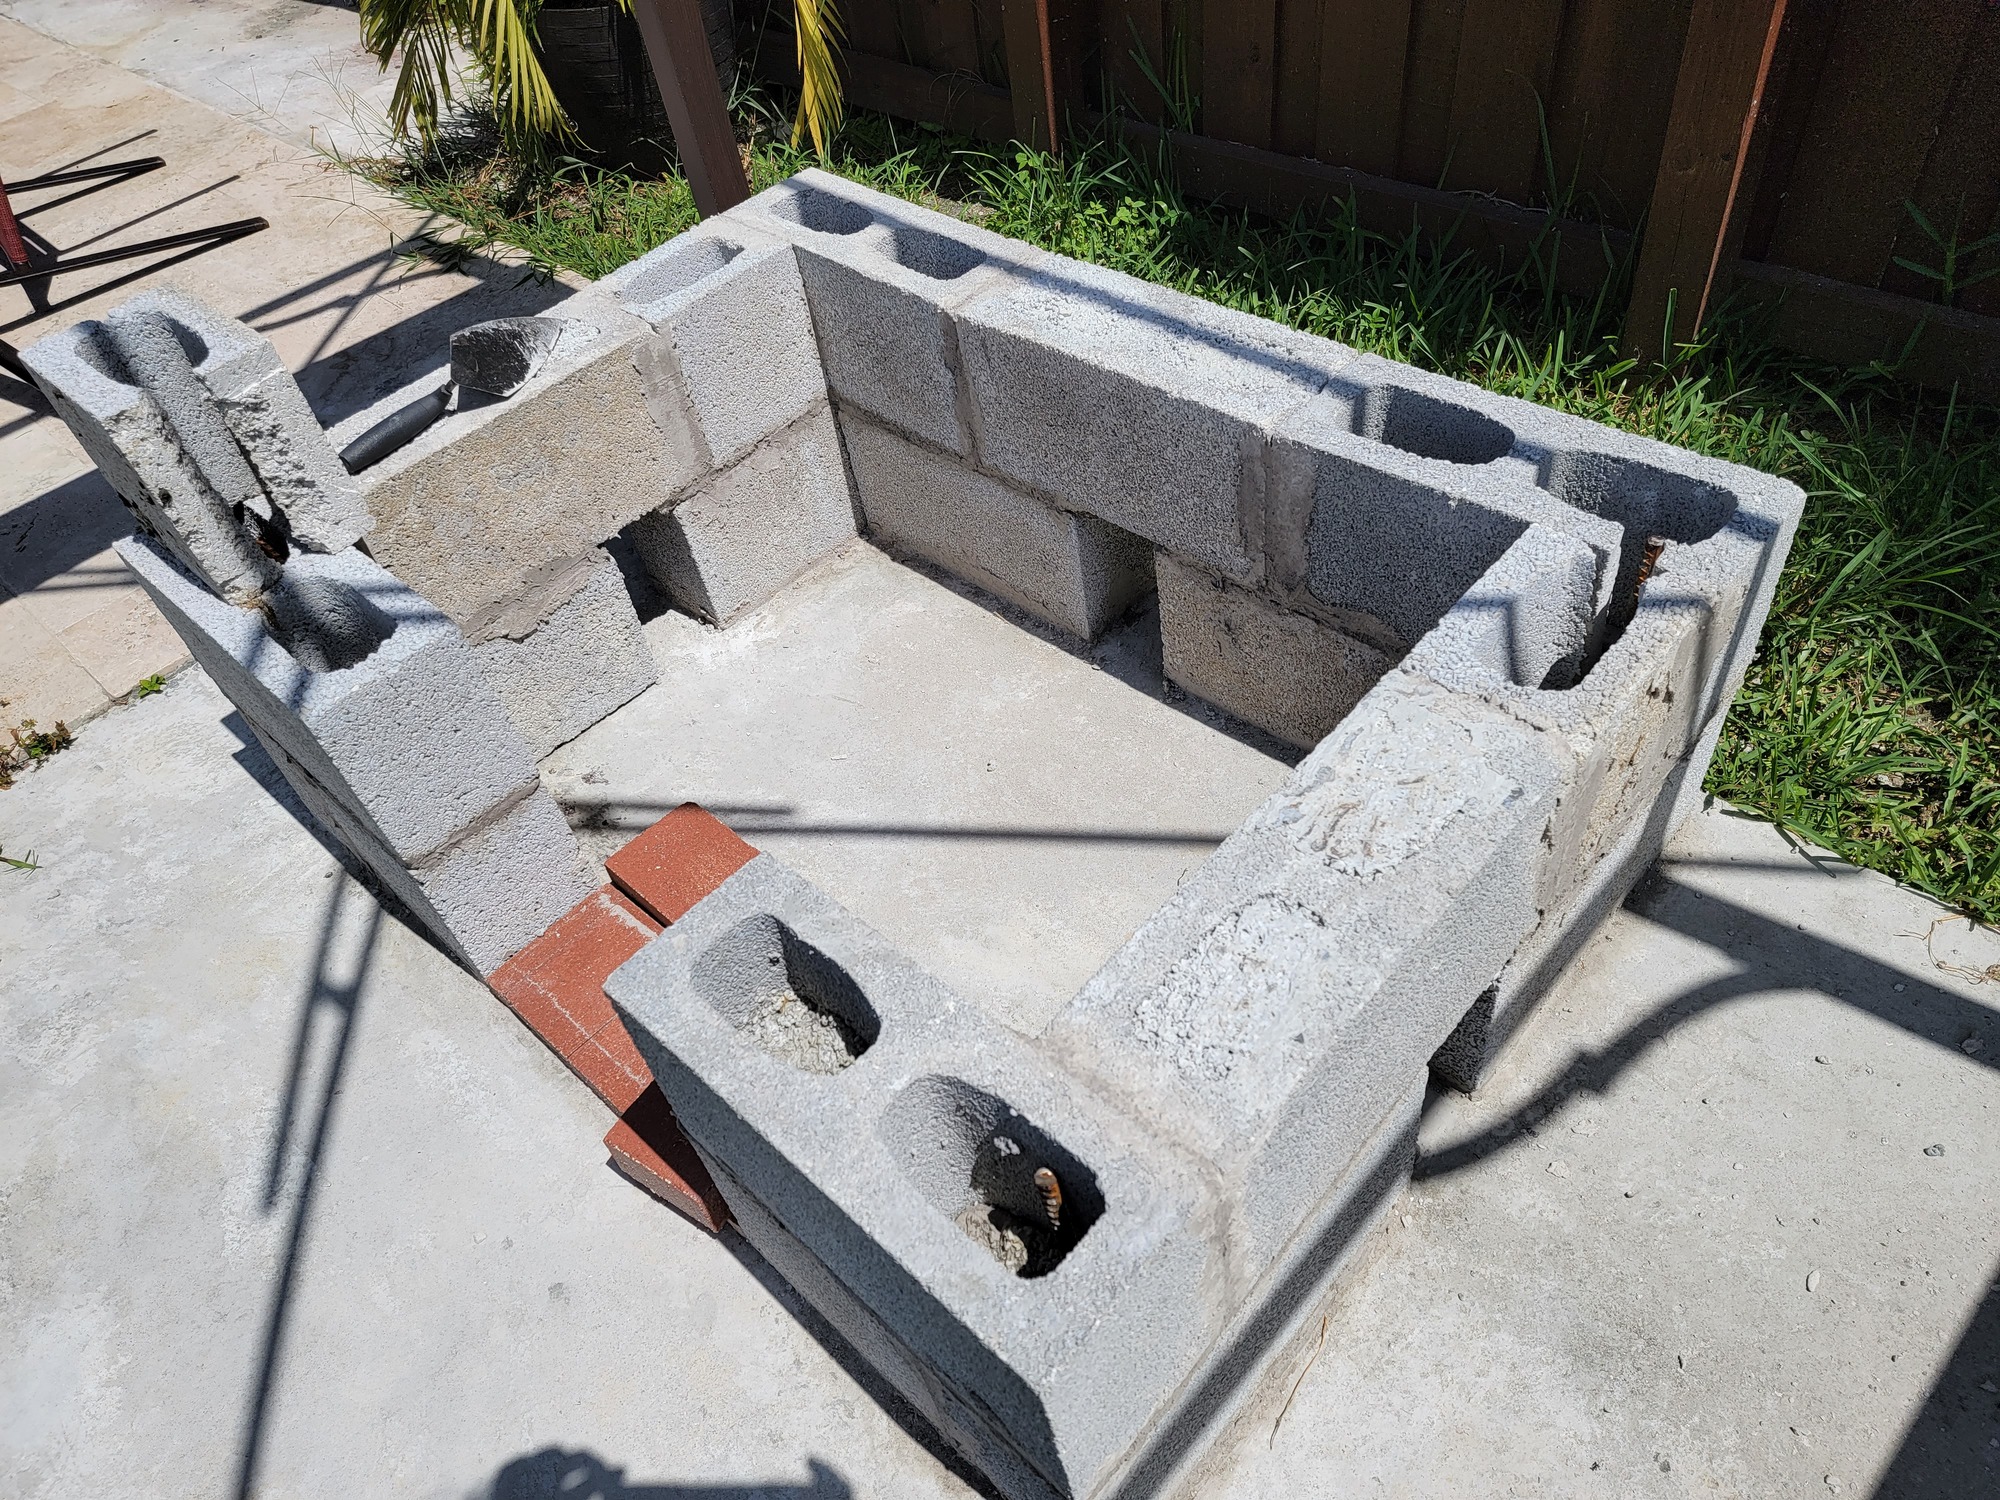
7/17/2021 - The second thing we did was to start to the actual box on the existing slab. We put the first row of cinderblocks according to instructions, piling the rows to the side first, marking the footprint of the cinderblocks, etc. We did not fill anything up, just used the mortar mix to put them in place.

7/18/2021 - We filled the first row of cinderblocks as needed and placed the second row of cinderblocks. Again, we did not fill them. Mostly because it took us a long time to put the rows and level them right, left, up, and down. The mortar flattens out with the weight of the cinderblock, and we needed to work slowly.

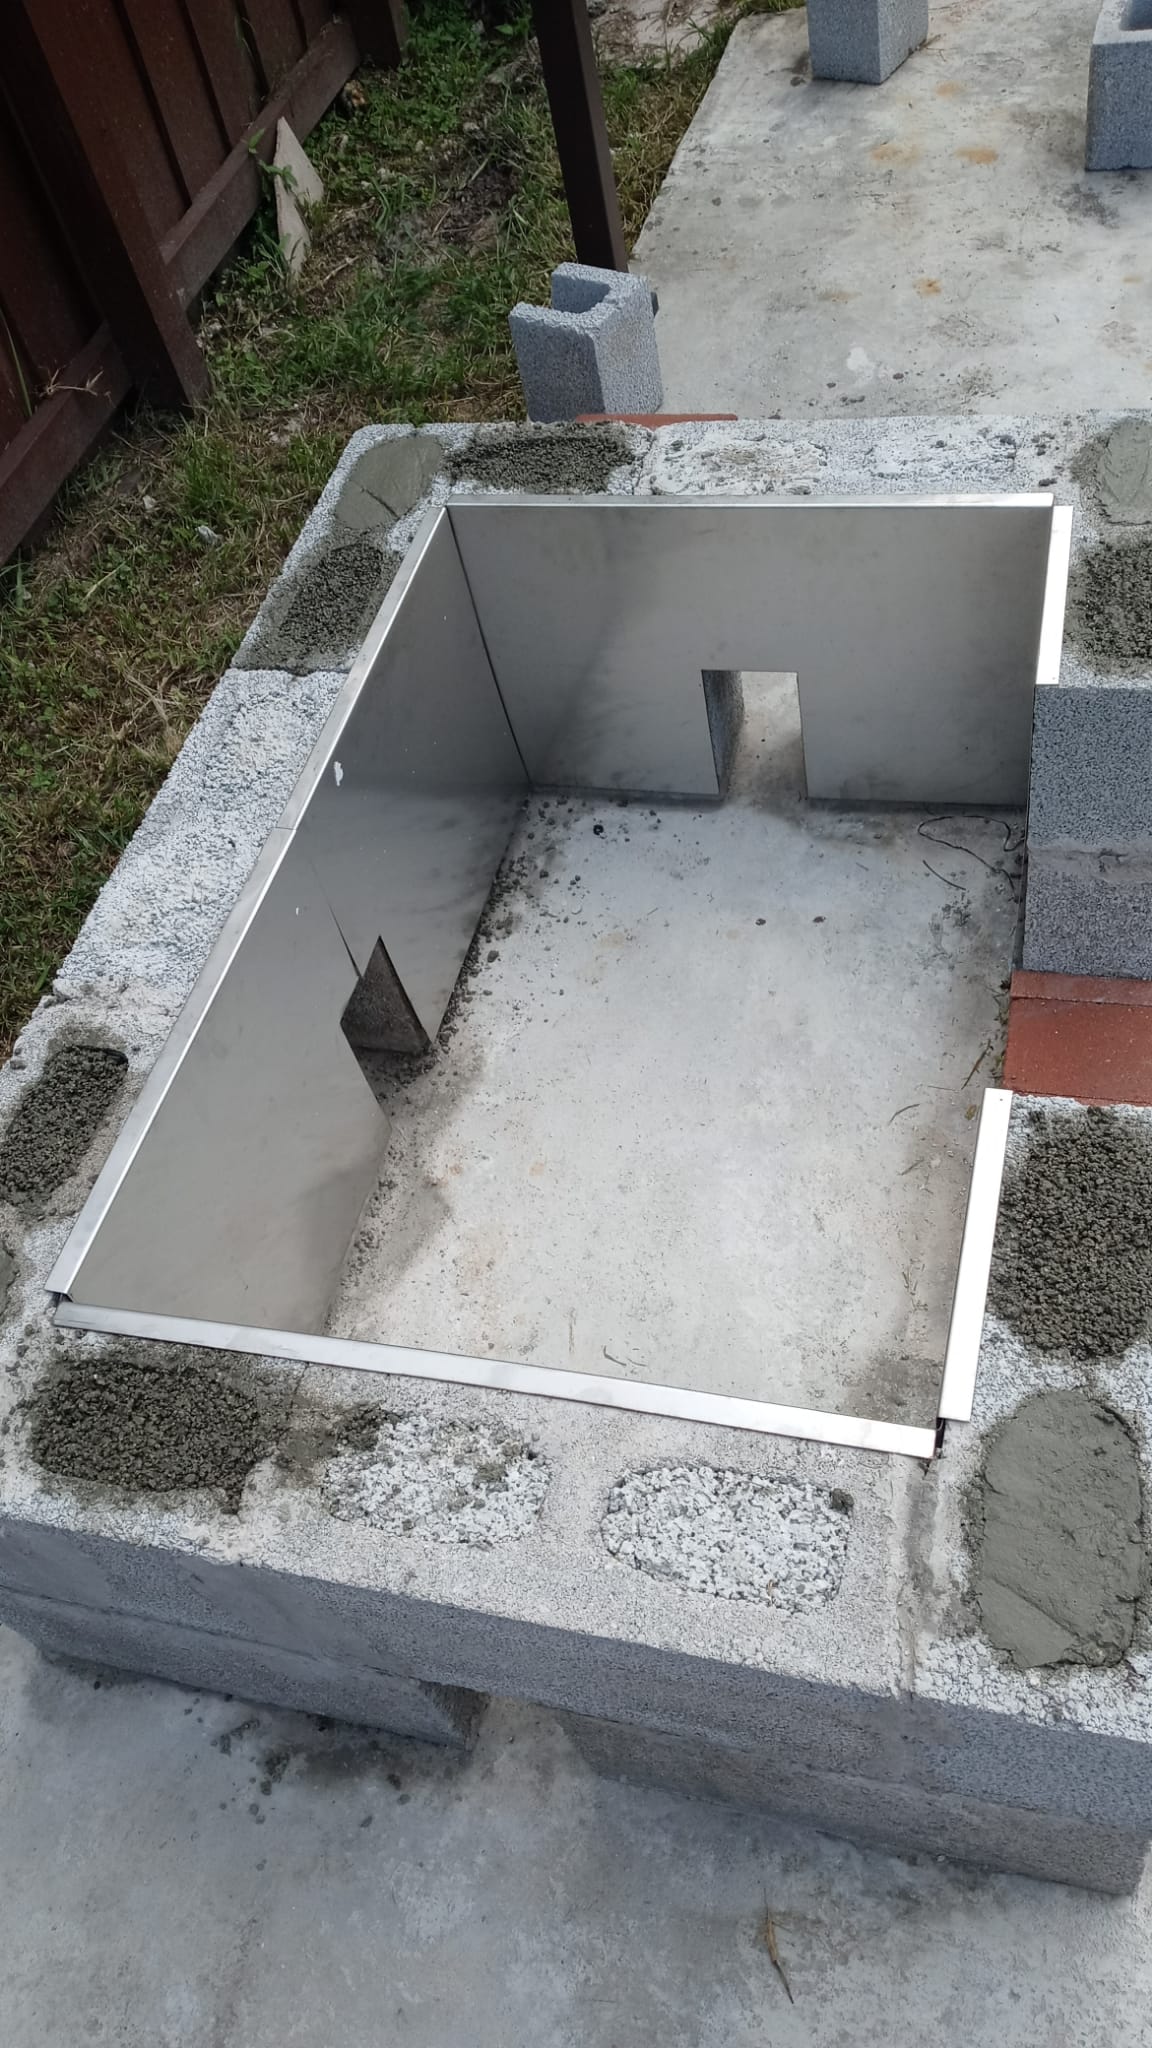
So far that is all we have done. We will be filling up the cinderblocks this week, some with insulation, some with concrete mix. After that, we will wait until we get the lower oven package because we will need to put the fireguards before we attempt to move the concrete slab onto place. I have not yet figure out how we will lift that heavy thing from the garage.

Comments -

I am thinking possible of attachments or improvements to the box. Most BBQ grills have a lid to it. I am wondering if there was a lid or something we could use for this purpose. large BBQs also have something to raise or lower either the actual cooking grill or the charcoal. I imagine this attachment to raise or lower can make use of the hitches or holes where the conduits are.

I will report this weekend when we fill in the cinderblocks, but that is as far as we can go. Without the fireguards, we cannot place the lower oven firebrick because the fireguards go behind them.

A couple of questions:

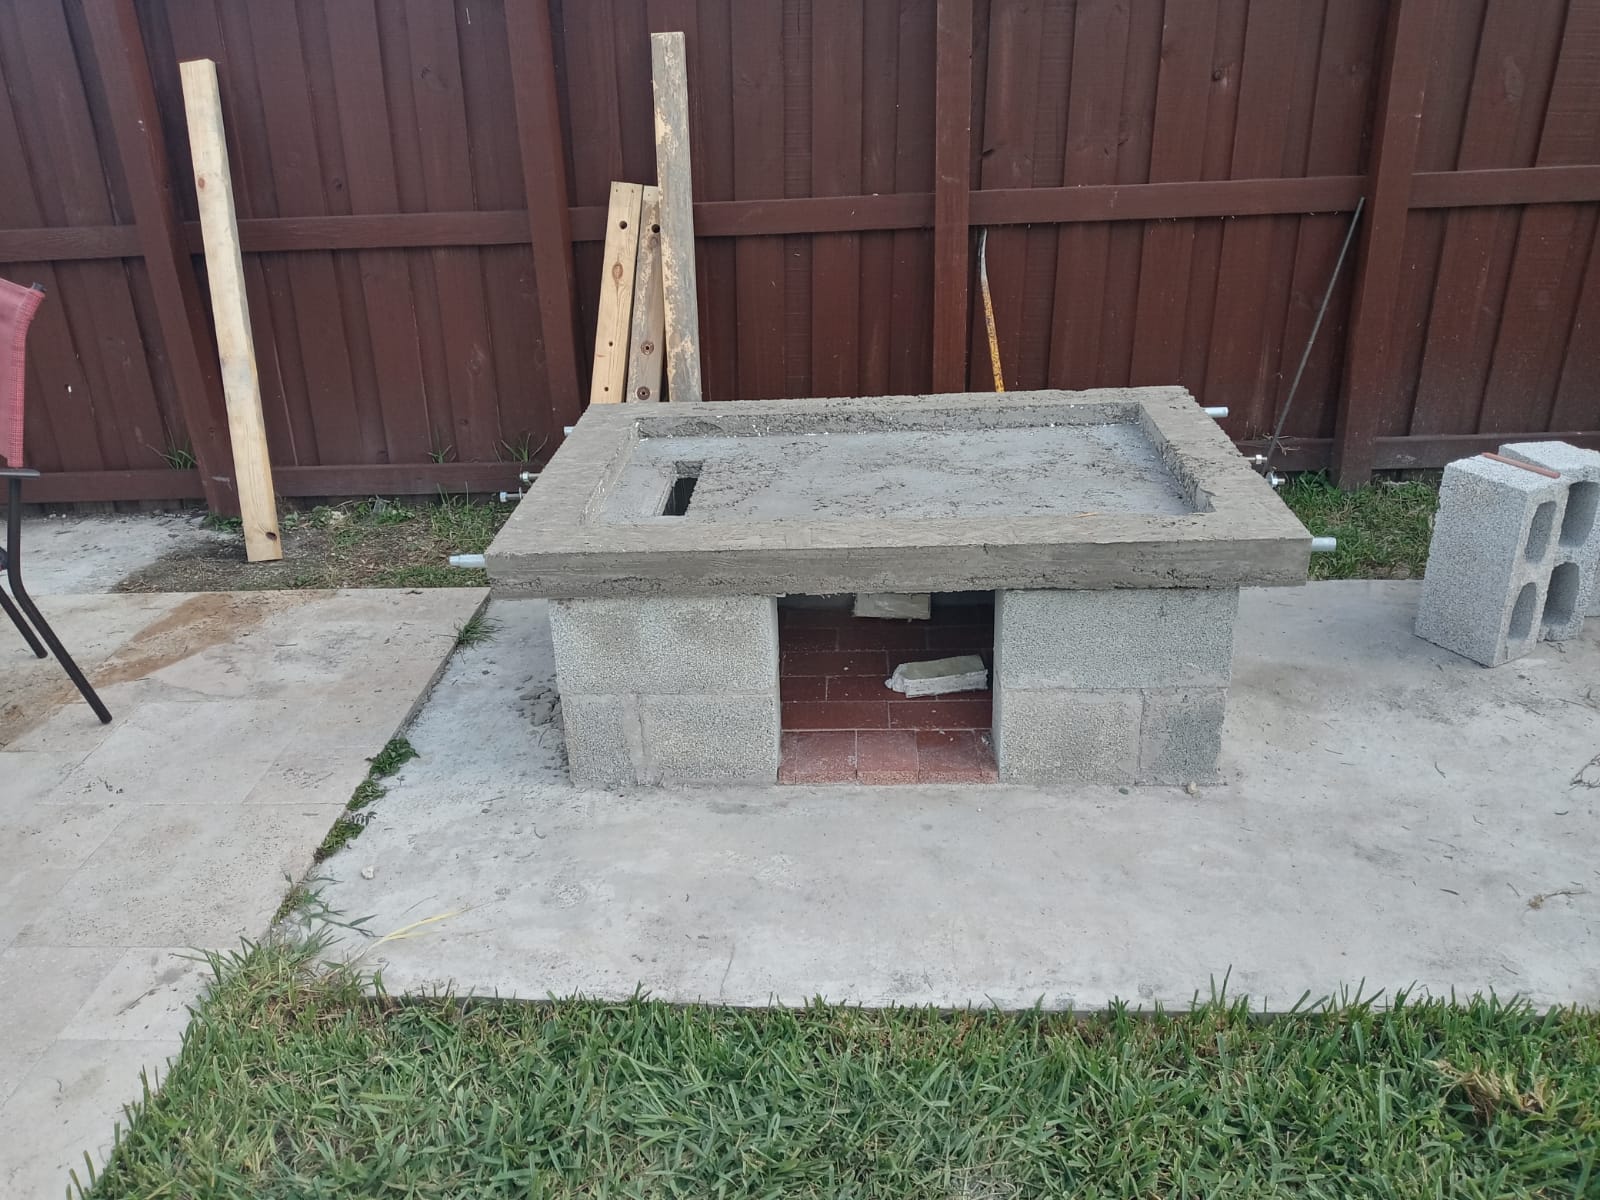
Is there a way to make the box higher? One thing I noticed is that the box is very low. I was wondering if it had not been better to put another concrete slab on top of the one I already had. As it stands, the two rows of cinderblock add up to 16“ (2x 8” cinderblocks plus mortar). That tells me the entire thing will be about 32” tall. That seems a bit short to me.

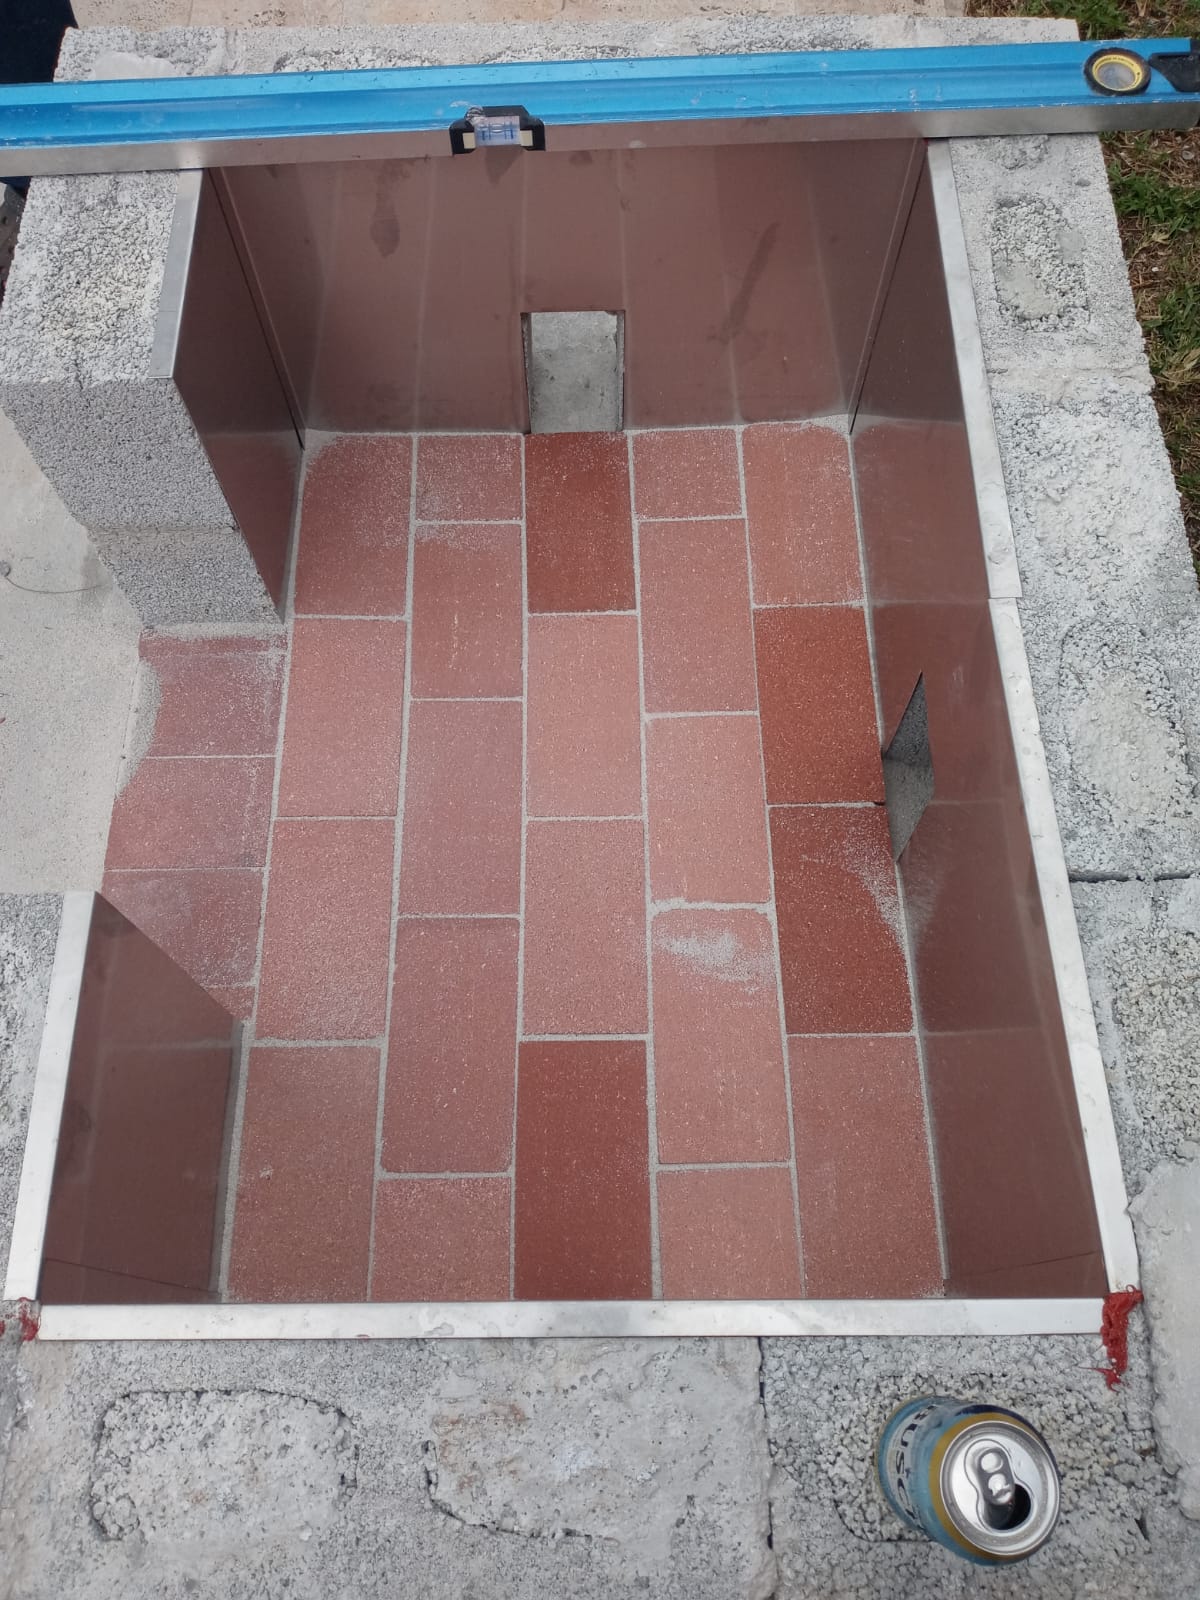
Has anyone had any problems with water going through the openings? The critters mesh will stop little animals but will not stop water going in and out the other side. I am thinking thunderstorms with water that rains sideways. Perhaps a little door to protect the sand between firebricks and also the actual firebricks. I will be placing a firebrick there to not leave it at level, but I do not know how the mortar reacts with heat and water.

I suppose that is all for now. I will attach pics later.

1 Like

Progressing on the box. Slowly, but surely.
August
We added the fire guards, and a few days later (actually a week), we mortared a few bricks. After those bricks were dried, we finish all lower oven bricks and sand.


Sept 2021
We have now mounted the insulation slab, which was heavy and difficult to do. We have had non-stop thunderstorms this summer, so everything has been slow going. We do not have the attachments or oven packages anyway, but I am about to order some.

We have now finished filling up the slab. It all looks level and even, so, we will just add the mortar to the bottom of the slab. Because we so not have the oven door, we need to leave six inches without mortar on that side. Other than that, we seem ok.


2 Likes

Hi Mariela! All that research has really made its way into your build. Truly going to be a huge source of enjoyment for you.

Thank you for sharing your photos!

1 Like

A little late response to your question (thought it might help someone new…). I live in a rainy area and have had no trouble with water coming in from the lower vents. I wouldn’t worry about that.

I did have an issue with rain coming into the whole thing from the top, and mixing with the ash and grease and mess… I just solved this with a cover. For about $60 I ordered a custom size cover that fits over the top with elastic corners to hold tight to the top. Order it big enough to fit over the top with handles, and the handles will make a natural tent shape that sheds the water.

2 Likes

Good call! Do you mind sharing your source?

Can you also show a couple of pictures? What material is it?

I did a quick search for BBQ custom covers and I actually got several hits. Also search for custom lids and got hits as well.

“Covers and All” is the website (I just found it on Amazon and then went to site, no prior experience with them).

With the 20% off first time discount (still available) I spent $55.
I will take some pics and post (my phone is filled with pics with it off…)

Mine was:
Custom Size

  1. Height : 2.5"
  2. Width : 42.25"
  3. Depth : 59.5"
    Fabric Type: Cover Tuff (some sort of vinyl, I guess. Feels like a slightly thicker version of the cover that comes with a standard gas grill)
    Color: Gray
    Extra Add on:
    Tie Downs: Elastic at Bottom $1.99 (this works perfectly to hold it secure. Worth the $2 :wink: )
    Grommets: No Grommets$0.00

In hindsight I would order it .5" bigger just so it would be slightly easier to pull on, but it’s fine (and perhaps it will stretch with time). And of course the size depends on how you finished the top- so measure and round up is my recommendation.

2 Likes

Thank you for the tips

Thanks for that, Adam! Looking forward to your photos.

I may explore that for my Mattone Barile Grande, which is more complicated because of the chimney. @BrickWood has recommended against covers in the past because they don’t tend to last, at least on that model.

But it seems like a great solution for your BrickWood Box, and the tip about ordering a little larger makes sense. I ordered custom clear vinyl tarps for our screen room windows about 4 years ago (they’ve held up well), and they said up front that you had to allow for a variance of a couple inches with cutting and stitching.

First snow of the year last night… glad I had cover on:
(I know I need to finish stone work… quarry is out of corners (and I have been lazy…))

1 Like

lol- looking at old thread and see it’s been almost 2 years since I called myself lazy for not finishing the stone work… It’s mostly there now… More than lazy I am too busy cooking :slight_smile:

(I do still recommend the cover, it rains a decent amount where I live)

1 Like

That cracks me up, Adam!

And looking up thread for other stuff, I can’t believe it’s been almost two years since we first talked about Covers and All. I see the cover on your box in November 2021. How has it held up for you, and do you still recommend this specific product?

Yes. Totally recommend. Just order cover slightly large, because I put a stone in the middle so it tents up and the water runs off.

Without this, the water runs down into the lower box and fires are tricky if you don’t clean it out. (Not that cleaning it out is that hard… remember… .I’m lazy…)

1 Like

That’s great to hear. Nothing like “talking to the man who owns one”!

Looks like they offer some discounts just for signing up for bulk email.

1 Like

Matt,
Did you end up getting a cover for your pizza oven?