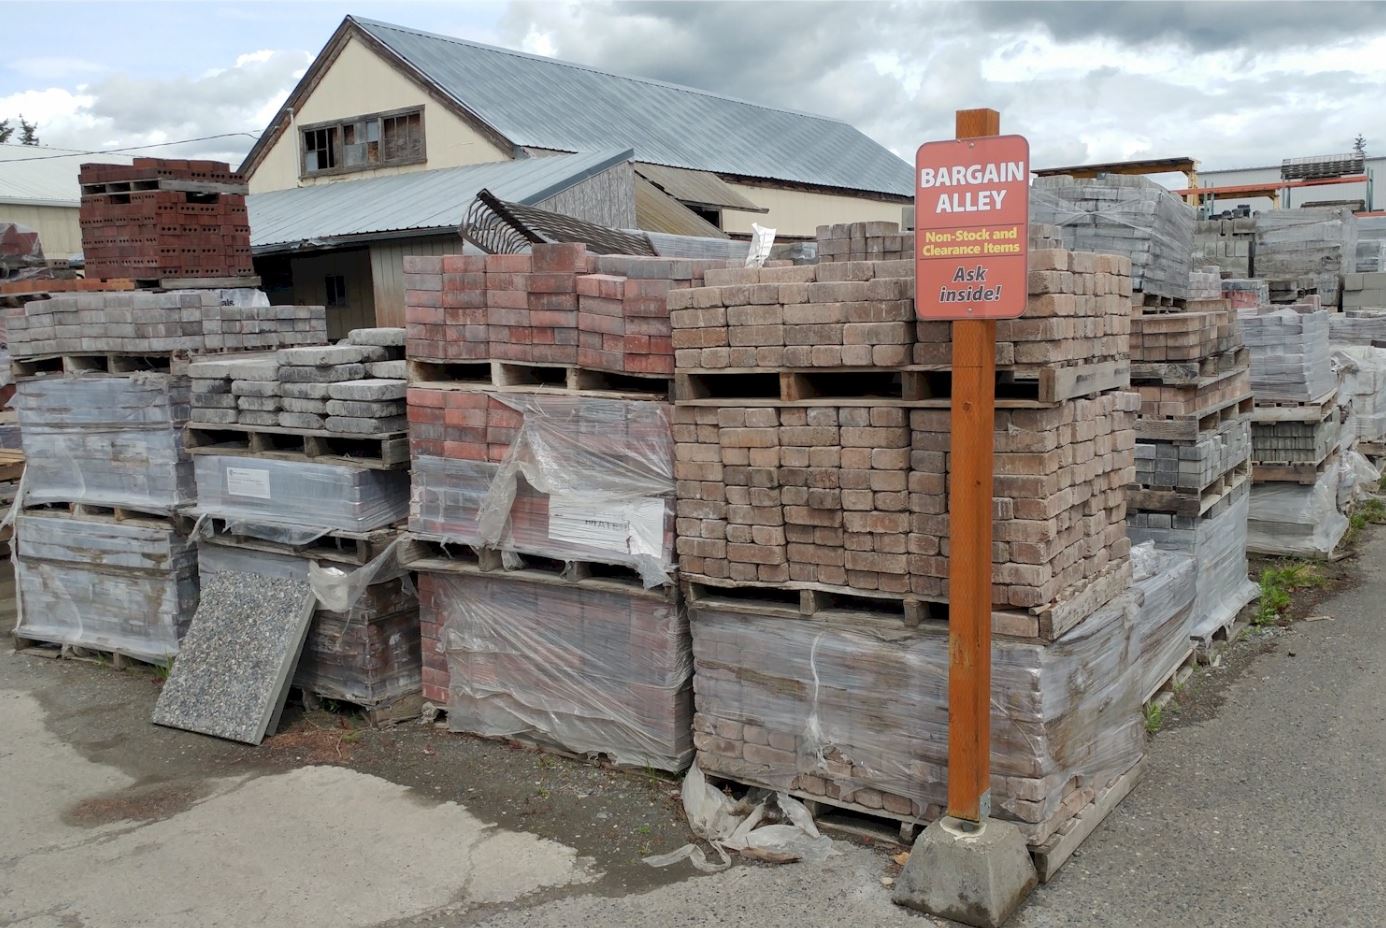
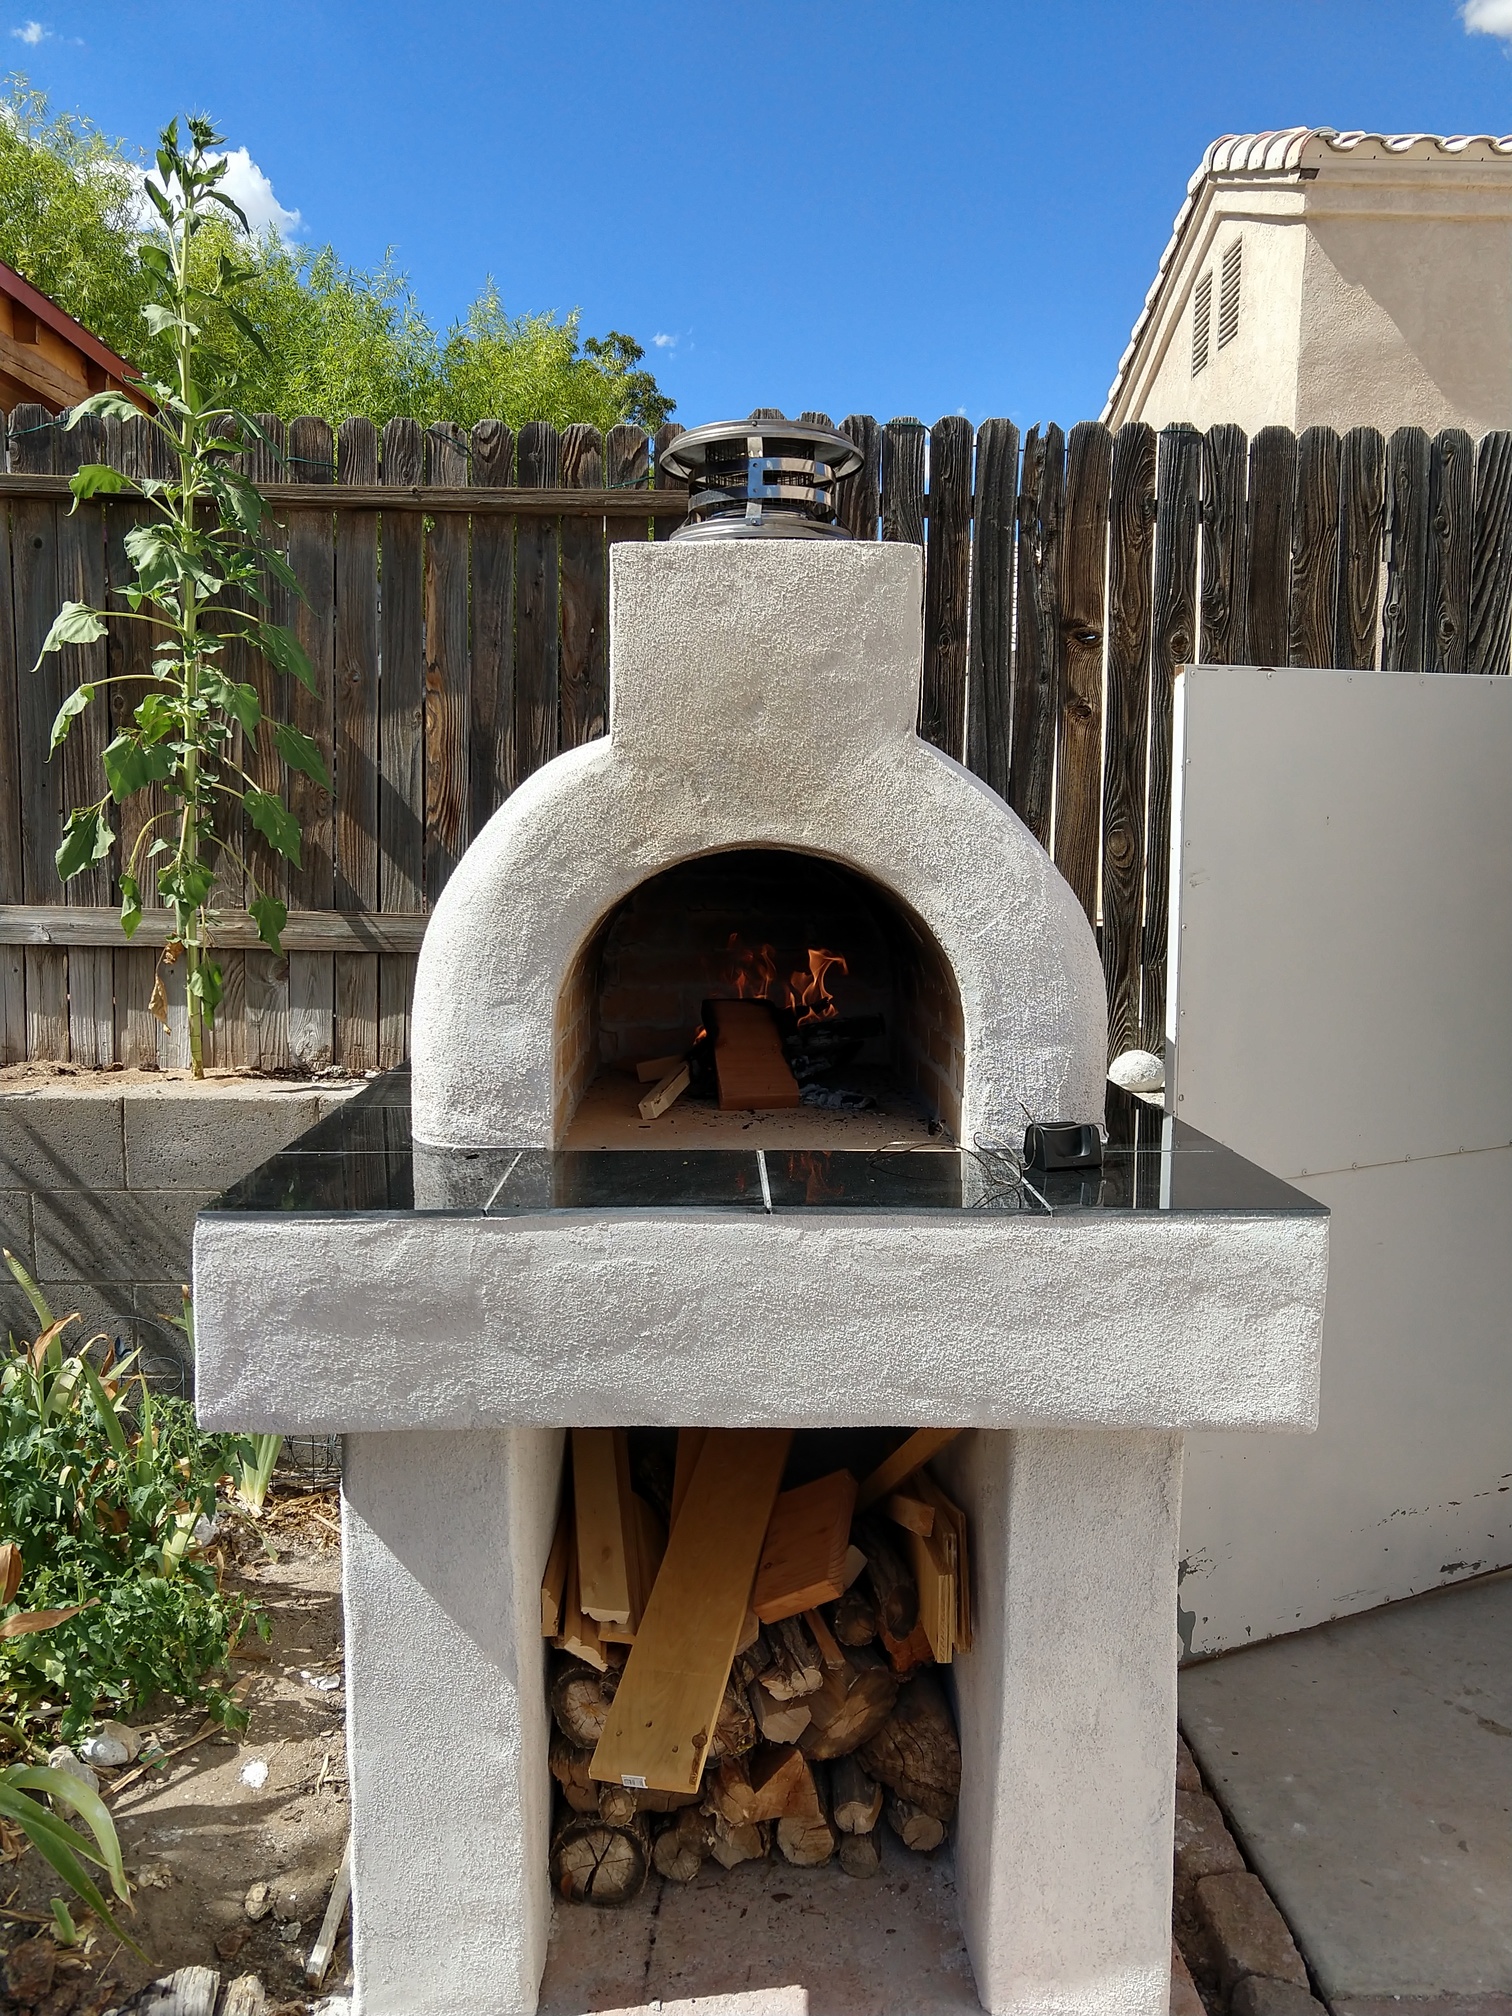
True Story – I took my wife veneer shopping at our local masonry supply and asked her to pick the veneer for a BrickWood Box that I was building at our new home. After searching and searching through a large number of styles and colors of veneer, she just couldn’t find what she was looking for. She explained to the sales rep exactly what she wanted and he guided us to their “Bargain Alley” – a place where unwanted brick and block are placed on clearance. After climbing over several pallets of brick, my wife found her gem… a single pallet of dirty, filthy and muck covered black brick with a very unique texture. The only problem, these were not veneer – they were full size brick.
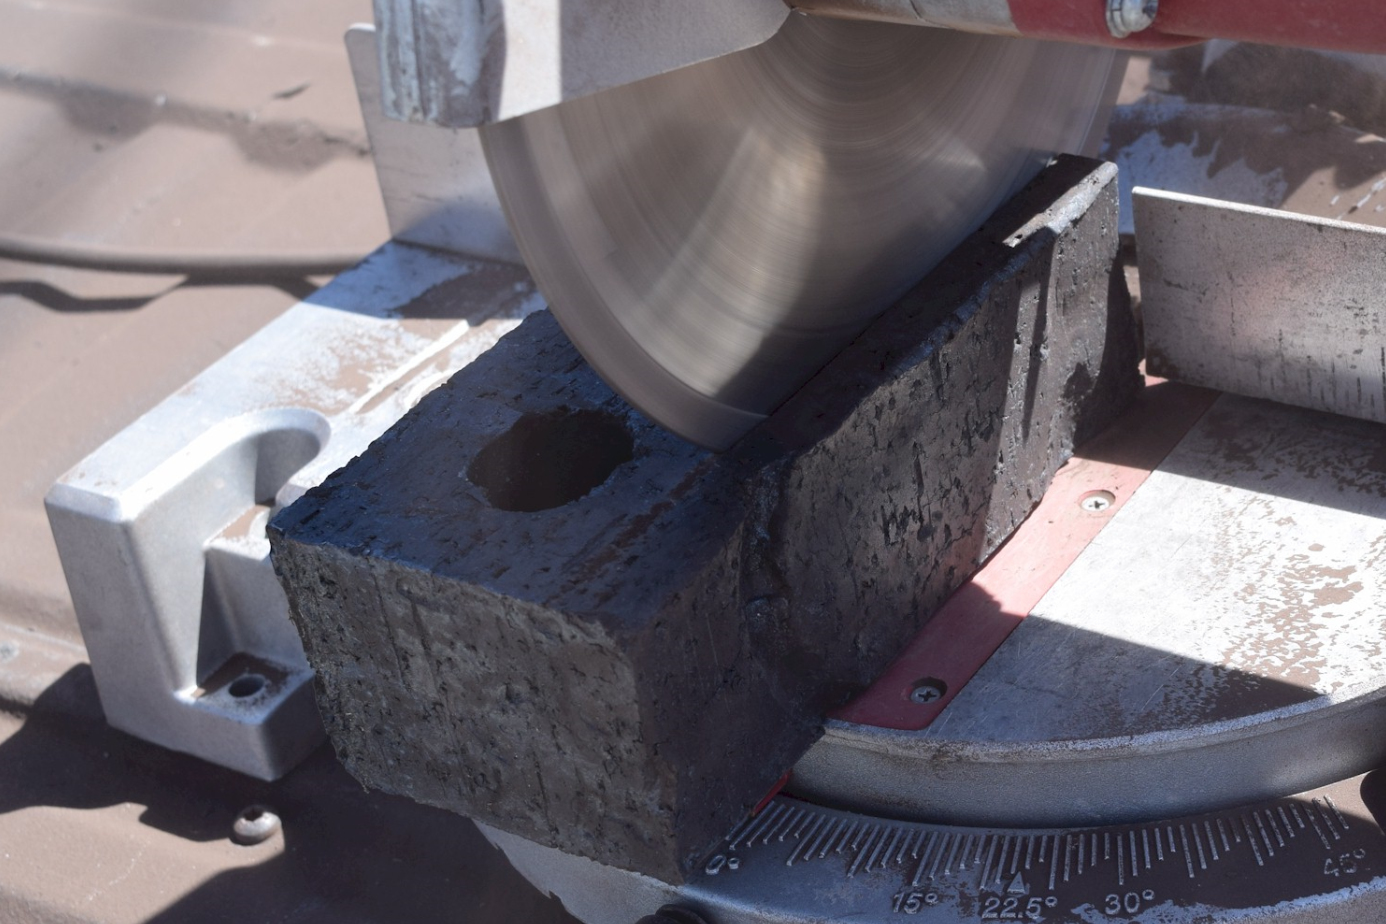
To make a long story short, I spent a full day in 100°+ temperatures cutting 1/2" off the face of each brick while she and the kids went to a movie in an air-conditioned theater then went shopping in an air-conditioned mall. Moral of the story – think twice before asking your wife to choose the veneer for your BrickWood Box!
If you can’t find the exact veneer you are looking for, you can make your own 1/2" veneer using full size brick – see what they have on clearance before paying for full price brick.
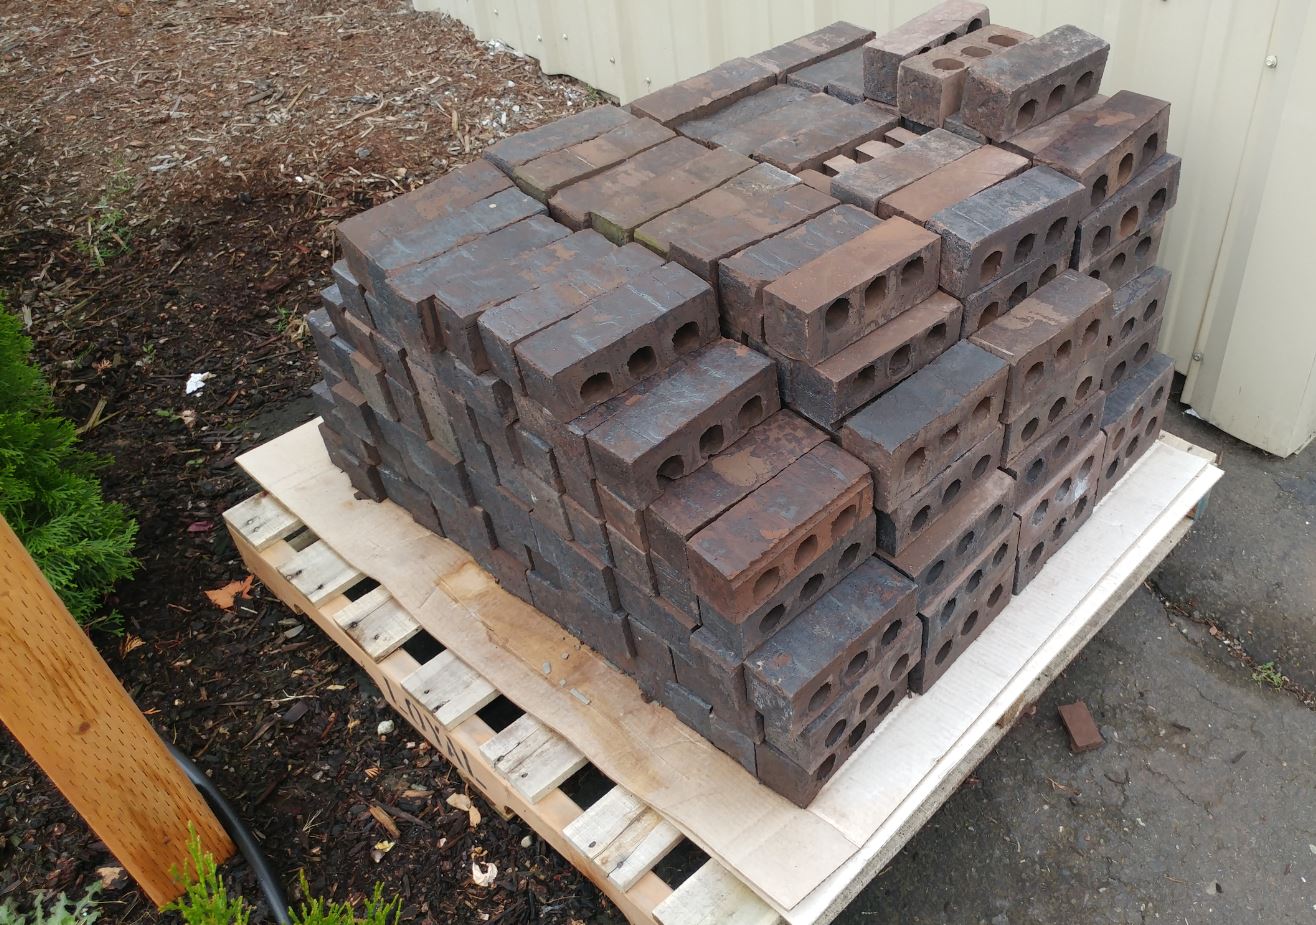
This pallet of beautiful black “Clicker” brick was hidden by other pallets of brick on clearance. After a little scrubbing, the brick showed its true beauty – a deep semi-gloss Black with touches of Silver.
When cutting the face off brick, you MUST use a Miter Saw with a Masonry Blade. Don’t even think about using an Angle Grinder for this LONG, BORING, DUSTY & TIME CONSUMING project.
SIDE NOTE: How do you get rid of hundreds of faceless brick? Craigslist! I just simply put all the faceless brick on a pallet and posted “FREE / CURB ALERT - FREE BRICK. FACES ARE CUT OFF. YOU WILL NEED TO LOAD”. I had 16 requests in the first 2 hours after posting the ad and they were gone by the end of the day.
I stumbled across this old thread and thought it applied to my question so I’m resurfacing it. I too will be cutting veneer and am curious of a rough estimate for the number of brick veneer it takes, cut from a standard brick? I will be covering the dome, the back and front. It’s a grande built to spec. Thanks!
Ok thank you. Funny story. My wife sips wine while she watches me build the brick oven. And if it’s too hot of course in the comfort of the air conditioning. LOL
When you do this kind of job on your miter saw, be prepared for the fact that “dusty” does not begin to describe the huge clouds of gritty, sharp brick particles that will surround your cutting project. My compound miter saw spins its blade at about 3,200 revolutions per minute (RPM). The blade kerf (the width of the blade and, therefore, the cutout space it leaves) is about 1/16 inch. That translates to a lot of material cut out of whatever is in its path.
Two things will help:
Wear appropriate protective gear. At a minimum you need safety glasses, ear protection (and plan on swabbing out some red dust afterwards even then), leather gloves, and safety shoes. (Don’t think you need steel-toe shoes? Think of how much fun you’ll have at the ER explaining how you dropped a seven pound weight on your foot.) You might also consider long sleeves and long pants.
Use your air compressor (or borrow one), and clean out your saw immediately after use. A good second choice is a shop vac with a brush attachment. Getting all the grit out of your saw is crucial, unless you’re looking for a good excuse to buy a new one soon. Lots of compressed air will shoot the dust away, and your saw will look pretty good after. To make it look great, follow up the air with a quick wipedown using a microfiber cloth.
All of this advice goes double for sawing firebrick, which contains aluminum and other ingredients that are theoretically harmful. For that material, you should also use a respirator (dust mask) to be sure you’re not inhaling the dust. This is true whether you use a miter saw or a grinder.
The good news is that the miter saw, equipped with a diamond masonry blade, makes fast work of veneer splits and cuts. In addition to the veneers, it’s a superior tool for cutting whole bricks into half bricks, because the result will look like it came from the factory and is not subject to the kind of ragged cut lines you might get from the angle grinder.
The angle grinder, though, is your go-to for cutouts like the ones for a chimney base.
I would agree with bikerbudmatt’s advice. It’s sound. I would also suggest soaking your brick in water before cutting . Both fire and the ones for making Veneer. Cuts down tremendously on the dust. It comes out of the saw like a wet saw dust. The blade also goes thur it like cutting butter with a hot knife.
I soak my brick the day before I cut them or set them in mortar. Over kill? Yes but worth it. Happy cutting.
Most of it shoots out of vacuum hole of the miter saw and all over our magnolia tree. Wife loves that. Caught a little business for that. But the Japanese Beatles stayed away from that tree this year. Who’s the genius now I said.
To answer your question. Yes some does stick to the saw. But if you let it dry you can clean just as you suggested.
Wow. Didn’t even think of putting the bag on it. Like you said. Your cutting alot of brick with the kerf of the blade. So it will fill up quick. Your call I guess.
Key importance is soaking the bricks so there is no dust flying around.
I’m saying the opposite: the bag is usually on the saw, so I’m saying I plan to take it off. I didn’t think of that when I was cutting some ordinary brick, and just slicing three of them lengthwise produced a lot of material. The bag was completely ineffective with dry brick dust, and I just picture it faring worse when it’s more like clay mud.
Since cutting brick is a VERY dusty project, do it when your neighbors are not home. You know - the ones that will complain about every little thing. Wait until they are gone if possible.
Place a box fan behind you - in the 4 o’clock or 7 o’clock position… and turn it on HIGH. This will not only blast any dust away from you, but it will also keep your cutting line dust free.
I am a total rookie with masonry, so I hesitate to chime in here, but, I will! I am not sure why using a wet tile saw with a diamond blade didnt come up here, but that’s how I cut my brick (both standard and fire). After a tremendous struggle with the angle grinder and the dusty miter, I borrowed a wet saw and it worked like a dream. It still eats through the blade pretty significantly when making a lot of cuts, and the 10 inch blade wasnt cheap, but I was super stoked with the result and the ease of cutting, and the virtually dust-free job.
On another note: My awesome HUSBAND often brings me an icy cold bevy when I am working, and even sticks around long enough in the 100 degree heat to give a few ooooo’s and aaaaaahhhh’s to cheer me on! LOVE IT!!
Great suggestion on the tile saw. I thought about it but decided not to rent one. I work slow would of cost me a fortune. Lol. My best option was a decommissioned 15 amp miter saw. I figured to buy cheap blades because what you said about them getting dull quickly. Got one on Amazon and low and behold its still going. I still have to cut a ton if full bricks to make veneer. So we’ll see.
So glad that worked for you! Some people have great luck with the wet saw, and others struggle with the pump lines and general attention that has to be paid. (I considered using one, but didn’t have access to a lendable one, and knew I didn’t want to purchase one.)
@423tommy’s reply struck me as a fairly common situation. Very few of us (me included) have first-hand experience with masonry, but most folks have a miter saw knocking around begging to be used. Angle grinders are cheap, though the cutting blade runs around $30 for even a small one. None of the rotary saws are really suitable for notches, which come up later in the project.
I completely agree with you, @Joy, that a wet saw is a good option if you have access to it, and it’s definitely not a dust-generator.
I used a nice worm-drive circular saw with a masonry blade for most straight cuts, and a grinder with a masonry blade for the tough stuff and to clean up my bad cuts when halfing bricks. A grinder with the safety guard is amazing for sculpting and cleanup of bricks, tile, mortar, cement…whatever. Just make sure you get a couple of masonry or multi-purpose blades because once you dull one…it flat out doesn’t work, while a new one will but like butter. The grinder was REALLY helpful with chimney cuts, and granite cuts (counter-top).
Knew you were bringing great skills, but that really does look beautiful. The granite is a gorgeous touch.
That’s the beauty of that tool, and thanks for mentioning the safety guard. I am concerned about folks who are tempted to work without it. One shard of stone or brick propelled by that blade would do a life-threatening number on your body if it lodged in the right place.