I’m getting ready to order my supplies. I want to make the top slightly larger offset the oven to create work space to the left. So rather than casting the the top 47" X 60" I want to make the top 60 X 60 and add a curve to the front for some style. I will enlarge the base proportionately but would like to cast the top in place using cement board. Will it need a center support?
Half inch cement board still has quite a bit of flex in it. I’d imagine there’s a good chance it’ll bow in the middle. It would only cost a few dollars to build a support out of 2x4s and plywood to support the base from below, inside the void of the base between the walls.
I thought about enlarging the hearth as well but then you’d have to recalculate how many firebricks you need and how the red brick outline will fill in the space. Will you have 2 rows of red brick all around or how do you plan to fill the space?
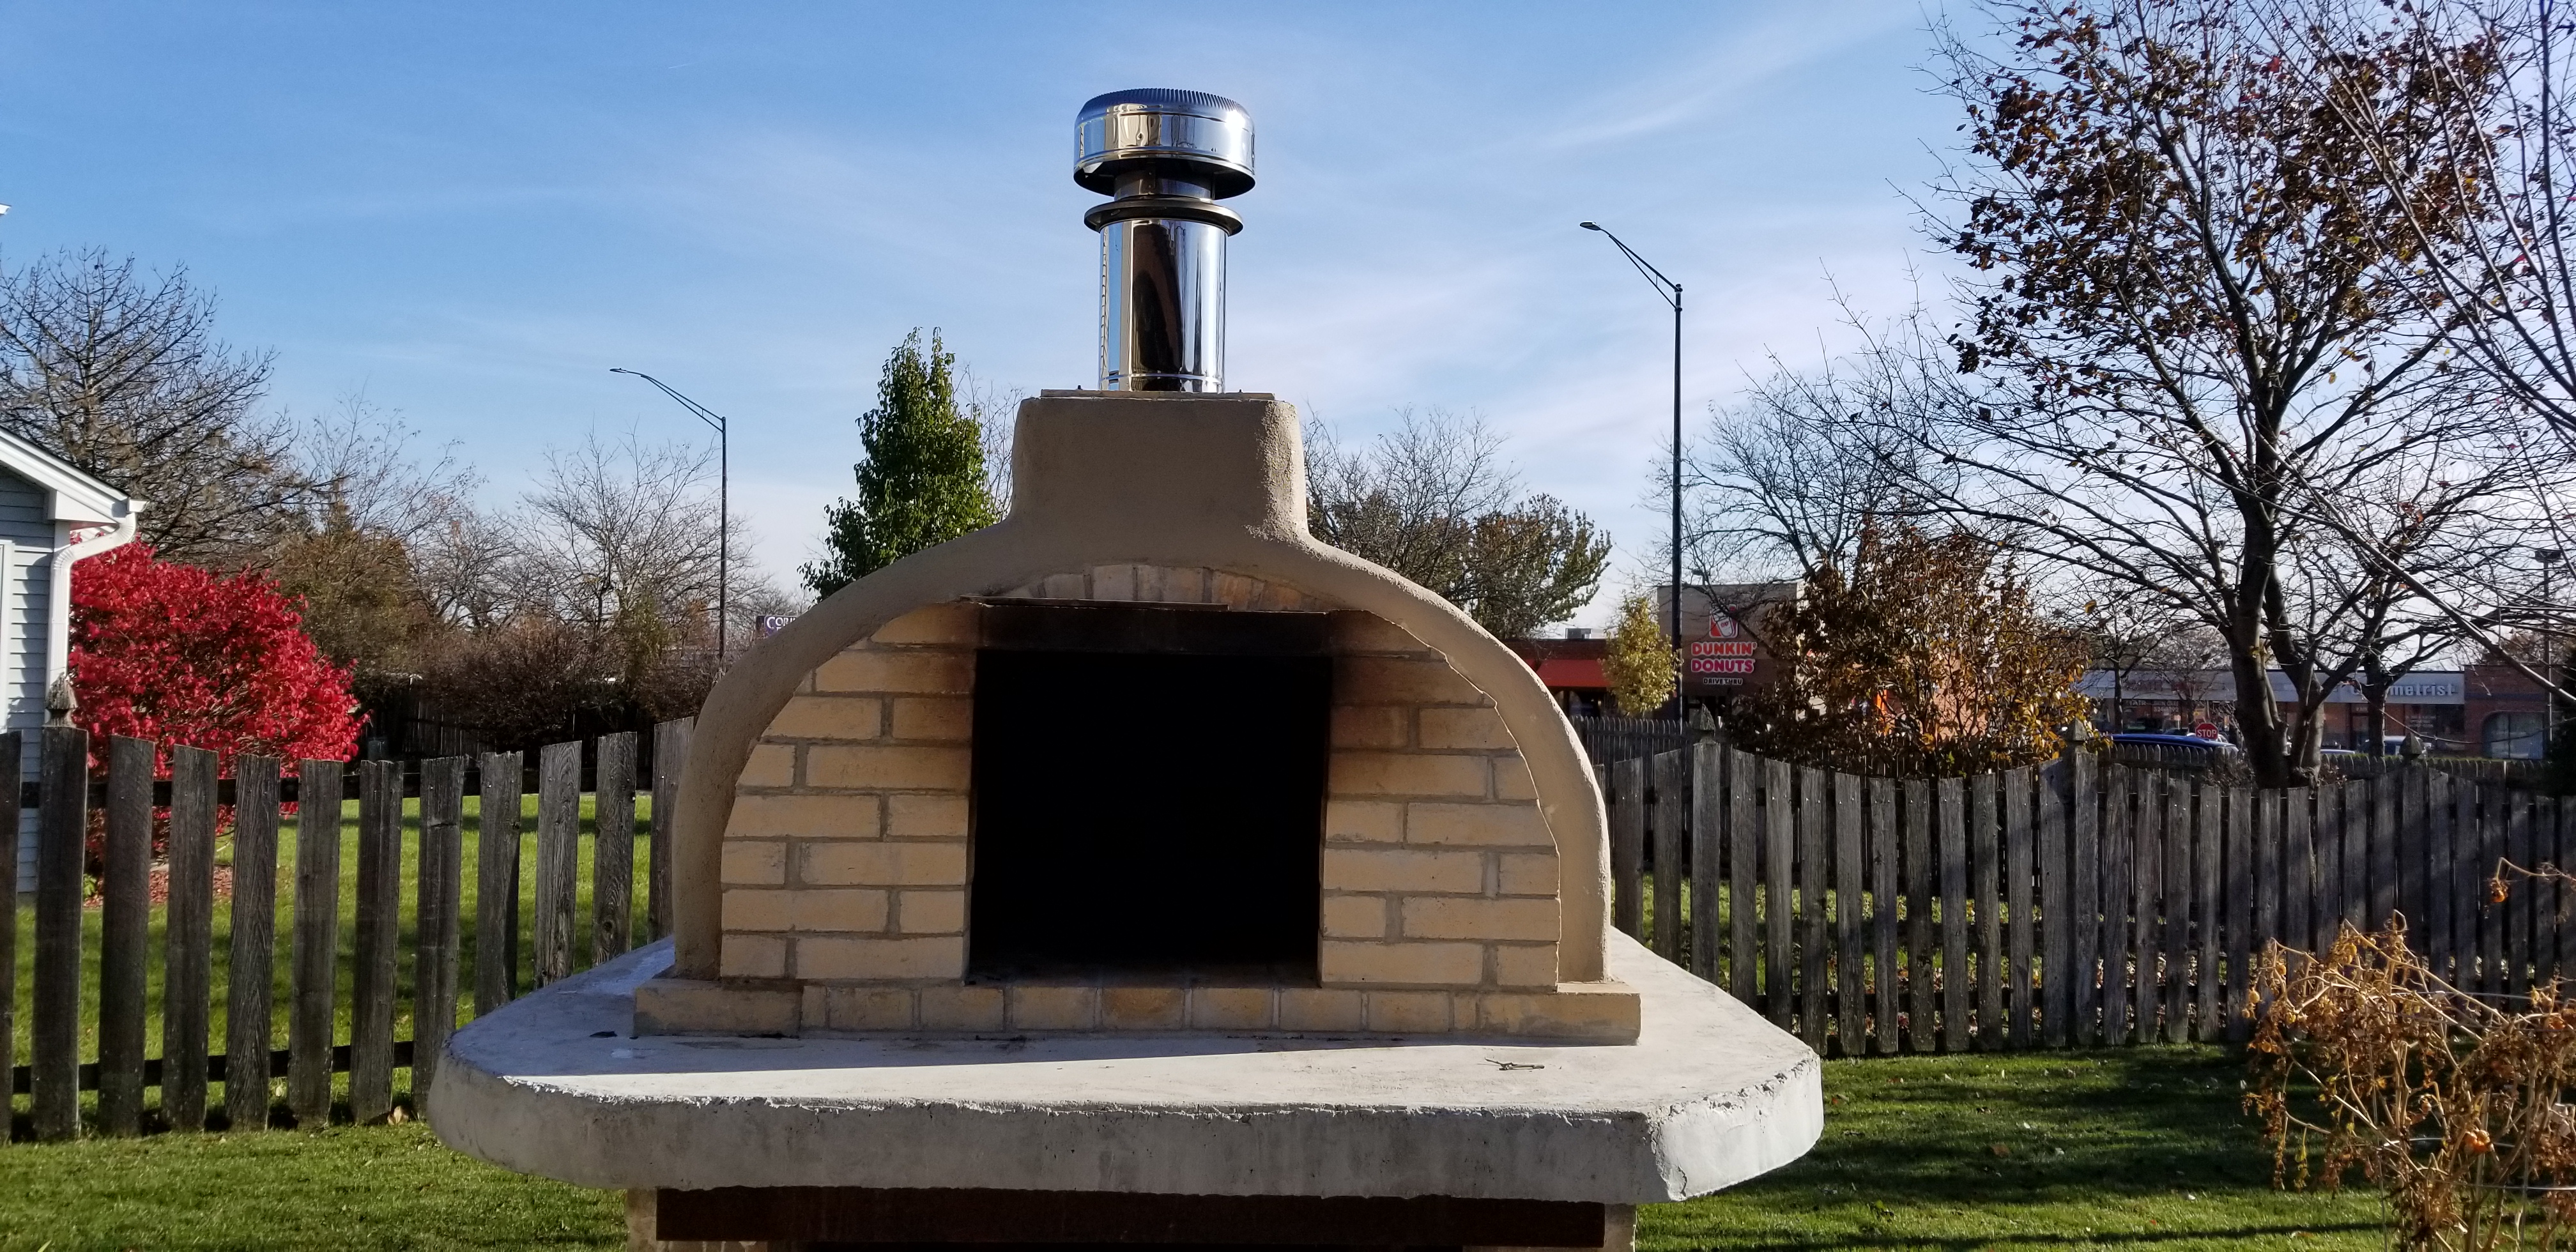
I followed the instructions on the base exactly and added to each side of the oven for work space. I have been very satisfied with the results. Hopefully the picture below will help you understand.

1 Like
Here’s what I did.

I have more detailed pictures if you like. Let me know I can email them to you.
Hope this helps.
I would like some more pictures please
I want to do the base on one pour also.
How did you get your indention ?
Did you use high temp mud on the whole platform ?
Just started mine today. Should have the pause done tomorrow and then the top this weekend
Thanks for the pics. This is exactly what I was thinking about. I assume the foundation and the block base area is per the plans. Do you recall the dimensions you used around the base? It looks larger than the plans.
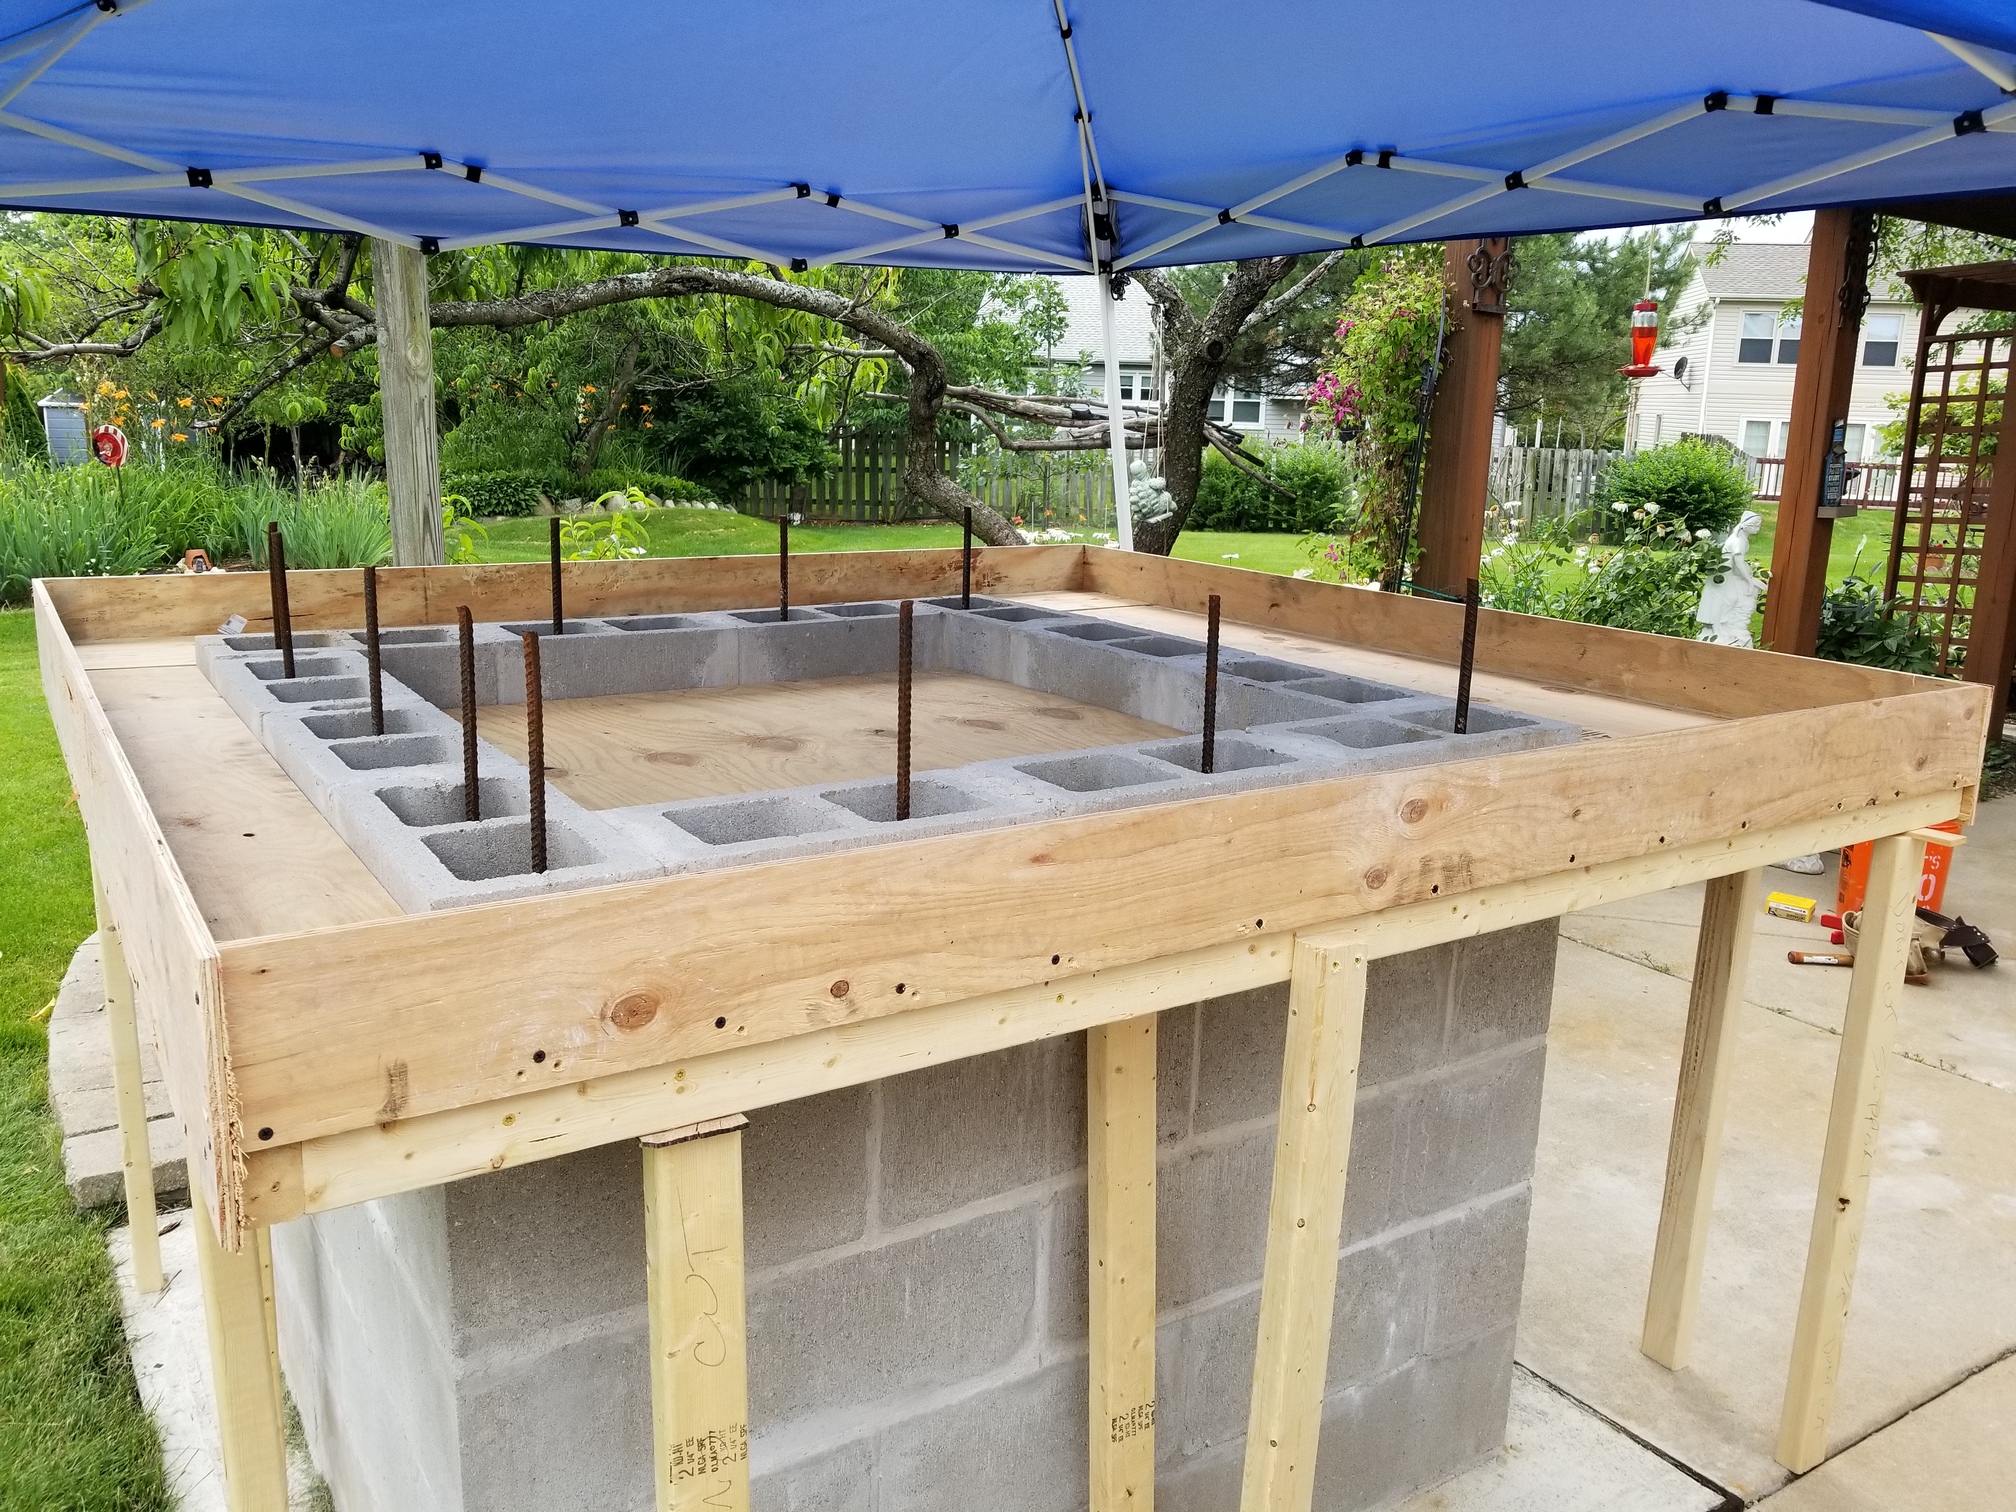
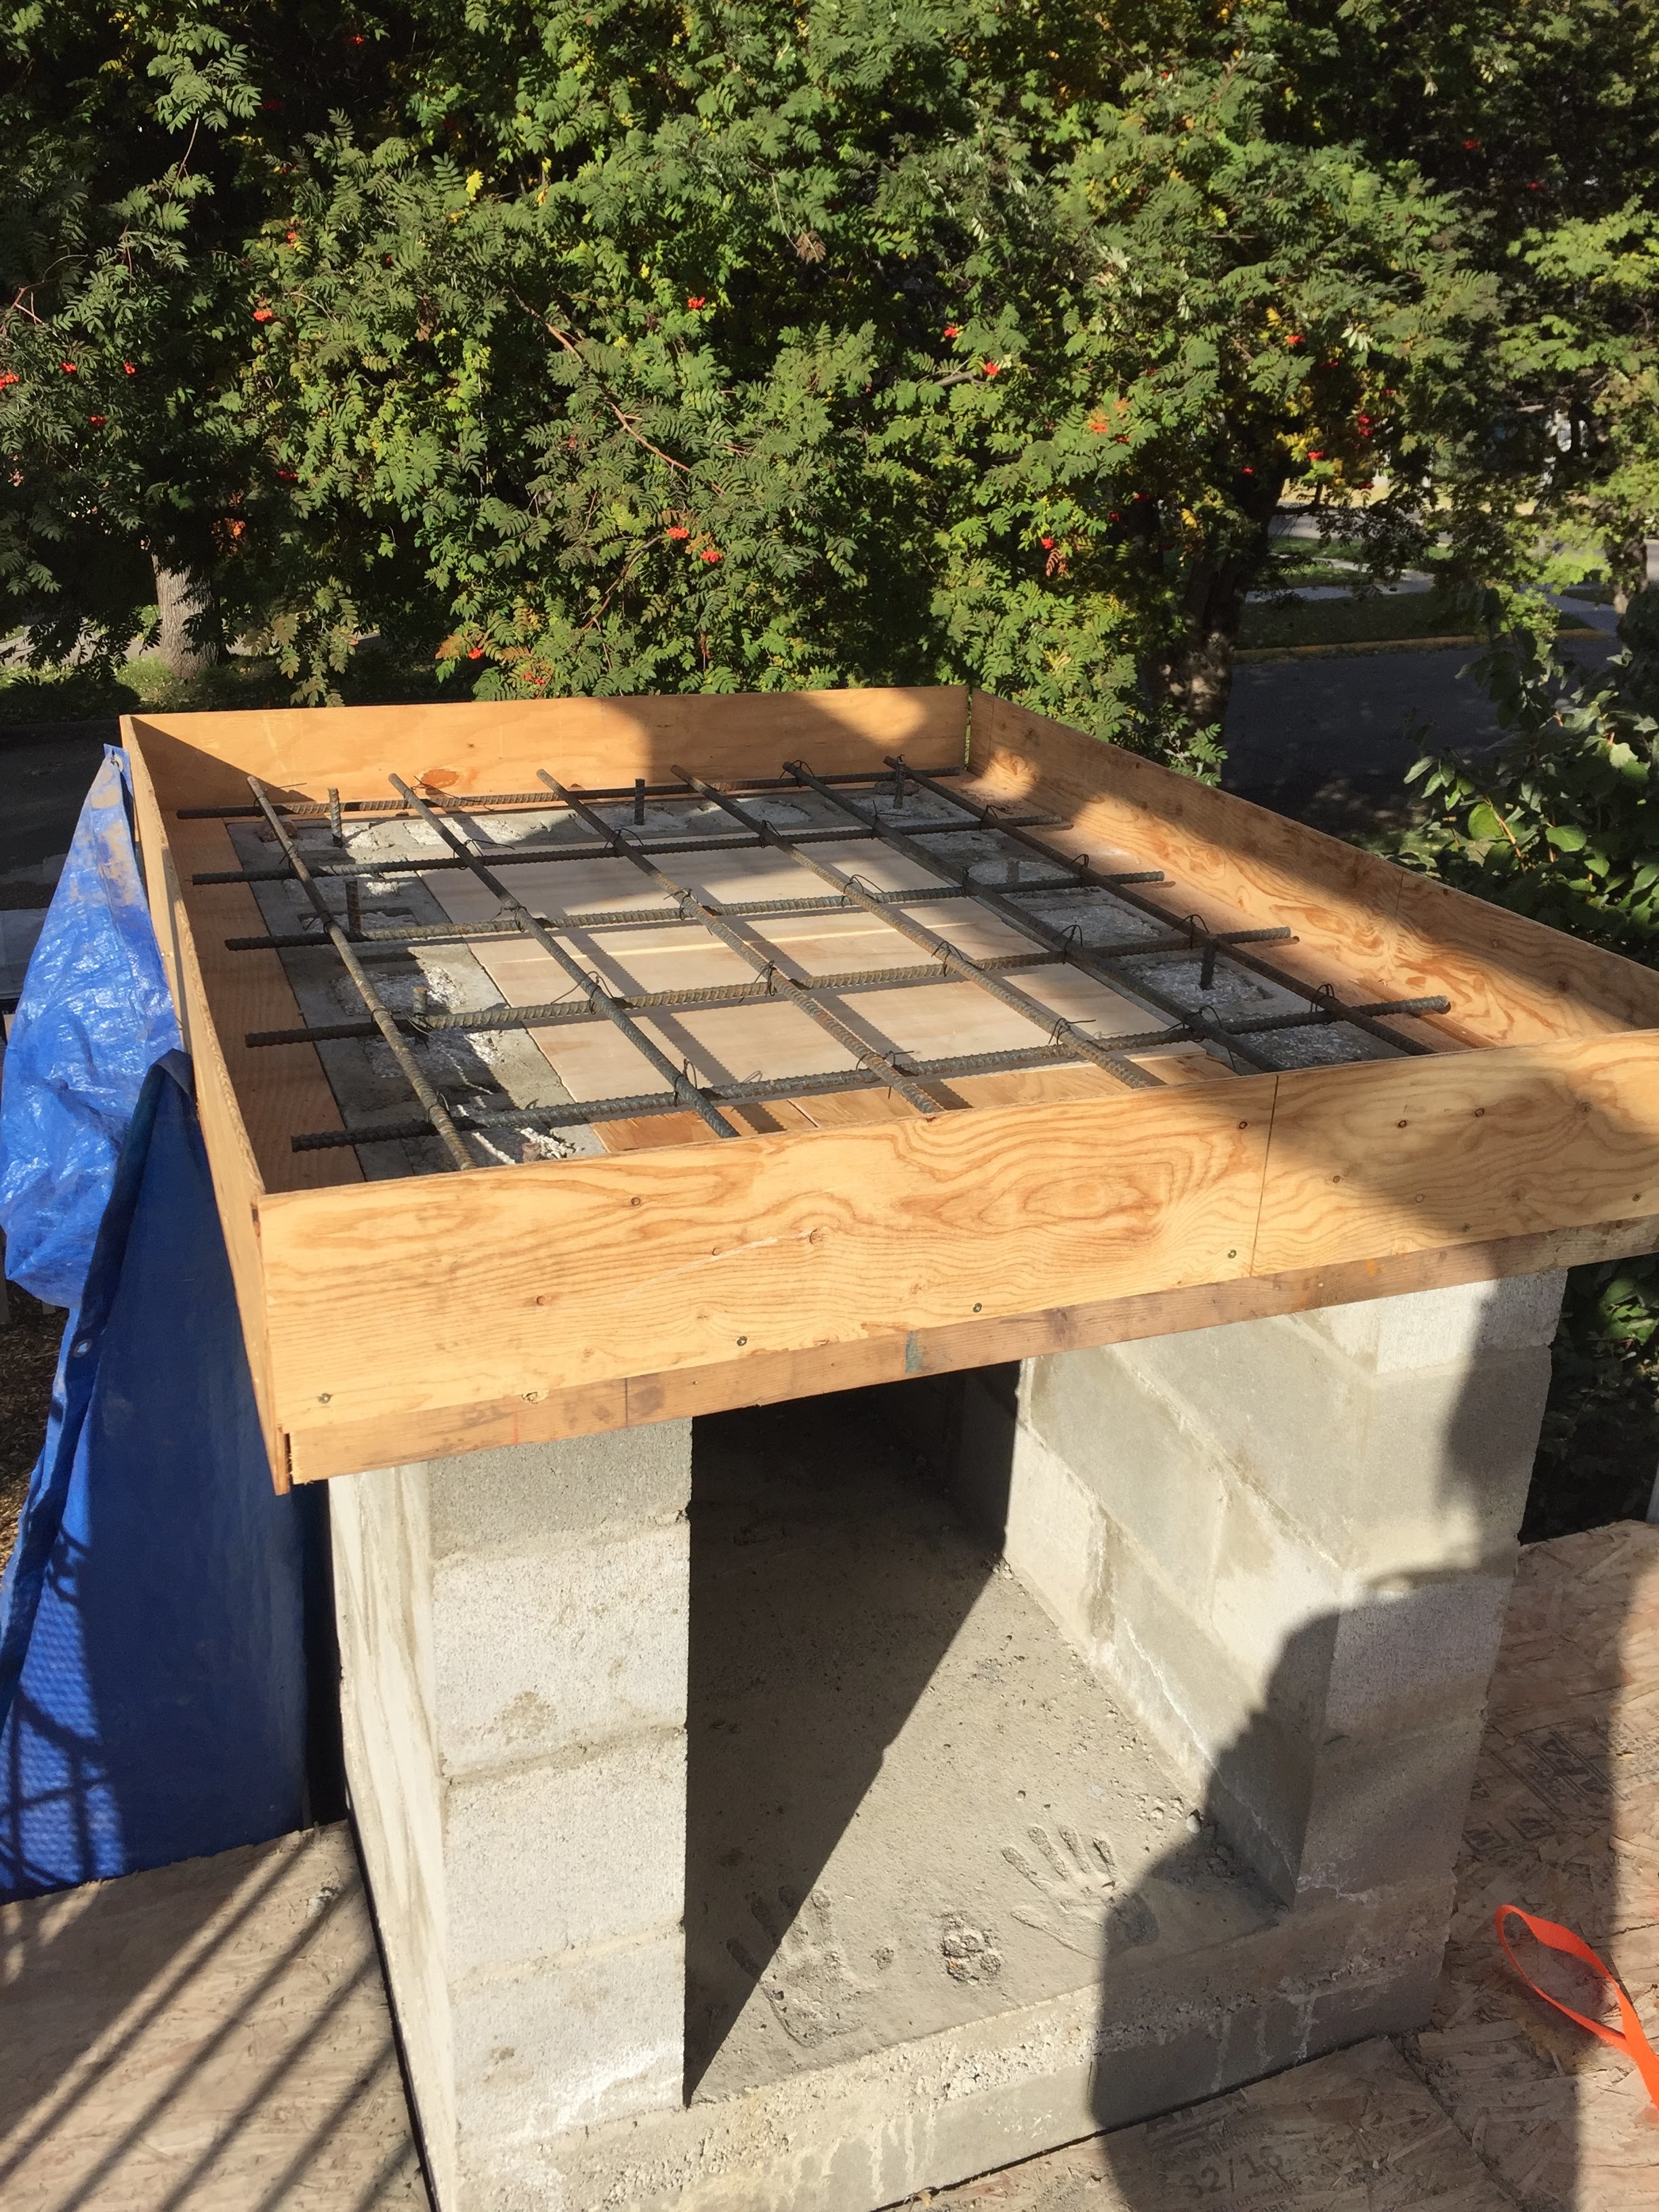
It seemed easier to me to pour the base in place. Especially since my oven is integrated into a raised deck. I have a few pictures that are attached.
- I affixed lumber to the inside and outside of the base using concrete screws.
- Inside the base, I added some plywood to hold the concrete in place from below
- Outside the base, I used 4x4s and then used some vertical plywood to hold in the concrete.
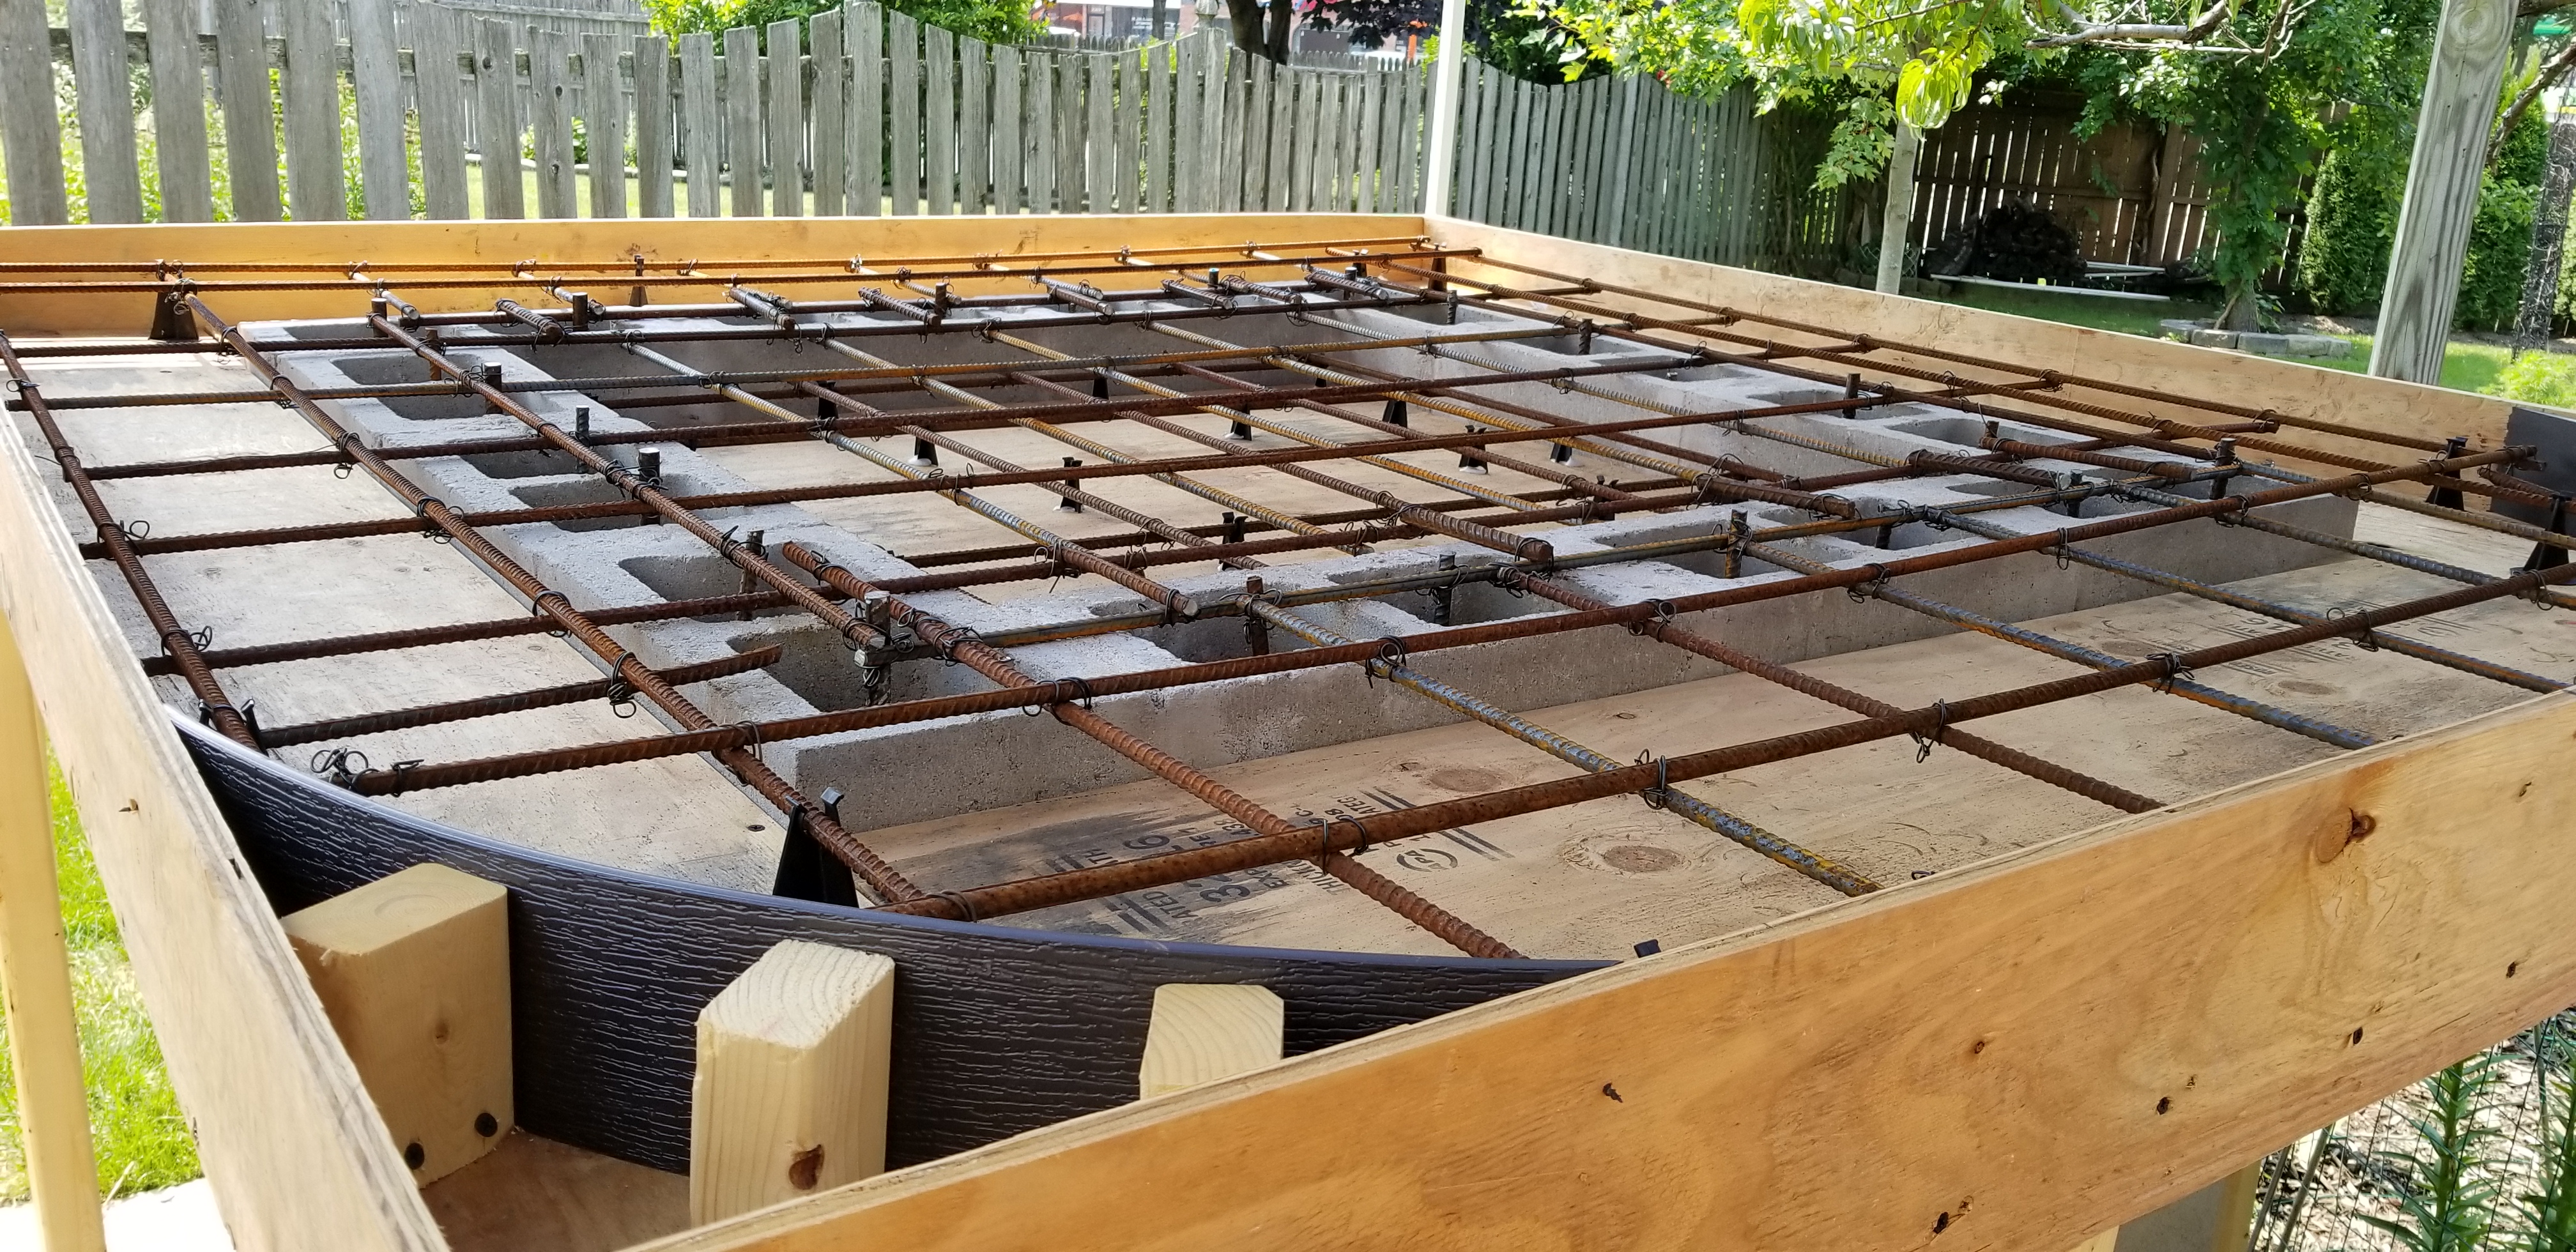
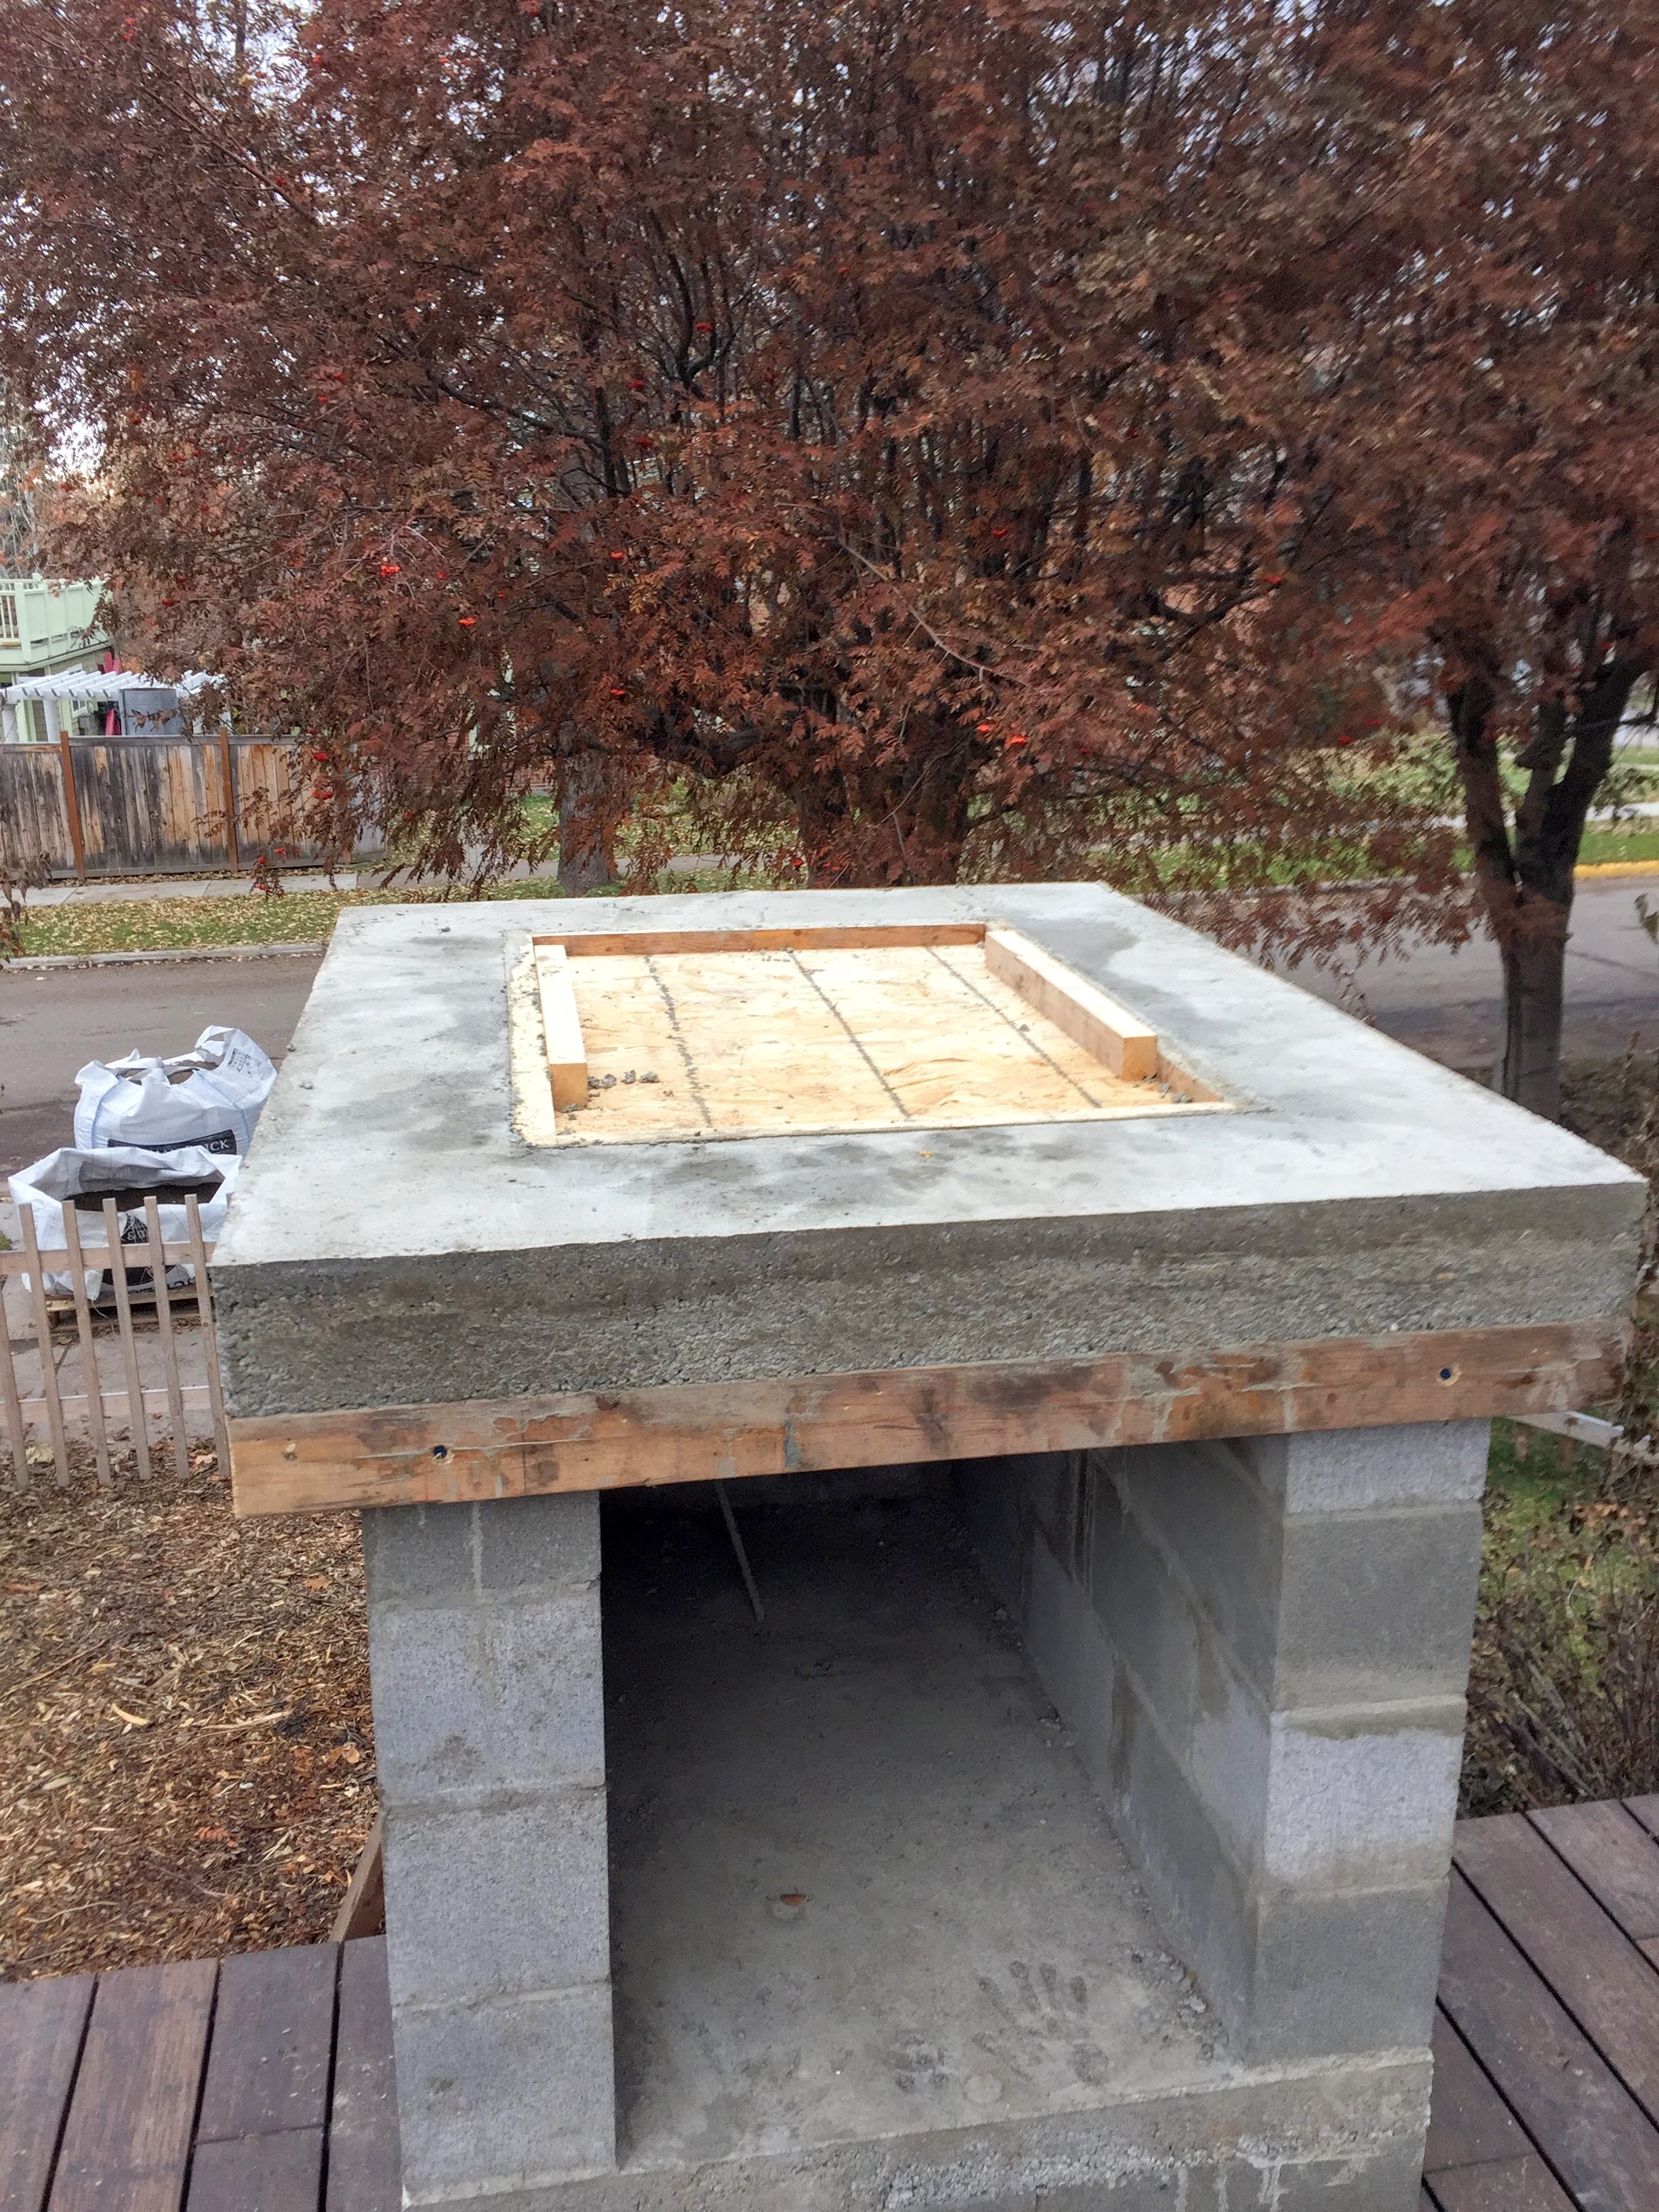
- I built a form the size of the indentation. I poured the concrete until it was at the correct height to place the indentation form. Then I placed the form over the concrete and fixed it in place to the sides of the form (not shown). Then I poured the rest of the concrete. (That was done as one pour so I didn’t have any cold joints.)
If I did it again, I would have used thicker plywood for the sides. The 1/4" stuff I had laying around bowed a very small amount. Oops. Probably no one but me will notice.
Hopefully this helps.
- Mark
1 Like
The forum would not allow me to include three pictures in the same post since I am a new user??? Anyway…
Mark Looks Great. Can you please send pics and info how you started with the base (Ground Level) and got up to deck level ?
Love how you did this! Could you provide any other detail on how you built the counter space?
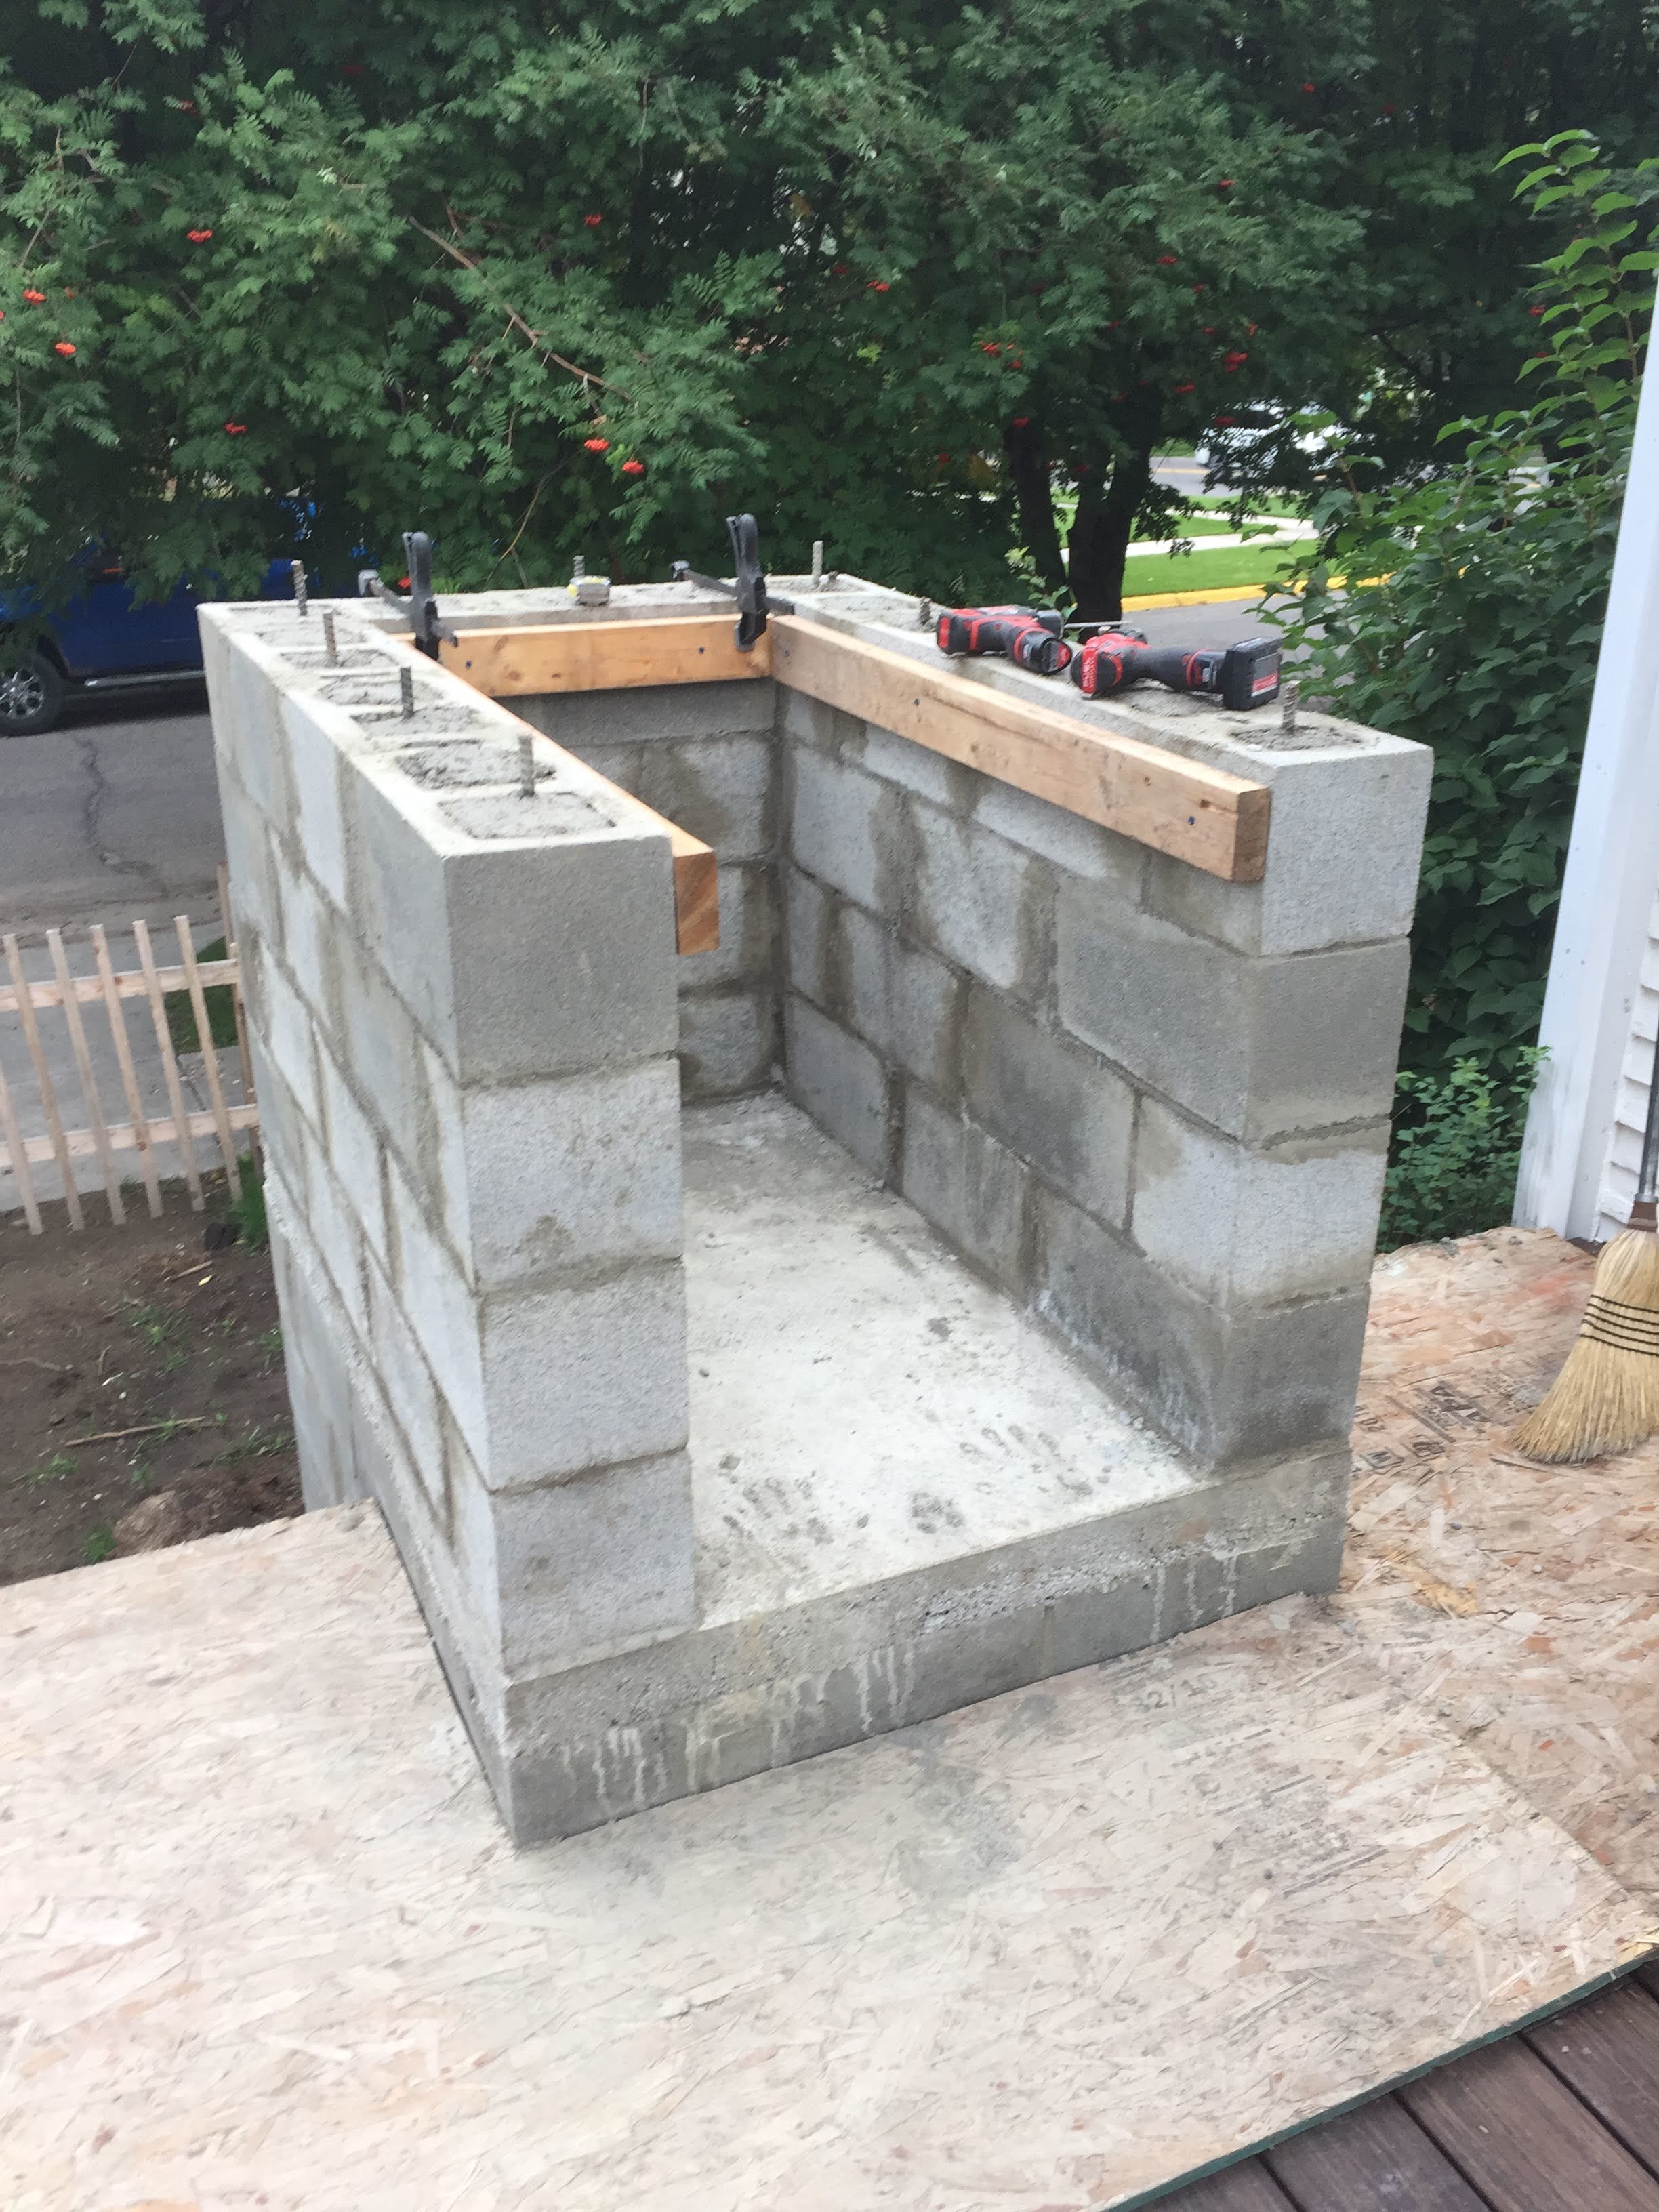
Thanks for the review. What I did was lay block just as I did for the oven, but only went 3 high. Instead of the front open, as on the oven base where I stack wood, the back is open on side counters. It gives a little more storage space for other items if needed. I put a stone veneer over the block which dressed it up on the sides. I then poured the tops only 3 1/2 in. thick using rebar just as I did in the oven base. I used a very smooth laminate board so my top is really smooth. Another suggestion is I sprayed olive oil non stick cooking spray inside the form which really helped from sticking. I used the same procedure on my foam form of the oven and it slid right out, and believe it or not, if I want to build another oven I could use the same foam form again. Hope this helps, thanks again.
4 Likes
Another question for you - how did you create the counter top? Did you build a form and then pace it on top of the cinder blocks? For the oven base slab, I know the instructions call for three slabs… but the counter you have here looks like it’s one solid piece. Thanks!
Looks great! Beginning my build next week, could you send me more pictures?
Thanks
1 Like