Q: You recommend 9" x 4.5" x 2.5" firebrick, but I can only get 9" x 4.5" x 2.25" or 9" x 4.5" x 2" … Will either of those sizes work with a BrickWood Ovens form?
A: Yes. If you can’t get your hands on the 2.5" firebrick, 2.25" firebrick will be just fine… but your mortar joints will be slightly larger. If you would like to see two awesome ovens that used the 2.25" firebrick, jump back to the Photo Gallery and check out the LEWIS OVEN and NATALE OVEN.
If your firebrick are any other size, it will most likely work -
The firebrick WIDTH should be 2.25 - 2.5".
The firebrick HEIGHT should be 3.75" - 4.5".
The firebrick LENGTH should be 7.5" - 9". Make sure you layout the firebricks along the foam form before cutting. This will allow you to visually see how you should cut the edge firebrick to size.
I have tried everywhere to find 2.25 to 2.50 thick bricks but when I ask them to actually measure the fire brick they say 2 1/8 at best. Where do people get 2.50 thick fire brick?
Start with the BrickWood materials locator . My local stone supply, for example, is listed, but they did not have firebrick in stock. I showed them the materials list, and specified that I was looking for low-duty or medium-duty firebrick, and they delivered them to me about 2 days later on a pallet.
In general, this is a better route than “taking what you can get,” because you’ll find that is usually more expensive and less satisfactory.
Post here again if you still can’t find the proper materials. @BrickWood usually has a couple of ideas, and there are others who have been in this same situation.
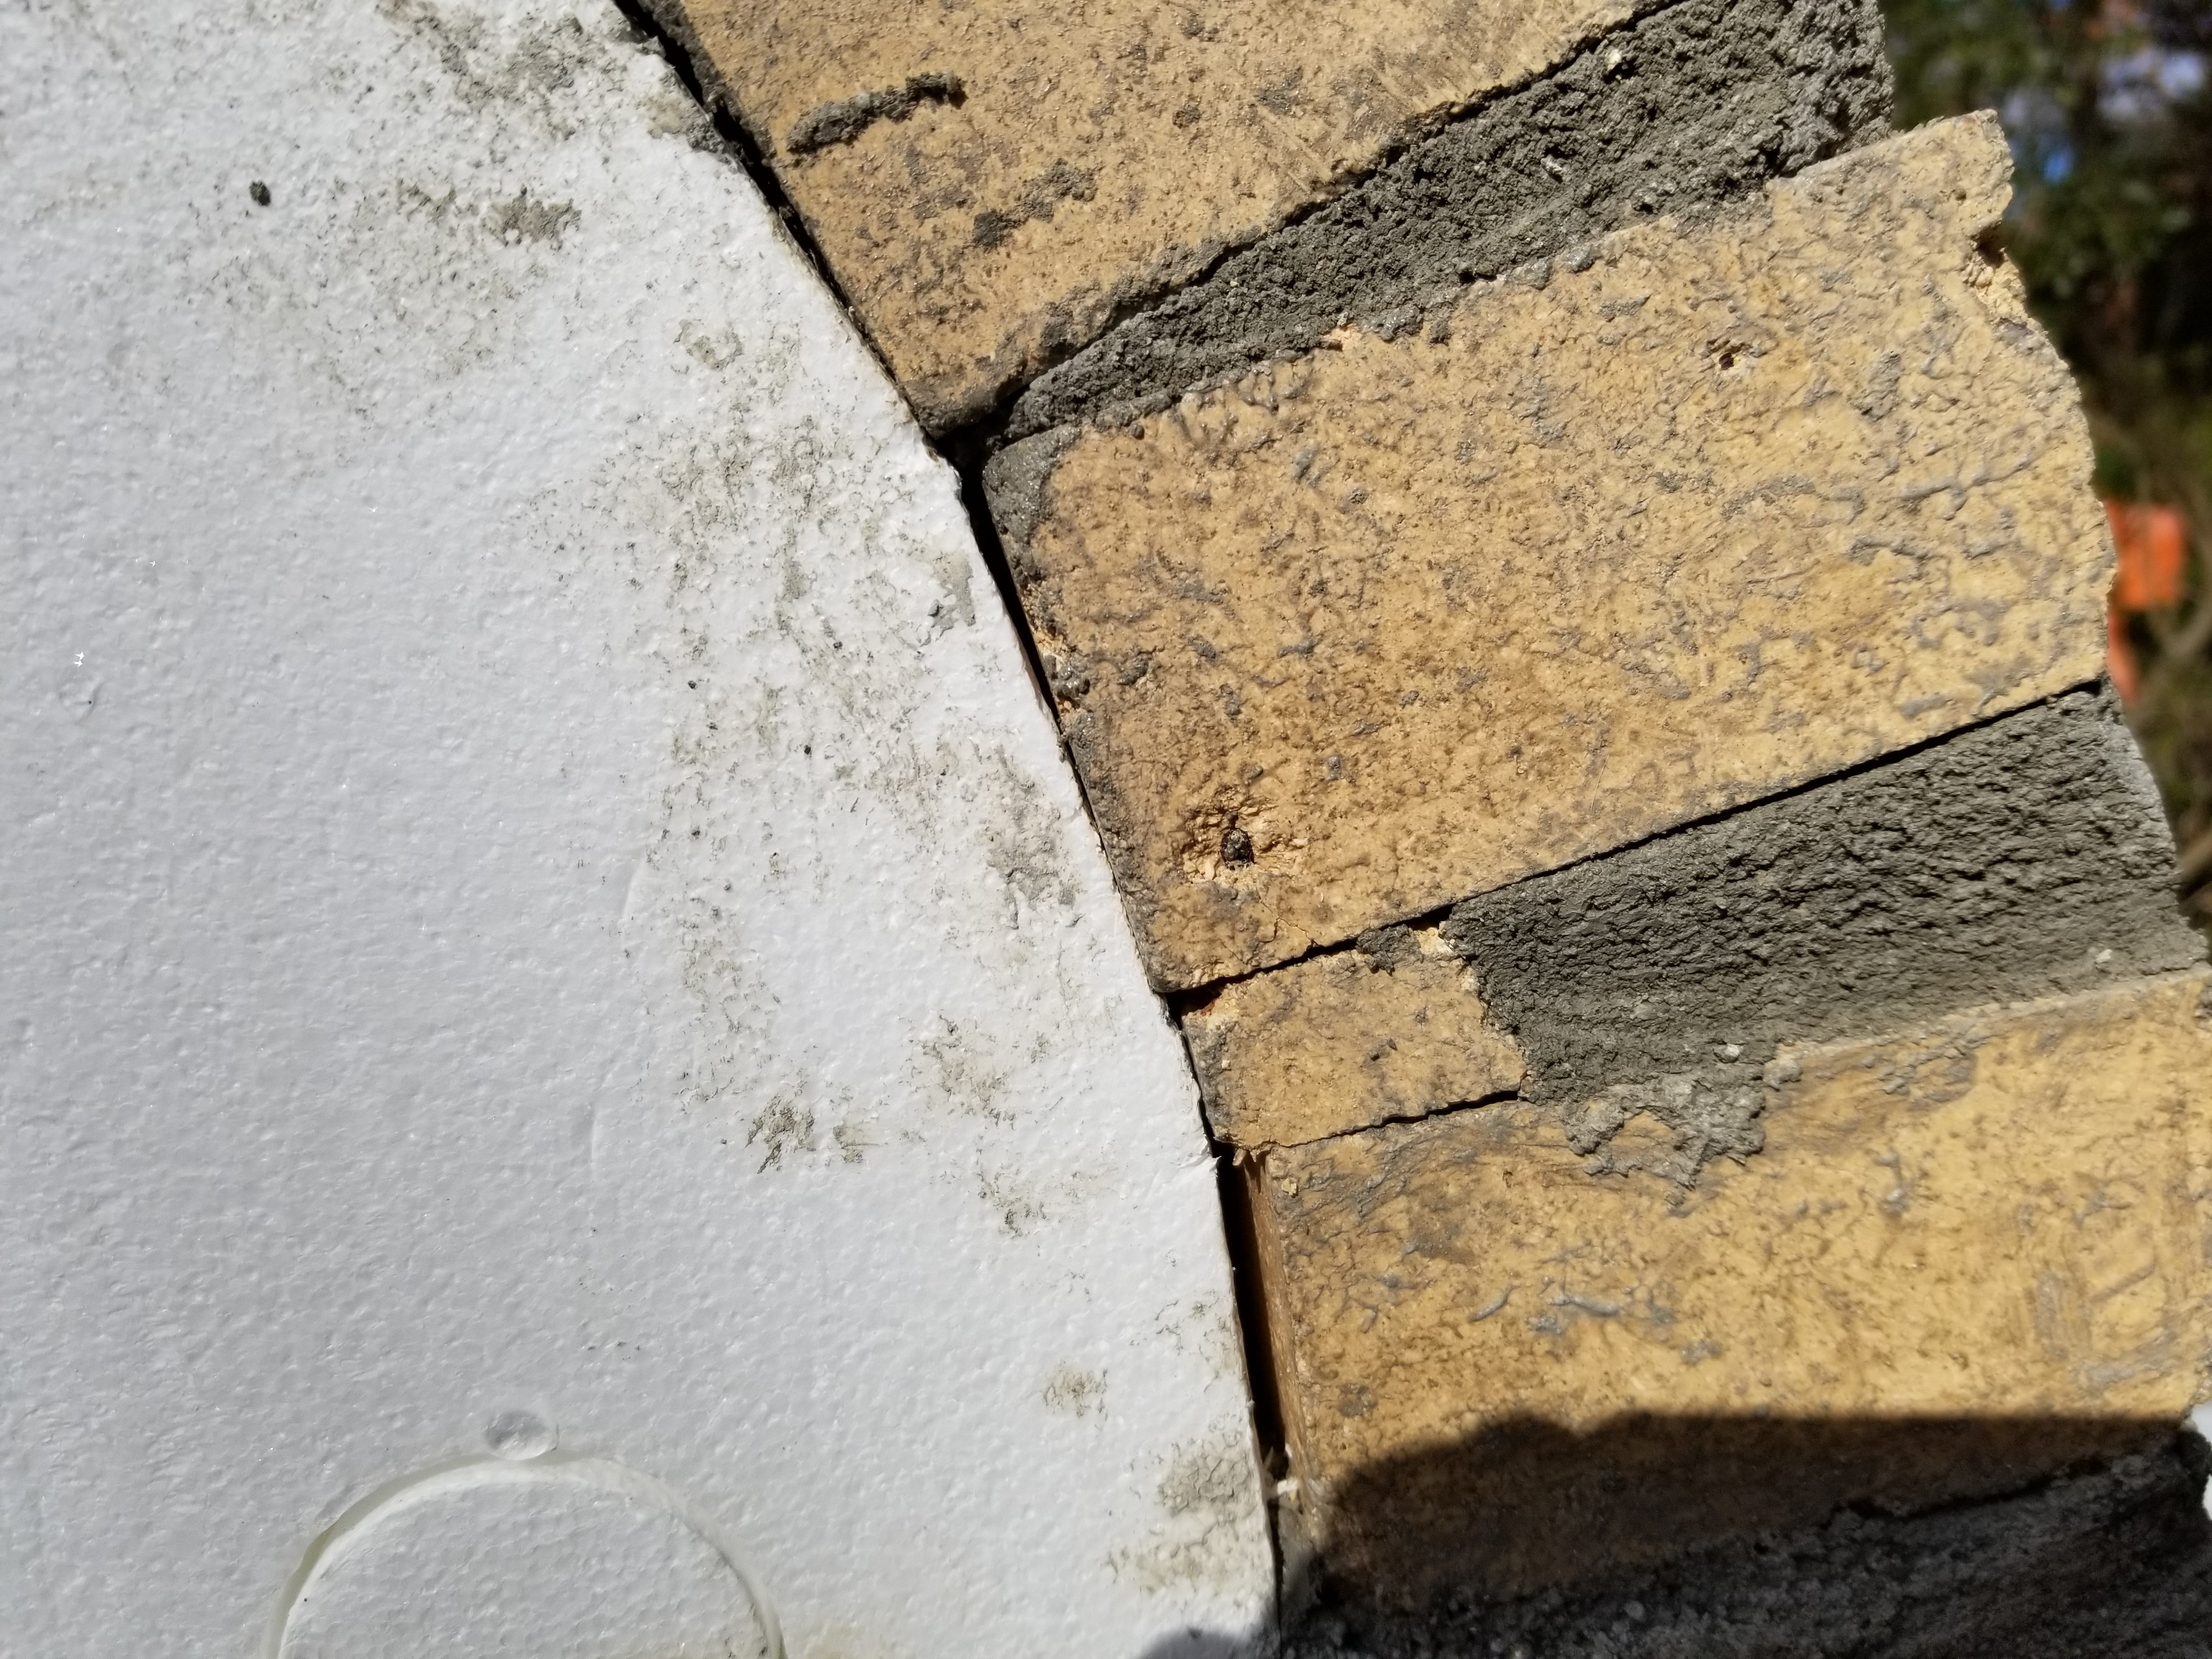
The forms are pretty maxed out at 2.25” firebrick, so 2” will be a bit tougher – but can be done. You need to keep the mortar joints tight / thin as possible, so here’s what I would do…
Grab a Sharpie and a 3’ level. Place the level on bottom left ridge… and bottom right ridge - draw a straight line. Continue up the oven marking horizontal lines from ridge to ridge. Do this on the FRONT and BACK of your form. This is to keep the brick joints at the same height horizontally when mortaring your bricks into place (esthetics)
Now grab some sandpaper (100 grit) and sand down those ridges. Your 2" firebrick isn’t going to benefit from the ridges in the foam… but you still get the perfect firebrick arch using the foam form when mortaring your firebrick in to place. Use the Sharpie lines on the foam to make sure your mortar joints are lining-up perfectly / horizontally.
ALSO… you can mortar your firebrick VERTICALLY if you want! Instead of having a 4.5" thick oven… your oven would be 2". And many, many ovens on the market are 2" thick. In fact, probably the majority. But 4.5" thick ovens hold their heat much, much, much longer. If you plan on using your oven for 2 - 3 hours / weekend pizza warrior, than 2" is plenty. If you plan on using your oven all day (looking at you bread bakers), then you would want the 4.5" thick oven.
If you are ordering firebricks and want to make sure you get 9" x 4.5" x 2.5" firebricks, you can order from your local HarbisonWalker. They cost a bit more - but they are the correct size and you can have the bricks delivered to your home via Residential Freight Delivery with a Liftgate. But again - try to find the bricks locally first (this way, you’ll save major $$$).
I purchased 2.25" brick, but decided to use this “sharpie and sandpaper” method anyway to reduce/eliminate the gaps between bricks above the second row. It required an extra row of bricks, and two rows of brick “slices”, but appears to have eliminated most of the gap. Will let you know for sure when I cut out the styrofoam.
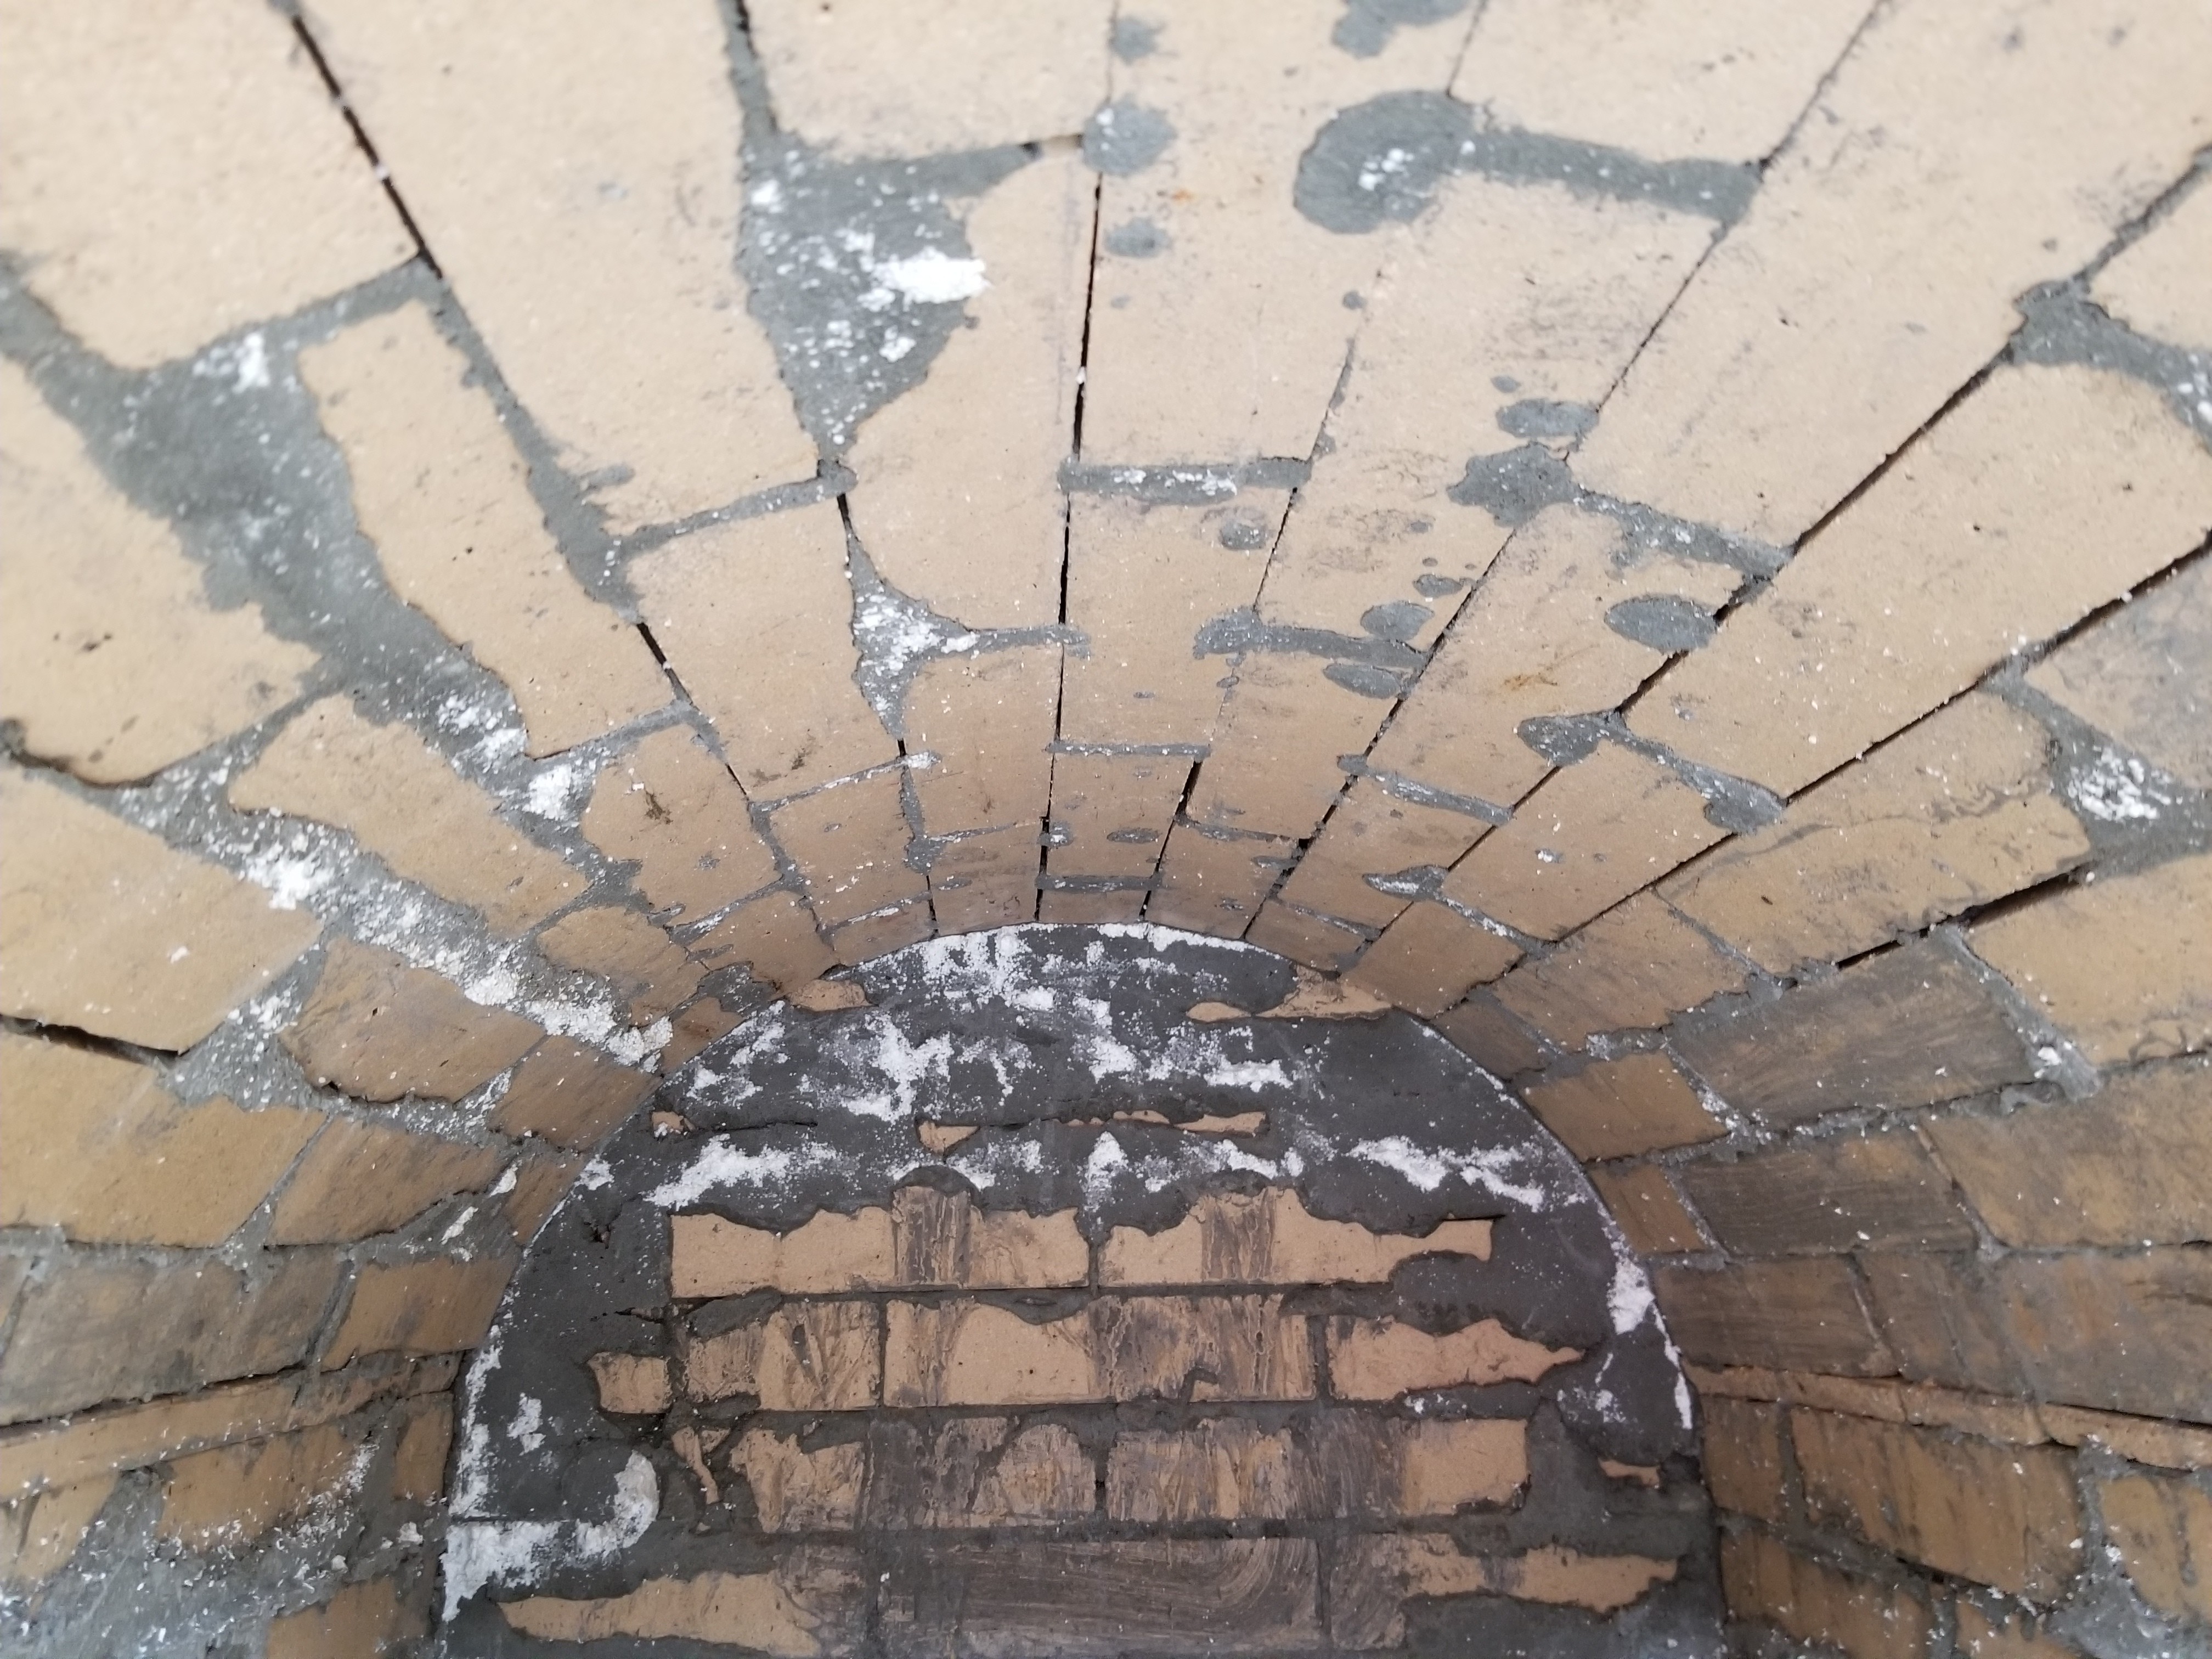
We had a customer submit photos of their oven this past month that used fire brick SPLITS (9" x 4.5" x 1.25"). He had a ton of extra fire brick splits lying around and decided to make a pizza oven.
I have never seen that before - but it seemed to work.
Brian, that looks great! And take it from everyone who’s been there: don’t worry about your back wall. It’s better to have some flash back there than to have any gaps.
And I’m sure you’ve already read this elsewhere: don’t even think about trying to chip off the flash mortar. It is impossible to do that without damaging firebrick and the mortared joints. The yellow will get blackened pretty quickly once you are firing your oven regularly, and no one’s going to be worrying about that inconspicuous mortar while they’ve got delicious pizza in their mouths.