I poured the hearth slab in place last week. I removed the form today to find that the pour had failed. I am assuming from too little water. I mixed according to the instructions and used a cement mixer. Mixing one or two bags at a time.
I spent the day cleaning up and rebuilding the form to pour as soon as TS Elsa passes by tomorrow evening. I’m not giving up yet
Has this happened to anyone else or looking at the picture would you agree it was from a lack of sufficient water?
Thanks Bill
Wow I’ve never seen that before. Was the concrete fluid when you placed it? If mixed correctly it should flow but not be too runny. Yours looks almost like it was dry packed. Check out a few you tube videos on mixing and consistency. Hope it works out for you! You are going to love the oven .
2 Likes
Hi Bill,
Oh, yeah, that’s not enough moisture. I can only imagine how disappointed you must feel about that.You are right to pull that out and rebuild your form.
The challenge with the instructions on the premix bags is that their ratios are conservative. If they told you something like 5 pints to a bag, for example, that’s a good starting point. But from there, you need to assess how the mix looks and splash more liquid in a little at a time, give it a chance to hydrate the mix, and then assess again.
In my opinion, it’s ready for this kind of a pour when everything first packs into one or two large lumps (not little “malted milk balls” but a couple of single clumps), then starts to loosen again. The concrete needs to flow into the form, but can’t be “soupy” because then it will form a weaker bond over its 30 days of curing time.
Get it to the clump stage, add up to a pint more water, and allow it to hydrate in the mixer. If that’s not enough, add a little more until you hear a nice “shoop shoop” sound which means the aggregate is able to move around in the mix. If you see water on the mix after a minute of mixing, there’s too much liquid and you’ll have to add more dry mix to fix it.
I admire your spirit…don’t give up!
1 Like
Matt and Matt
Thank you for the advice. Elsa will be out of here tonight. I am planning to report tomorrow. I’ll let you know how it goes.
Brgds/Bill
2 Likes
Well… seeing these pictures just ruined my Friday! I have NEVER seen anything remotely close to this and I’m very, very sorry this happened! As the Matts mentioned, the slabs were lacking the proper amount of water / moisture during the mixing process.
In the near future, we will be making videos for each step of the oven construction process, but for now, please view this video I found on YouTube -
How to Properly Mix Concrete - YouTube
1 Like
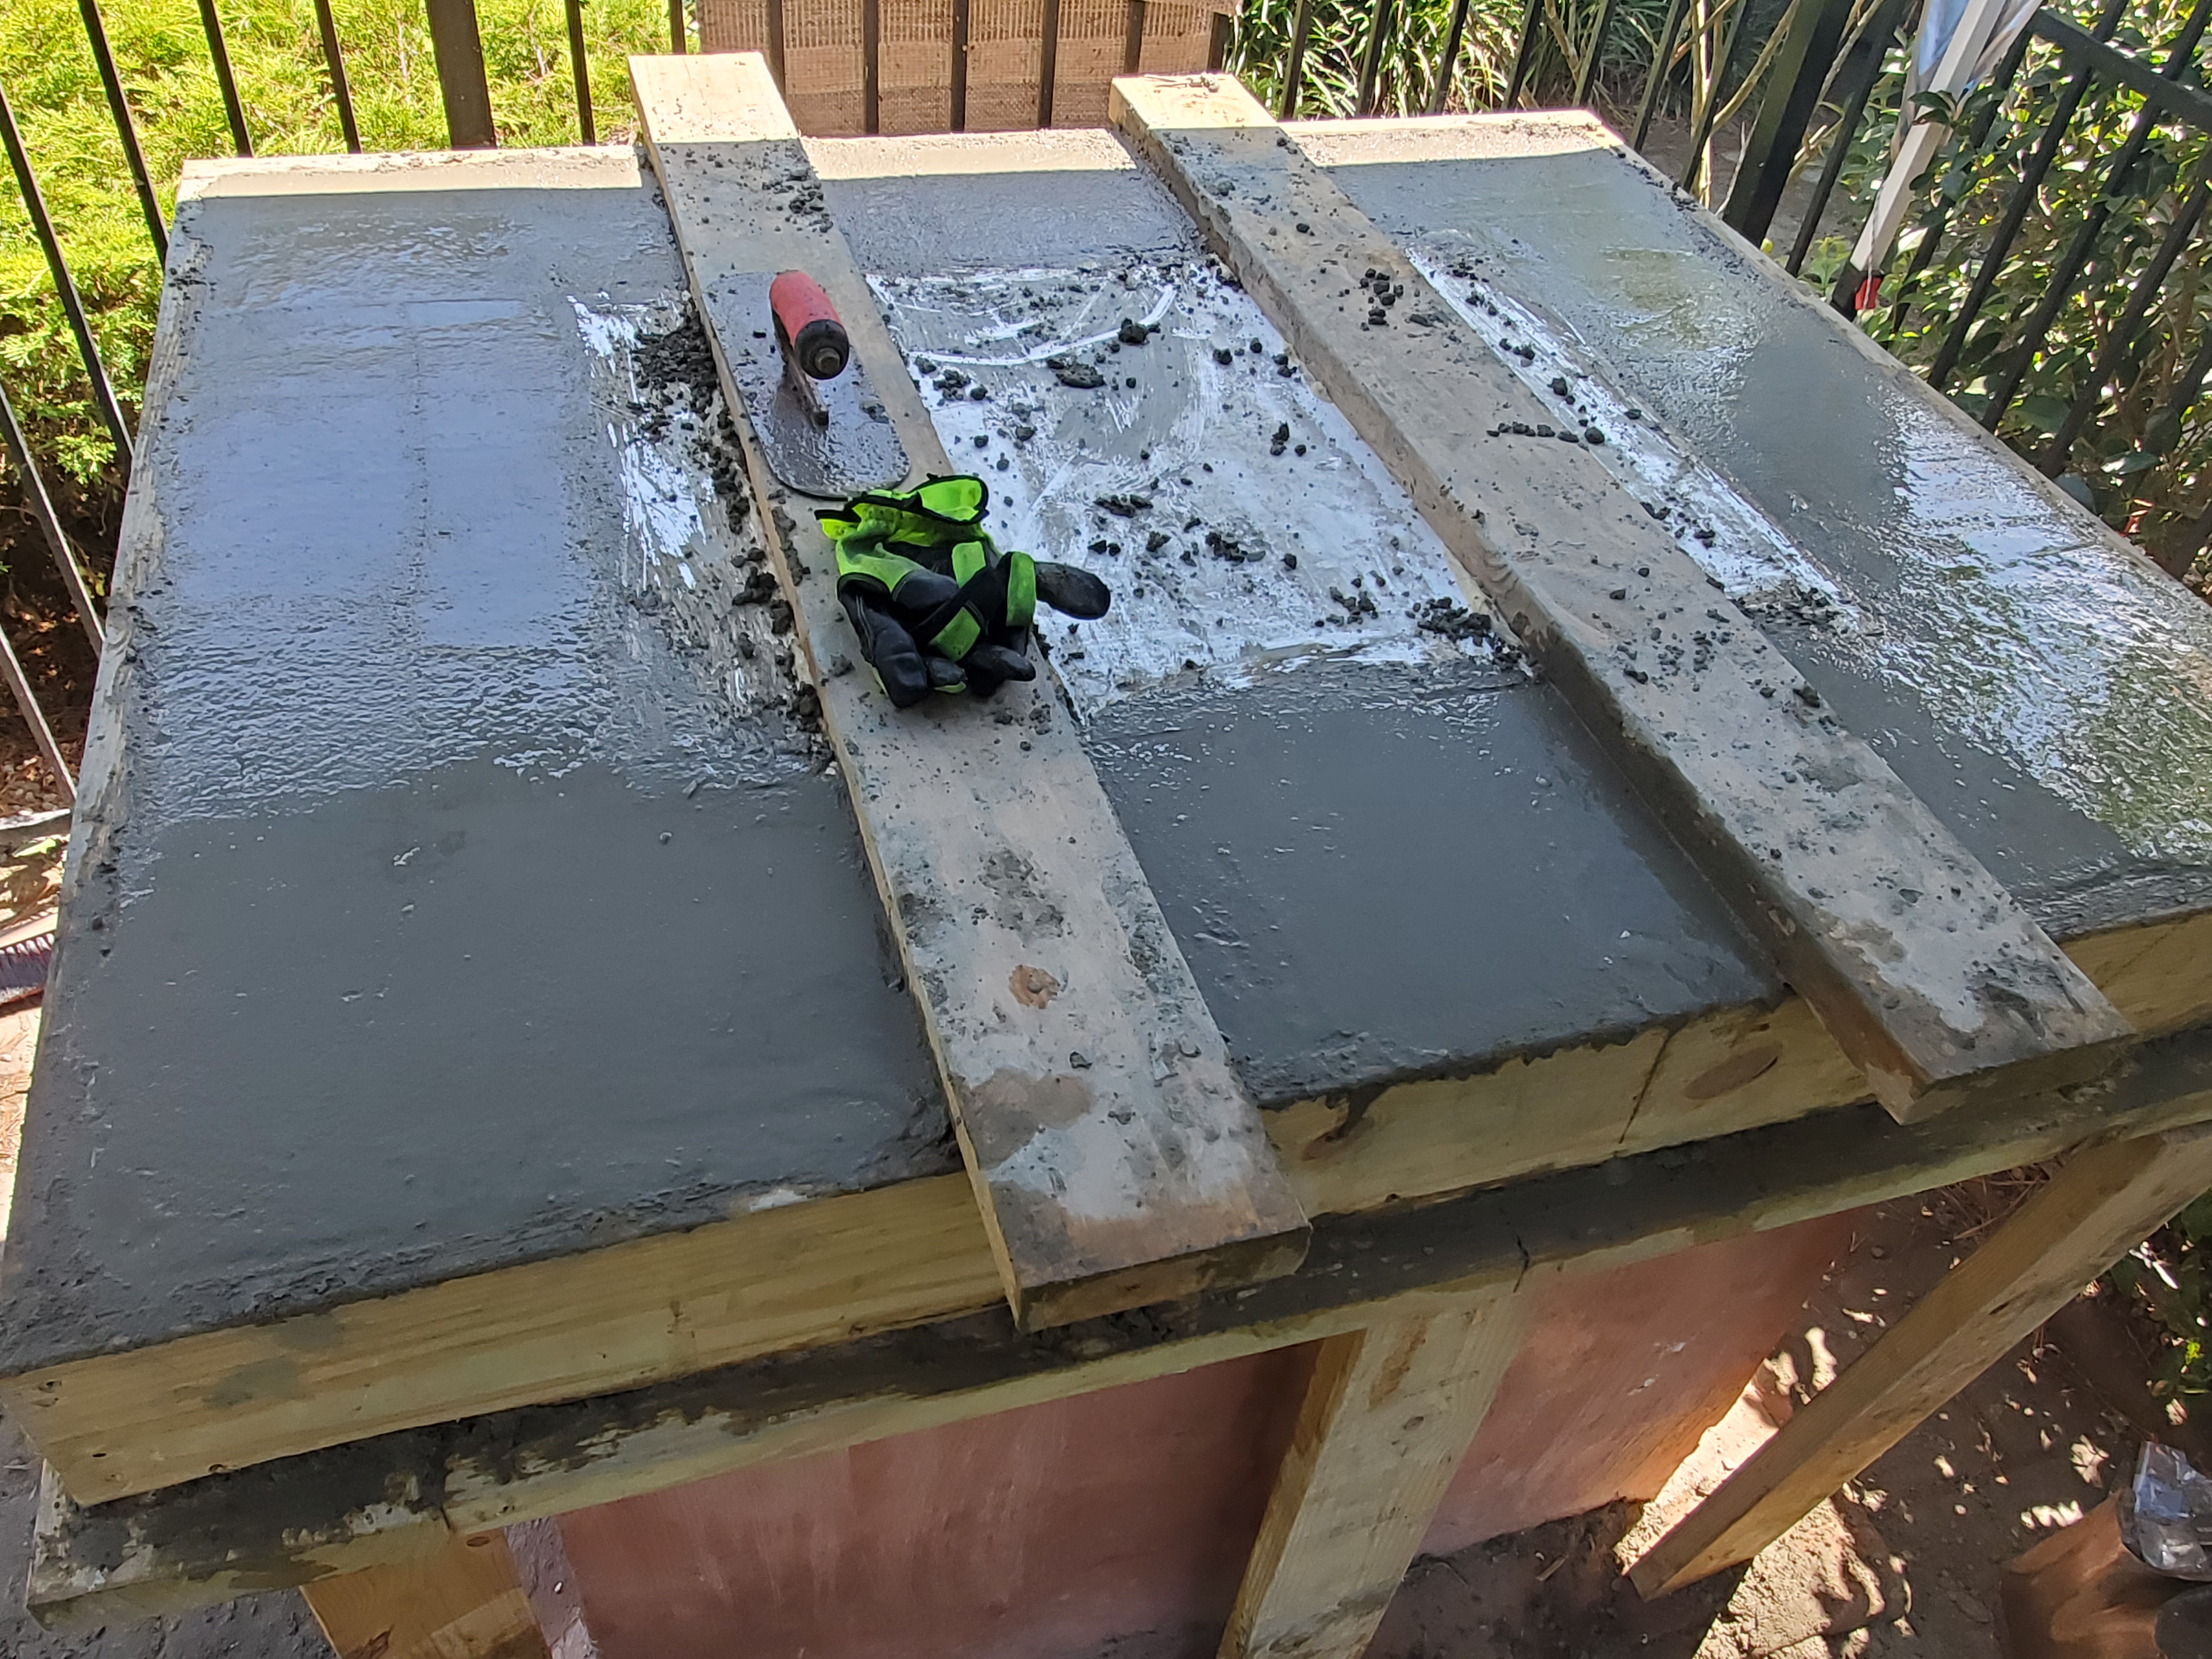
Sorry to ruin your Friday. I re-poured today and hopefully this will turn your Friday around. I know it helped mine.
2 Likes
For the win! That looks like a perfect mix, Bill. I’m pretty sure that’s going to brighten @BrickWood’s Friday, and I know I’m smiling now. And not just because Elsa seems to have departed Connecticut in the last hour.
Did you stay with the concrete mixer, the (excellent and novel) method in the short YouTube video, or some other technique?
However you did it, it’s the stone opposite of what you had before, and will be a perfect base for your oven.
1 Like
Matt
I stayed with the mixer. I’m too old to mix by hand. After watching a view videos using a mixer, I added a bit more water and got a mix that worked. Being a transplanted MassHole in NC, difficult to admit I was wrong… hahaha.
Hope to have the brick trim and insulation done by the end of next week. Once completely, done I’ll send in my pics, including the mistakes.
Brgds/Bill
Thanks for the support
2 Likes
I’ll look forward to the photos, Bill. The mistakes help us learn, and I’m sure there is a place for your before-and-after shots in the upcoming videos that @BrickWood mentioned.
And yes, here in southern New England, it’s easier to call something a “feature” than a “bug.” 
Good luck with the rest of your build!
1 Like